
Constructing a React utility could be a advanced and time-consuming course of, particularly on the subject of making a visually interesting and intuitive person interface. That is the place utilizing a UI part library like Grommet could be extremely beneficial.
A UI part library is a group of pre-built and pre-styled UI elements that may simply be built-in right into a frontend utility. The significance of leveraging a UI part library when constructing an app that makes use of a JavaScript frontend framework lies in its capacity to save lots of effort and time.
On this article, we’ll step via the method of establishing a brand new React challenge and integrating Grommet to present the app’s UI a elegant and user-friendly design.
Soar forward:
Grommet (generally known as Grommet UI) is a contemporary design system and UI part library for constructing stunning, intuitive, and accessible functions. It’s constructed on high of the React JavaScript library and offers a constant, responsive design language and a variety of pre-built and pre-styled elements that may be simply built-in right into a React utility.
Grommet additionally consists of options similar to accessibility assist, theming, and internationalization, making it a robust device for constructing user-friendly and accessible functions.
Grommet and Chakra UI are each widespread React UI frameworks that present a group of pre-built and pre-styled UI elements for constructing person interfaces.
One of many key variations between the 2 frameworks is their design language. Grommet is designed to be a contemporary and minimalist design system, with a clear and easy aesthetic. In distinction, Chakra UI is designed to be extra versatile and customizable, with a variety of themes and design types to select from.
One other distinction is the vary of elements and options provided by every framework. Grommet provides a variety of elements, together with buttons, varieties, icons, menus, and extra. Compared, Chakra UI offers a extra restricted vary of elements however consists of distinctive choices similar to modals and drawers.
By way of efficiency and accessibility, each Chakra UI and Grommet are well-optimized and supply good assist for accessibility requirements. Nevertheless, Chakra UI makes use of the Emotion CSS-in-JS library to type its elements, which can lead to bigger bundle sizes and slower efficiency in comparison with Grommet’s inline styling method.
Total, each Chakra UI and Grommet are highly effective and helpful instruments for constructing React functions. The selection between the 2 will rely upon the particular wants and preferences of the developer, similar to the specified design language, the vary of elements and options, and the efficiency and accessibility necessities.
Let’s discover the method of making a easy sign-up web page utilizing Grommet’s pre-built and pre-styled UI elements.
To get began, you’ll have to have Node.js and npm put in in your pc. In case you don’t have already got these instruments, you may obtain and set up them from the Node.js web site.
Organising the React app
With Node.js and npm put in, you may create a brand new React challenge with the next command:
// terminal command
npx create-react-app grommet-demo
This can create a brand new listing, grommet-demo, with all the mandatory recordsdata and dependencies for a React challenge.
Now, navigate to the brand new listing and begin the event server, like so:
// terminal command
cd my-app
npm begin
This can begin the event server and open your default net browser to http://localhost:3000, the place you need to see the default React welcome web page.
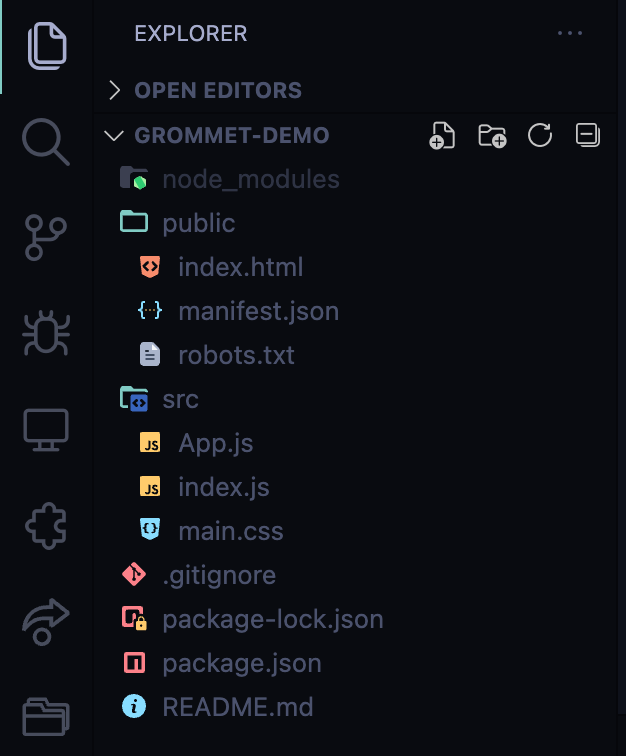
Now that you’ve got a fundamental React utility arrange, let’s clear up the React app as a result of we’ve a whole lot of boilerplate code.
This process is straightforward. Simply delete each file that’s not within the picture under after which filter out all of the import statements from the remaining recordsdata:
Right here’s how your stylesheet ought to look:
html, physique{
      margin:0;
      padding:0;
}
Within the above code, we’re simply doing a easy reset on the margin and padding properties for your entire webpage.
Putting in Grommet and its dependencies
Subsequent, you may add Grommet to the challenge by working the next command:
// terminal command
npm set up grommet grommet-icon
This can set up the Grommet library, its dependencies, and the Grommet SVG icon assortment. As soon as set up is full, you may import the Grommet elements and types into your React app by including the next line to the highest of your utility’s entry level file (normally index.js):
// JavaScript [React]
import { Grommet } from 'grommet';
Then, wrap your complete utility with the Grommet part, like so:
// JavaScript [React]

import React from 'react';
import ReactDOM from 'react-dom/shopper';
import App from './App';
import { Grommet } from 'grommet';

const theme = {
  international: {
    font:{
      household: "Roboto",
      dimension:"18px"
    },
  },
}
const root = ReactDOM.createRoot(doc.getElementById('root'));
root.render(
  <React.StrictMode>
    <Grommet theme={theme}>
      <App />
    </Grommet>
  </React.StrictMode>
);
This offers you entry to the Grommet elements and types in your React app. You’ll be able to then use these elements to create a Grommet-powered UI to your utility.
Discover the theme object that’s declared after which handed as a prop to the Grommet part. We’ll use this to customise our Grommet UI. Values declared within the theme object will propagate to all of the feedback under.
Constructing and styling the UI
Let’s say you wish to create a easy login type with Grommet. You should use the <Kind> and <FormField> elements to create the shape, and the <Button> part to create the submit button.
Your code may look one thing like this:
// JavaScript [React]
import { Field, Kind, FormField, Button } from 'grommet';

perform App() {
  return (
      <Field width="medium" margin="auto">
        <Kind>
          <FormField label="Username" identify="username" />
          <FormField label="Password" identify="password" sort="password" />
          <Button sort="submit" main label="Submit" />
        </Kind>
      </Field>
  );
}

export default App;
This code will create a sign-up type with a username and password area, in addition to a submit button. The shape shall be centered on the web page and have a medium width, due to the <Field> part.
Grommet additionally offers a variety of customizable theme choices that might be used to vary the appear and feel of the shape.
For this tutorial, we’ll construct and magnificence a sign-up web page with a carousel utilizing solely Grommet. Right here’s how our last challenge will look:

For this demo, we’ll construct your entire app from one part, app.js; we gained’t write or import another elements besides these from Grommet.
First, open the app.js file and wipe out the present code that’s returned by this part. Your App part ought to appear to be this:
perform App() {
  return (
    <div className="App">
    </div>
  );
}
Subsequent, import all the things you want from Grommet on the high of the app.js file, like so:
import './primary.css';
import { Field, Carousel, Picture, Heading, Textual content, TextInput, FormField, Button } from 'grommet';
import { Google } from 'grommet-icons'

perform App() {
  return (
    <div className="App">
    </div>
  );
}
Now, let’s arrange the sign-up web page structure. As you may see within the video above, our web page has a two-column structure. The left column holds the carousel and the suitable column holds the sign-up type.
Extra nice articles from LogRocket:
To realize this, we‘ll use the <Field> part. That is simply an abstraction over CSS flexbox; we are able to use it to outline our structure by setting completely different props on it. It is extremely possible that you simply’ll use the <Field> part very incessantly when working with Grommet.
Right here’s the up to date app:
import './primary.css';
import { Field, Carousel, Picture, Heading, Textual content, TextInput, FormField, Button } from 'grommet';
import { Google } from 'grommet-icons'

perform App() {
  return (
    <div className="App">
      <Field path="row" top="100vh">
        <Field width="60%"></Field>
        <Field width="40%" top="100vh" pad="xlarge" background="light-3" justify="heart"></Field>
      </Field>
    </div>
  );
}
Now, let’s add the carousel. Discover within the code above, there are two internal<Field> elements. Let’s add the carousel to the primary part:
import './primary.css';
import { Field, Carousel, Picture, Heading, Textual content, TextInput, FormField, Button } from 'grommet';
import { Google } from 'grommet-icons'

perform App() {
  return (
    <div className="App">
      <Field path="row" top="100vh">
        <Field width="60%">
          <Carousel controls={false} play={3000} top="100vh">
            <Picture match="cowl" src="https://photographs.unsplash.com/photo-1668063497279-7ecb0f0ffa8a?ixlib=rb-4.0.3&ixid=MnwxMjA3fDB8MHxwaG90by1wYWdlfHx8fGVufDB8fHx8&auto=format&match=crop&w=774&q=80" />
            <Picture match="cowl" src="https://photographs.unsplash.com/photo-1639332793139-32eed37bdc99?ixlib=rb-4.0.3&ixid=MnwxMjA3fDB8MHxwaG90by1wYWdlfHx8fGVufDB8fHx8&auto=format&match=crop&w=774&q=80" />
            <Picture match="cowl" src="https://photographs.unsplash.com/photo-1655742260938-82ab000acc2d?ixlib=rb-4.0.3&ixid=MnwxMjA3fDB8MHxwaG90by1wYWdlfHx8fGVufDB8fHx8&auto=format&match=crop&w=1740&q=80" />
          </Carousel>
        </Field>

     <Field width="40%" top="100vh" pad="xlarge" background="light-3" justify="heart"></Field>
     </Field>
   </div>
  );
}
The carousel has three slides. We achieved this utilizing the <``Carousel``> part with three <``Picture >youngster elements.
The ultimate step is so as to add the sign-up type. Right here’s the ultimate look of the app part:
import './primary.css';
import { Field, Carousel, Picture, Heading, Textual content, TextInput, FormField, Button } from 'grommet';
import { Google } from 'grommet-icons'
perform App() {
  return (
    <div className="App">
      <Field
        path='row'
        top="100vh"
      >
        <Field width="60%" >
          <Carousel controls={false} play={3000} top="100vh" >
            <Picture match="cowl" src="https://photographs.unsplash.com/photo-1668063497279-7ecb0f0ffa8a?ixlib=rb-4.0.3&ixid=MnwxMjA3fDB8MHxwaG90by1wYWdlfHx8fGVufDB8fHx8&auto=format&match=crop&w=774&q=80" />
            <Picture match="cowl" src="https://photographs.unsplash.com/photo-1639332793139-32eed37bdc99?ixlib=rb-4.0.3&ixid=MnwxMjA3fDB8MHxwaG90by1wYWdlfHx8fGVufDB8fHx8&auto=format&match=crop&w=774&q=80" />
            <Picture match="cowl" src="https://photographs.unsplash.com/photo-1655742260938-82ab000acc2d?ixlib=rb-4.0.3&ixid=MnwxMjA3fDB8MHxwaG90by1wYWdlfHx8fGVufDB8fHx8&auto=format&match=crop&w=1740&q=80" />
          </Carousel>
        </Field>
        <Field width="40%" top="100vh"  pad="xlarge" background="light-3" justify='heart'>
          <Field width="80%" fill="horizontal" align='heart' >
            <Field as="span" fill="horizontal">
              <Heading
                responsive={true}
                textAlign="begin"
                dimension="xsmall"
                margin="none"
                a11yTitle="Create an account"
              >Create an account</Heading>
              <Textual content
                textAlign="begin"
                dimension="14px"
                margin={{
                  vertical: "10px"
                }}
                a11yTitle="Let's get began together with your 30 days free trial"
              >Let's get began together with your 30 days free trial</Textual content>
            </Field>
            <Field margin={{
              vertical: "2em"
            }}
              fill="horizontal"
            >
              <FormField
                margin={{
                  vertical: ".5em"
                }}
              >
                <TextInput placeholder="Identify" dimension="14px" a11yTitle ="Enter your identify"/>
              </FormField>
              <FormField
                margin={{
                  vertical: ".5em"
                }}
              >
                <TextInput placeholder="E mail" sort="electronic mail" dimension="14px" a11yTitle="Enter your electronic mail deal with" />
              </FormField>
              <FormField
                margin={{
                  high: ".5em",
                  backside:"2em"
                }}

              >
                <TextInput placeholder="Password" sort="password" dimension="14px" a11yTitle="Enter your password" />
              </FormField>
              <Button
              main
              label="Create account"
                margin={{
                  vertical: ".5em",
                }}
                colour="#101727"
                type={{padding:".5em", borderRadius:"8px", fontSize:"14px"}}
                a11yTitle="Create account button"
              />
              <Button
              icon={ <Google />}
              label="Enroll with Google"
                a11yTitle="Enroll with Google button"
                type={{ padding: ".5em", borderRadius: "8px", fontSize: "14px", borderColor:"#AEAFB860" }}
                margin={{
                  backside: "1.5em",
                }}
              />
              <Field as ="span" >
                <Textual content dimension="14px" colour="#AEAFB8" textAlign='heart'>Have already got an account? <Button href="https://weblog.logrocket.com/" type={{ fontWeight: "900", colour: "#01010180" }} a11yTitle="Log in if you have already got an account">Log in</Button></Textual content>
              </Field>
            </Field>
          </Field>
        </Field>
      </Field>
    </div>
  );
}
export default App;
In case you refer again to the above sign-up web page video, you’ll see that this code creates a sign-up type with the next UI elements:
- Dad or mum field: The mum or dad
Fieldhas a light-colored background and a few padding across the edges; it takes up 40% of the display screen’s width and 100% of its top - Inside field: The internal
Fieldis situated throughout the mum or dadField; it takes up 80% of the mum or dadField’s width and stretches horizontally to fill the house. The internalFieldcomprises aHeadingand a paragraph ofTextual content, each aligned to thebeginof theField - Kind fields: Beneath the
Textual contentwithin the internalFieldis one otherfieldwith threeFormFields for the person to enter their identify, electronic mail deal with, and password. TheFormFields have some vertical margin between them to create spacing - Buttons: Beneath the
FormFields are two buttons. The shape will submit when the “Create account”Buttonis clicked. The “Enroll with Google”Buttonhas a Google icon from the Grommet icons library; it permits the person to enroll utilizing their Google account. - Login textual content: Beneath the shape, is a paragraph of
Textual contenttelling the person they will log in in the event that they have already got an account. ThisTextual contentis aligned to the middle of theFieldand hyperlinks to the login web page
Making the UI accessible
Grommet is designed to be accessible and meet the necessities of the Internet Content material Accessibility Tips (WCAG). Discover that our <TextI``nput``> and <Button> elements have an a11yTitle prop. This helps assistive applied sciences, like display screen readers, perceive and navigate the content material. Moreover, Grommet makes use of semantic HTML tags to present context and which means to the content material on the web page, additional bettering its accessibility.
Right here’s a hyperlink to the entire challenge on GitHub.
Advantages of utilizing Grommet
Grommet is a robust frontend device. Listed here are some advantages of utilizing Grommet for constructing UI in React:
- Simple to make use of and customise: Grommet offers a variety of pre-built UI elements that may be simply custom-made to suit the wants of your utility
- Responsive design: Grommet mechanically adapts the structure of your utility to completely different display screen sizes, making certain that your utility seems nice on all gadgets
- Accessibility: Grommet follows finest practices for accessibility, making it simple to construct functions which can be accessible to customers with disabilities
- Cell-first method: Grommet has a mobile-first design philosophy, which means that it prioritizes the design and person expertise on cell gadgets
- Integration with React: Grommet is constructed on high of React, so it integrates seamlessly with React functions and is straightforward to make use of for builders accustomed to React
Conclusion
Grommet offers a robust and environment friendly method to create a contemporary, intuitive, and accessible person interface. Grommet offers a variety of pre-built and pre-styled elements that may be simply built-in right into a React utility, in addition to options similar to theming, internationalization, and accessibility assist.
By following the steps outlined on this article, you may rapidly and simply arrange a React challenge with Grommet and begin constructing a person interface to your utility. Whether or not you’re a seasoned React developer or a newcomer to the world of frontend growth, Grommet is a beneficial device that may allow you to create an expert and user-friendly utility.
Lower via the noise of conventional React error reporting with LogRocket
LogRocket
is a React analytics resolution that shields you from the a whole lot of false-positive errors alerts to only a few really necessary gadgets. LogRocket tells you probably the most impactful bugs and UX points really impacting customers in your React functions.


LogRocket
mechanically aggregates shopper facet errors, React error boundaries, Redux state, sluggish part load instances, JS exceptions, frontend efficiency metrics, and person interactions. Then LogRocket makes use of machine studying to inform you of probably the most impactful issues affecting probably the most customers and offers the context you might want to repair it.
Concentrate on the React bugs that matter —
strive LogRocket right now.
