
Over the previous a number of years, Subsequent.js has additional established its place because the hottest backend framework constructed on React. A number of latest updates have both enhanced or added to this framework’s present options. One instance is its potential to render pages each on the server facet and consumer facet together with its built-in routing system, which makes navigation between these renderers seamless.
Nonetheless, transitioning between these renderers isn’t as buttery easy as you may anticipate. Subsequent.js takes slightly little bit of time to route between pages, particularly to server-side rendered pages as these are rendered on request. A web site could seem quickly frozen every time a person tries to route to a different web page, and this could translate to a poor person expertise.
This tutorial will tackle this subject by demonstrating how one can construct and show a progress bar indicator when altering routes in a Subsequent.js utility. We’ll create one model of the loader part with customized CSS and we’ll additionally present how one can use third-party libraries so as to add animation.
Contents
Stipulations
To observe together with this tutorial, you‘ll want the next:
What are Subsequent.js Router occasions?
Router occasions are occasion listeners that enable us to trace route adjustments in Subsequent.js by way of the Router object. The thing offers properties that we are able to use to take heed to completely different occasions occurring within the Subsequent.js Router and carry out sure actions primarily based on the occasions.
For instance, if we wish to log "route is altering" to the console each time a person clicks on a hyperlink and navigates to a different web page, we are able to use the "routeChangeStart" Router occasion, like so:
  Router.occasions.on("routeChangeStart", (url)=>{
    console.log(“route is altering”)
    })
The routeChangeStart occasion fires when a route begins to alter. It returns a callback perform that we are able to use to run codes and actions. As you’ll be able to see within the above code, the occasion fires a callback perform that logs the "route is altering" string to the console.
Here’s a record of some supported Subsequent.js Router occasions:
routeChangeStart: fires when a route begins to alterrouteChangeComplete: fires when a route change is accomplishedrouteChangeError: fires when an error happens whereas altering routes, or when a route load is canceledbeforeHistoryChange: fires earlier than altering the Router’s route historical past
Go to the Subsequent.js documentation to study extra about these Router occasions.
Getting began
I’ll assume you have already got a Subsequent.js mission arrange. If not, you’ll be able to fork the pattern mission’s CodeSandbox to observe alongside.
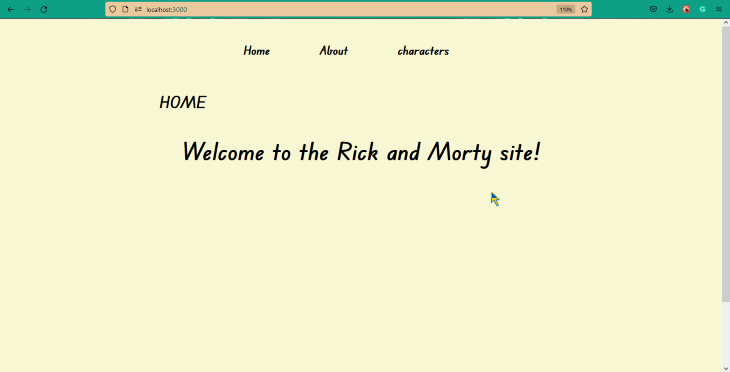
The pattern mission used on this tutorial is a straightforward Subsequent.js app primarily based on the Rick and Morty sitcom. The pattern app has three pages: House, About, and Characters. The primary two pages are client-side rendered, whereas the Characters web page is server-side rendered.
Contained in the Characters web page, we’re utilizing the getServerSideProps perform to fetch and show knowledge from the Rick and Morty API:
const Characters = ({ knowledge }) => {
    return (
        <div className={kinds.container}>
        ...
        </div>
    );
}

export default Characters;

export async perform getServerSideProps() {
    const delay = (s) => new Promise(resolve => setTimeout(resolve, s))
    const res = await fetch("https://rickandmortyapi.com/api/character")
    await delay(2000)
    const knowledge = await res.json();

    return {
        props: {knowledge}
    }
}
The Characters web page is pre-generated on preliminary load, however the fetching request is simply accomplished when a person clicks on the route. This fashion, the web page’s content material will solely be exhibited to the person when the request is completed, which can take a while.
As a substitute of leaving the person clueless as to what’s occurring throughout these few seconds, we’ll show a progress bar indicator utilizing the Subsequent.js Router occasions.
Because of this, we’ve added a 2s delay to the fetching course of utilizing the delay promise, as proven within the under code:
Extra nice articles from LogRocket:
const delay = (s) => new Promise(resolve => setTimeout(resolve, s))
 ...
await delay(2000)
 ...
This delay will give us time to showcase the progress indicator after we path to the Characters web page.
To complete establishing, run the next command in your terminal to put in two third-party libraries, NProgress and React Spinners, that we’ll be utilizing later on this tutorial.
npm i --save nprogress react-spinners
These libraries are animated progress bar suppliers; we’ll discuss extra about them later on this article.
Creating the loader part
Subsequent, we have to create a part that can wrap the progress indicator ingredient.
Begin by making a part folder and add a Loader.js file inside.

Now, open the loader.js file and add the next code:
const Loader = () => {
    return (
        <div className={kinds.wrapper}>
            <div className={kinds.loader}>

      </div>
        </div>
     );
}

export default Loader;
The code comprises two div tags, a wrapper div, and a nested loader div. When you plan on making a customized progress bar indicator with CSS, these components will turn out to be useful.
Subsequent, navigate to the kinds folder inside your mission root folder, and create a brand new CSS module for the loader part.
Contained in the module, add the next code:
.wrapper{
    width: 100%;
    top: 100vh;
    place: absolute;
    prime: 0;
    left: 0;
    background-color: rgb(0, 0, 0, 0.3);
    backdrop-filter: blur(10px);
    show: flex;
    justify-content: heart;
    align-items: heart;
    z-index: 99;
}

/*code for customized loading icon*/

.loader{
    border: 10px stable #f3f3f3;
    border-radius: 50%;
    border-top: 10px stable #505050;
    width: 60px;
    top: 60px;
    animation: spin 2s linear infinite;
}

@keyframes spin {
    0% { remodel: rotate(0deg); }
    100% { remodel: rotate(360deg); }
}
The above code will make the wrapper div take up your complete viewport with a backdrop filter and can heart each youngster ingredient (on this case, the loader div) throughout the wrapper.
N.B., the CSS properties throughout the loader selector are for a customized CSS progress bar indicator; ignore this when you’d choose to make use of NProgress or React Spinners library as a substitute
Now, return to the loader.js part and import the CSS module on the prime of the code block, like so:
import kinds from '../kinds/Loader.module.css'
Subsequent, we’ll transfer on to creating the Router occasions.
Creating the Router occasions (routeChangeStart, routeChangeComplete, and routeChangeError)
Since we’ll be displaying the progress bar indicator on each web page route, moderately than on a specific route, we’re going to name the Router occasion listeners instantly contained in the _app.js part.
In case your mission doesn’t have an _app.js part, go to the pages folder, create a brand new _app.js file, and add the next code:
import '../kinds/globals.css'

perform MyApp({ Element, pageProps }) {
  return ( <Element {...pageProps} /> )
}

export default MyApp
Subsequent.js will use the _app.js part to initialize the pages in our mission. We will override it and management the initialization.
Subsequent, import the Router object, useState, and useEffect Hooks contained in the _app.js part, like so:
import Router from 'subsequent/router'
import { useState, useEffect } from 'react';
With the Router object imported, we are able to begin declaring the occasions.
We would like to have the ability to observe when a route begins to alter, has modified, and when an error happens both whereas altering routes or when a route load is canceled. Subsequently, we’ll subscribe to the routeChangeStart, routeChangeComplete, and routeChangeError occasions, respectively.
First, create an isLoading state variable utilizing the useState Hook we imported earlier and go it a default Boolean worth of false.
const [isLoading, setIsLoading] = useState(false);
Then, name the useEffect Hook and add the routeChangeStart occasion listener inside its callback perform.
useEffect(() => {
    Router.occasions.on("routeChangeStart", (url)=>{

    });

}, [Router])
Subsequent, set the worth of the isLoading state variable to true contained in the occasion’s callback perform, like so:
Router.occasions.on("routeChangeStart", (url)=>{
    setIsLoading(true)
  });
Now, create two extra Router occasion listeners under the primary, one for routeChangeComplete and one for routeChangeError:
  Router.occasions.on("routeChangeComplete", (url)=>{
    setIsLoading(false)
  });

  Router.occasions.on("routeChangeError", (url) =>{
    setIsLoading(false)
  });
The routeChangeComplete and routeChangeError occasions will likely be answerable for ending the loading session, which was initiated by the routeChangeStart occasion, when the route has utterly modified or when an error happens.
After finishing the above steps, your useEffect perform ought to seem like this:
useEffect(() => {
    Router.occasions.on("routeChangeStart", (url)=>{
      setIsLoading(true)
    });

    Router.occasions.on("routeChangeComplete", (url)=>{
      setIsLoading(false)
    });

    Router.occasions.on("routeChangeError", (url) =>{
      setIsLoading(false)
    });

  }, [Router])
Now we’ve got a state that reacts to the completely different occasions occurring contained in the Subsequent.js Router.
Subsequent, we’ll import the loader part we created earlier and render it primarily based on the state of the isLoading variable.
import Router from 'subsequent/router'
import { useState, useEffect } from 'react';
import Loader from '../part/loader';

perform MyApp({ Element, pageProps }) {

  const [isLoading, setIsLoading] = useState(false);

  useEffect(() => {

    ...

  }, [Router])


  return (
    <>
      {isLoading && <Loader/>}
      <Element {...pageProps} />
    </>
  )
}

export default MyApp
What we’re doing right here is fairly self-explanatory. We import the loader part and conditionally render it to the view.
When you use the customized CSS loader we created earlier, it is best to see the same loading display screen to that proven under while you strive routing throughout the utility.
Including animation
The progress indicator proven within the above part was constructed utilizing customized CSS. Now, let’s experiment with including animation utilizing two libraries: NProgress and React Spinners.
Utilizing NProgress
NProgress is a light-weight library that lets us show sensible trickle animations on the prime of the viewport to point loading progress, as a substitute of utilizing an animated loading icon.
To make use of NProgress, import the NProgress perform contained in the _app.js part, like so:
import NProgress from 'nprogress'
The perform has a set of strategies we are able to use to show and configure the progress bar animation. Listed here are a number of the out there strategies:
begin: exhibits the progress barset: units a shareinc: increments by slightlycarried out: completes the progressconfigure: configures choice
See the NProgress official documentation to study extra about these strategies.
Subsequent, name the perform’s begin() and carried out() strategies contained in the routeChangeStart and routeChangeComplete occasion callbacks, respectively:
Router.occasions.on("routeChangeStart", (url)=>{
    Nprogress.begin()
  })

Router.occasions.on("routeChangeComplete", (url)=>{
      Nprogress.carried out(false)
    });
Lastly, we’ll add the NProgress-associated CSS to our mission by way of the under CDN hyperlink:
<hyperlink rel="stylesheet" href="https://cdnjs.cloudflare.com/ajax/libs/nprogress/0.2.0/nprogress.min.css" integrity="sha512-42kB9yDlYiCEfx2xVwq0q7hT4uf26FUgSIZBK8uiaEnTdShXjwr8Ip1V4xGJMg3mHkUt9nNuTDxunHF0/EgxLQ==" crossorigin="nameless" referrerpolicy="no-referrer" />
To go about this, import the Head part from Subsequent.js and nest the CDN hyperlink throughout the declaration, like so:
  ...
import Head from "subsequent/head"

perform MyApp({ Element, pageProps }) {

  ...

  return (
    <>
      <Head>
        <hyperlink rel="stylesheet" ... />
      </Head>
      <Element {...pageProps} />
    </>
  )
}
When you save your progress and click on on a route within the browser, it is best to see a progress bar and a spinning icon on the prime of the viewport much like that proven under.
To disable the spinning icon on the top-right nook of the viewport, name the configure technique and go it an object with a showSpinner property and the worth set to false.
Nprogress.configure({showSpinner: false});
Now when you save the code and return to the browser, the spinning icon must be gone.
![]()
Utilizing React Spinners
React Spinners is a light-weight library comprised of a group of React-based progress indicators. The library offers forms of animated loading icons that can be utilized to point loading progress.
![]()
The progress indicators are uncovered from the library as parts. These parts absorb props that we are able to use to customise their pace, dimension, loading state, and coloration.
To make use of React Spinners, return to the loader.js part and import a spinner part, like so:
import {HashLoader} from 'react-spinners'
You may select and configure your most popular spinner from the product web page.
Subsequent, nest the spinner part contained in the wrapper div and save your progress.
<div className={kinds.wrapper}>
      <HashLoader
       coloration="#eeeeee"
       dimension={80}
       />
</div>
Now, when you return to the browser, it is best to see a properly animated loading icon while you route between pages.
![]()
Conclusion
On this article, we launched Subsequent.js Router occasions and demonstrated how one can use them to trace routing actions and show a progress bar indicator.
We demonstrated how one can create a loader part that renders a progress bar indicator primarily based on the occasions emitted by the Router and likewise added personalized loaders utilizing the NProgress and React Spinners libraries.
LogRocket: Full visibility into manufacturing Subsequent.js apps
Debugging Subsequent purposes will be troublesome, particularly when customers expertise points which are troublesome to breed. When you’re focused on monitoring and monitoring state, mechanically surfacing JavaScript errors, and monitoring gradual community requests and part load time, strive LogRocket. 

LogRocket is sort of a DVR for internet and cellular apps, recording actually all the pieces that occurs in your Subsequent app. As a substitute of guessing why issues occur, you’ll be able to mixture and report on what state your utility was in when a problem occurred. LogRocket additionally displays your app’s efficiency, reporting with metrics like consumer CPU load, consumer reminiscence utilization, and extra.
The LogRocket Redux middleware package deal provides an additional layer of visibility into your person classes. LogRocket logs all actions and state out of your Redux shops.
Modernize the way you debug your Subsequent.js apps — begin monitoring totally free.
