Navigation bars are most likely one of the best ways to permit customers navigate round your web sites effortlessly with out getting misplaced.
Individuals normally place navbars on the very prime of the web page, however you can too put a navbar on both facet of your webpage if it compliments your design. Navbars can both be a horizontal record of nav gadgets (hyperlinks) or hamburger-style on the top-left or top-right corners of internet pages on smaller screens.
To permit higher accessibility to navbars, you may sticky them on the prime through the use of a number of strains of CSS and JavaScript. Extra JavaScript code can develop into piled up because the complexity of the navbar will increase.
On this submit, we’ll see how one can create a {custom} sticky navbar that’s aware of all display sizes with nice performance, utilizing solely CSS to create it.
We’ll additionally discover ways to use the SCSS’s syntactic sugar to write down our CSS code a lot quicker and cleaner.
So, let’s get began.
Desk of Contents
Utilizing HTML and SCSS
We’ll begin with some easy stuff and progressively dive into extra advanced issues as this text shall progress. The very first thing we will do to create a nav bar is, write some HTML. So, begin by copying this HTML code into your favourite code editor or within the Codepen.
<html>
  <physique>
    <header class="header">
      <nav class="header__nav" id="navbar">
        <ul class="header__list">
          <li class="header__item"><a href="https://weblog.logrocket.com/build-custom-sticky-navbar-css/index.html" class="header__link">Dwelling</a></li>
          <li class="header__item"><a href="about.html" class="header__link">About</a></li>
          <li class="header__item"><a href="providers.html" class="header__link">Providers</a></li>
          <li class="header__item"><a href="providers.html" class="header__link">Contact</a></li>
        </ul>
      </nav>
    </header>
  </physique>
</html>
The above-given HTML code is sort of easy, and there’s nothing advanced happening in it. I’d such as you to notice the conventions I used for writing the “class names” for each aspect. This little conference to write down “class names” for HTML components is named BEM. BEM stands for Block-Aspect-Modifier.
We give a Block title to each wrapper aspect in our HTML code. On this case, the wrapper is our <header class="header">. You may as well describe it because the guardian aspect.
Every youngster aspect contained in the wrapper or guardian has the category title of its guardian, adopted by two underscores with a singular identifier. As you will have observed, in our case, it’s:
Extra nice articles from LogRocket:
<nav class="header__nav" id="navbar">
Now, we may give each youngster aspect in our wrapper a category title like this. One other factor to notice right here is that I’ve began their class names with the phrase “header”, even when they’re the sub-child of the header. It’s executed on function to keep up consistency, and whereas writing SCSS code, it should ultimately assist us loads, and we’ll see this in a bit.
To proceed, you may copy the under given SCSS code in your SCSS file:
$color-blue: #00315c;
$color-purple: #6f479f;
$color-black: #202020;
$color-gray: #edebeb;
$color-white: #fcfcfc;

html {
  font-size: 62.5%;
  scroll-behavior: clean;
}

html,
physique {
  width: 100%;
  margin: 0px;
  padding: 0px;
  overflow-x: hidden;
}

physique {
  font-family: "Montserrat", sans-serif;
}

.header {
  peak: 20vh;
  background-color: $color-gray;
  padding: 1.5rem;
  place: relative;

  &__nav {
    show: flex;
    place: mounted;
    prime: 0;
    left: 50%;
    rework: translateX(-50%);
    padding: 4rem 5rem;
    justify-content: space-around;
    align-items: heart;
    z-index: 100;
    width: 100%;
    transition: 0.6s;
  }

  &__list {
    list-style: none;
    show: flex;
  }

  &__item {
    &:not(:last-child) {
      margin-right: 5rem;
    }
  }

  &__link {
    font-size: 1.6rem;
    colour: $color-blue;
    font-weight: 400;
    text-decoration: none;

    &:hover {
      font-weight: 600;
      transition: all 0.3s;
    }
  }
}
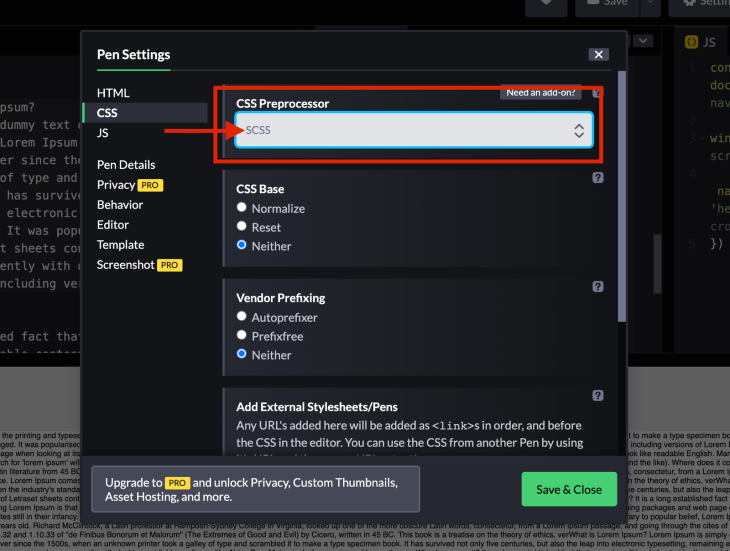
(Be aware: If you’re following up with me in Codepen, you may choose the SCSS choice within the settings menu within the CSS window. If you’re in your editor like VS Code, you may obtain the SCSS extension; it should compile your SCSS code into CSS code which you’ll be able to embody in your HTML file)
If you’re acquainted with SCSS and perceive what’s going on within the above-given code, then be happy to skip the following few strains.
- The primary few strains of the code are the variables for the colours, which we’ll be utilizing most on this tutorial. You’ll be able to set these variables to any colour you want, after which as an alternative of writing the hash-value or “RGBA” worth each time you wish to use a colour, you may write the variable title
- The syntax that I would like you to notice begins from line 24. I’ve written the
.headerto provoke the styling for the header aspect. However, inside the identical brackets, I’ve additionally written “&__nav” which initiates the styling for our nav aspect - In SCSS, you may write the styling of the nested components in the identical brackets. As well as, the
&signal holds the worth of your guardian identifier. On this case, it’s.headerIf we had been utilizing IDs as an alternative of sophistication names, the&would imply#header - You may as well see in line 61, how I’ve used the
&:hover, as a result of I wished to use the pseudo hover class on my hyperlink components - So, it makes it straightforward for us to write down the nested styling and take away the redundant code. You’ll be able to comply with this hyperlink to learn extra about SCSS and its syntax
As you could have observed, we didn’t put a lot effort into making a navbar for bigger screens as a result of, as per the nice consumer expertise, it ought to all the time be a horizontal record on the prime of the display.
We are able to add the hamburger menu on bigger screens, however to stop additional clicks from customers, the hamburgers menu all the time goes on smaller screens, which we’ll be doing now.
Hamburger navbars with CSS
Now, we will transfer our deal with making a {custom} hamburger navbar on smaller screens by simply utilizing CSS.
To offer you an summary of what we’re constructing; it isn’t possible to show horizontal nav gadgets on smaller screens. As an alternative, we’ll create a hamburger menu, which is able to show the gadgets by overlaying the background of the entire display.
Let’s get began by writing some code. Copy the below-given HTML code after line 10 inside your present HTML code.
 <div class="navigation">
    <enter
      kind="checkbox"
      class="navigation__checkbox"
      id="navi-toggle"
    />
    <label for="navi-toggle" class="navigation__button">
      <span class="navigation__icon"></span>
    </label>
    <div class="navigation__background"></div>
    <nav class="navigation__nav">
      <ul class="navigation__list">
        <li class="navigation__item">
          <a href="https://weblog.logrocket.com/build-custom-sticky-navbar-css/index.html" class="navigation__link">Dwelling</a>
        </li>
        <li class="navigation__item">
          <a href="about.html" class="navigation__link">About</a>
        </li>
        <li class="navigation__item">
          <a href="providers.html" class="navigation__link">Providers</a>
        </li>
        <li class="navigation__item">
          <a href="contact.html" class="navigation__link">Contact Us</a>
        </li>
      </ul>
    </nav>
  </div>
After copying the code, your HTML file ought to look one thing like this:
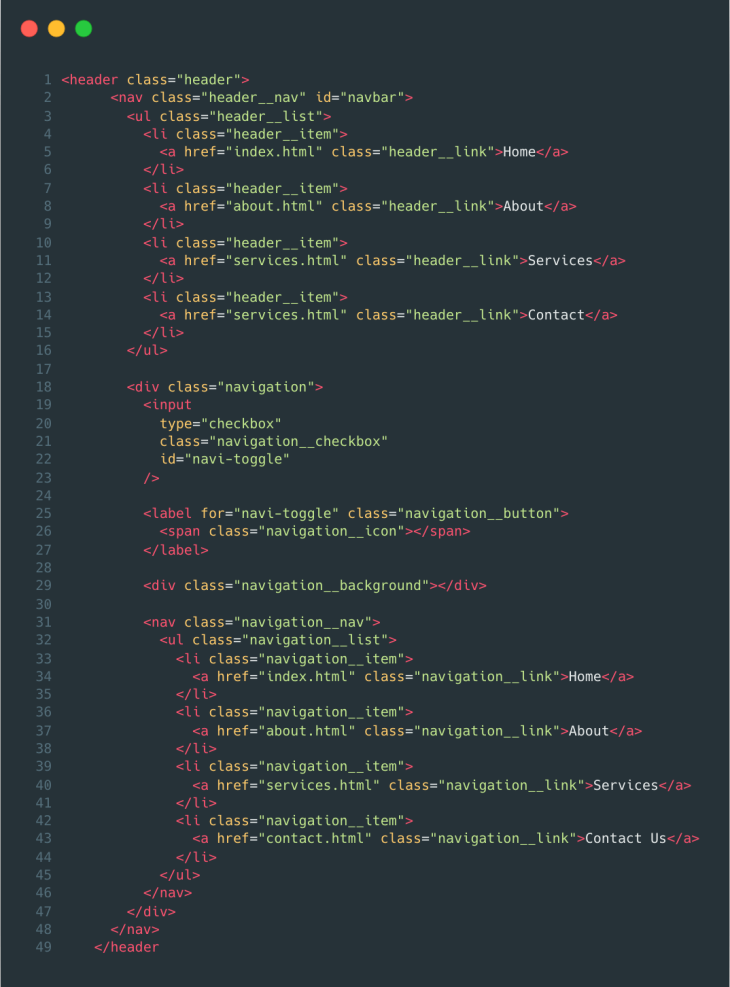
It’s the solely HTML code we have to make a hamburger menu that appears good on smaller screens. So, let me clarify to you some key factors on this newly added code:
- We now have added a brand new
<div>aspect and provided that<div>a category title of “navigation”. Contained in the div, we’ve added a checkbox. This checkbox will assist us to find out once we need our nav gadgets to point out and once we wish to cover them - After the checkbox, we’ve a label which, together with a aspect inside it, will act because the “three strains” icon that we see in a typical hamburger menu
- The third aspect is one more
<div>with a category title “navigation__background”. This div will present a background overlay for our nav gadgets to be displayed clearly on the display - The very last thing is our nav gadgets in an inventory. We now have so as to add them once more as a result of the earlier Nav gadgets are for the bigger screens, and these nav gadgets are for the smaller ones
(Be aware: That I’ve used the identical BEM naming conventions for writing class names for each aspect)
Styling the navbar with CSS
Now, all that’s left is styling our navigation bar. So, we’ll be writing a variety of CSS code. I’ll attempt to clarify every block of CSS we write one after the other in order that it doesn’t trigger any confusion.
Firstly, we’ll write some media queries as a result of we have to show the hamburger menu at a sure width.
- Now, for media queries, we’ll be utilizing the “mixins“ in SCSS. Mixins are like features in SCSS
- For the argument, you’ll cross the breakpoint on which you wish to see the modifications
- To make issues simpler, you may give every breakpoint a reputation of its personal; for instance, “400px” may be named as “telephone” as a result of that’s the typical display width of a telephone
- As soon as known as, you may write your CSS types contained in the curly brackets, and the types shall be utilized for that breakpoint. Let’s see how we will obtain this by writing these media queries
Copy the next code on the prime of your SCSS file, and we’ll be prepared to make use of these media queries.
@mixin reply($breakpoint) {
  @if $breakpoint == telephone {
    @media solely display and (max-width: 37.5em) {
      @content material;
    } //600px
  }
  @if $breakpoint == s-hundred {
    @media solely display and (max-width: 43.75em) {
      @content material;
    } //700px
  }
  @if $breakpoint == tab-port {
    @media solely display and (max-width: 56.25em) {
      @content material;
    } //900px
  }
  @if $breakpoint == tab-land {
    @media solely display and (max-width: 75em) {
      @content material;
    } //1200px
  }
  @if $breakpoint == big-desktop {
    @media solely display and (min-width: 112.5em) {
      @content material;
    } //1800
  }
}
Did you get the syntax for these media queries? We created a mixin (perform) named “reply”, which is meant to take any “breakpoint” because the argument and apply these types inside that media question.
Styling the hamburger
Now, we will begin styling our navigation bar based mostly on these media queries. So, let’s begin by copying this code:
.navigation {
  show: none;
  @embody reply(s-hundred){
    show: block;
  }
  z-index: 2000;
  &__checkbox {
    show: none;
  }
}
Within the above code, we’re setting the show of our hamburger navigation to none, as a result of we solely wish to be seen on smaller screens. So, we’ve used our reply mixin to achieve that performance.
The z-index is about to 2000 as a result of we wish our navigation bar to overlay all the opposite content material. We’ll get to see it later on this article.
Since we’re displaying our hamburger navigation at 700px, we will take away the show of our horizontal record on the identical width.
To do that, add this little highlighted media question inside your “header__list” type.
&__list {
    list-style: none;
    show: flex;
    @embody reply(s-hundred){
      show: none;
    }
}
After including these a number of code blocks, your SCSS file ought to appear like this:
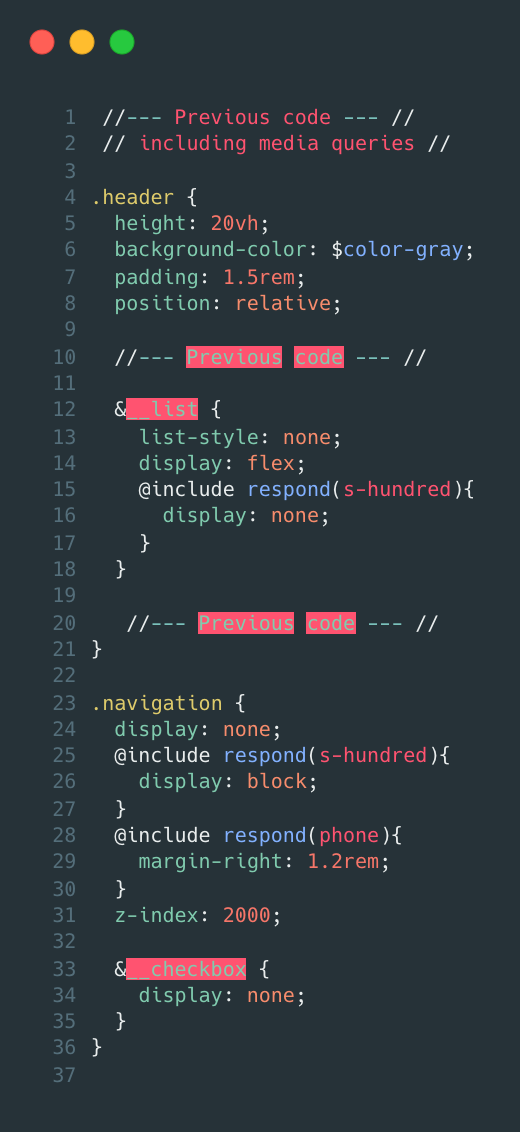
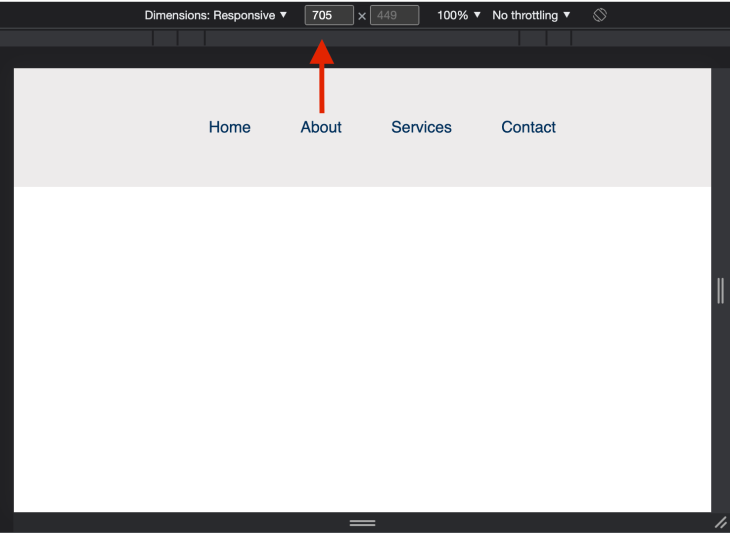
Display screen measurement greater than 700 px:
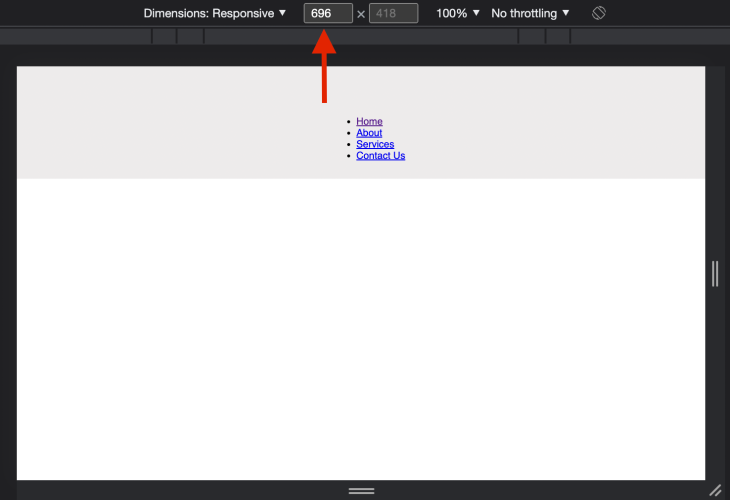
Display screen measurement lower than 700px for comparability:
Any longer, we’ve so as to add all code blocks contained in the “.navigation” type block as a result of all the things is nested.
The following piece of the code block is sort of easy. This code will type our navigation button to be clear and round. We’re making it clear as a result of the navigation icon aspect inside it should function the hamburger icon for this button.
&__button {
    background-color: clear;
    peak: 7rem;
    width: 7rem;
    prime: 6rem;
    proper: 6rem;
    border-radius: 50%;
    z-index: 2000;
    box-shadow: 0 1rem 3rem rgba($color-black, 0.1);
    text-align: heart;
    cursor: pointer;
  }
Now, we are going to type our hamburger icon. We’ll use the Pseudo “earlier than” and “after” courses with place: absolute. Lastly, we’ll add slightly hover impact on our icon utilizing the “hover” pseudo-class.
&__icon {
    place: relative;
    margin-left: 2rem;
    &,
    &::earlier than,
    &::after {
      width: 4rem;
      peak: 3px;
      background-color: $color-black;
      show: inline-block;
    }
    &::earlier than,
    &::after {
      content material: '';
      place: absolute;
      left: 0;
      transition: all 0.2s;
    }
    &::earlier than {
      prime: -0.65rem;
    }
    &::after {
      prime: 0.65rem;
    }
  }
  &__button:hover &__icon::earlier than {
    prime: -1rem;
  }
  &__button:hover &__icon::after {
    prime: 1rem;
  }
At this level, our hamburger menu icon ought to seem on the display like within the picture under:
![]()
Now, on the button press (or examine), we wish our hamburger icon to remodel into an “X” shut icon to point that our navigation bar is seen now, and that additional presses on it should shut our navigation bar.
To do that, copy the under given code, and we’ll be good to go along with our icon.
&__checkbox:checked + &__button &__icon {
  background-color: clear;
}
&__checkbox:checked + &__button &__icon::earlier than {
  prime: 0;
  rework: rotate(135deg);
  background-color: $color-white;
}
&__checkbox:checked + &__button &__icon::after {
  prime: 0;
  rework: rotate(-135deg);
  background-color: $color-white;
}
- Within the above code block, we’re taking the assistance of the “checked” pseudo-class that’s current on our checkbox aspect. Together with that, we’re additionally utilizing the “+” CSS selector
- The “+” CSS selector helps us to pick out the aspect that’s positioned instantly after the desired aspect
- lastly, we’re rotating the “earlier than” and “after” pseudo-elements of our icon to make it appear like an “X“
We’ll transfer ahead by including our background overlay. The logic behind our background is sort of easy; we’ll add the background colour on our button and, initially, it gained’t be seen as a result of its z-index can be behind the checkbox button.
As quickly we click on the checkbox, we are going to scale our background to cowl the entire display, and our navigation gadgets develop into seen.
Copy the under code to realize this.
&__background {
  background: radial-gradient(
    rgba($color-blue, 1),
    rgba($color-purple, 1)
  );
  peak: 6rem;
  width: 6rem;
  place: mounted;
  prime: -1rem;
  proper: 0rem;
  z-index: -1000;
  show: none;
  border-radius: 50rem;
  }

  &__checkbox:checked ~ &__background {
  @embody reply(s-hundred) {
    show: block;
    rework: scale(80);
  }
}
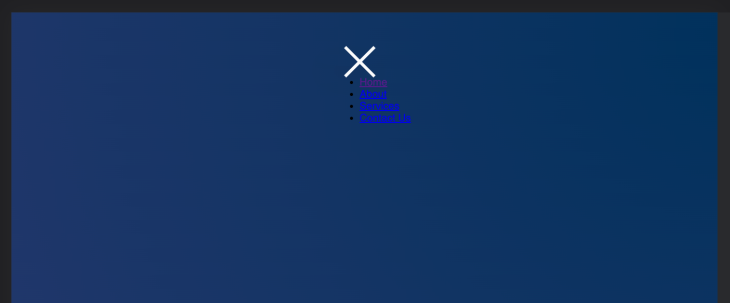
After making use of the background overlay, the navbar ought to appear like this:
The very last thing remaining is to type our navigation gadgets. For context, the navigation gadgets ought to solely seem once we click on on the hamburger icon.
It can cowl the entire display to supply a optimistic consumer expertise on smaller screens.
Lastly, it ought to disappear as soon as we click on on the icon once more. Some primary styling logic has gone into this code block which is similar to what we’ve executed in the remainder of the tutorial.
&__nav {
    place: mounted;
    margin-top: 1rem;
    padding: 1.2rem;
    font-size: 1.5rem;
    font-weight: 400;
    z-index: 1500;
    @embody reply(telephone){
      padding: 0;
    }
  }

  &__list {
    list-style: none;
    opacity: 0;
    visibility: hidden;
    margin-top: 50%;
  }

  &__item {
    &:not(:last-child) {
      margin-bottom: 1.5rem;
    }
  }

  &__link {
    text-decoration: none;
    colour: $color-white;
    &:hover {
      colour: $color-blue;
    }
  }

  &__checkbox:checked ~ &__nav &__list {
    opacity: 1;
    visibility: seen;
    transition: all 0.5s;
  }

  &__checkbox:checked ~ &__nav {
    @embody reply(s-hundred) {
      font-size: 4rem;
      place: absolute;
      prime: 32rem;
      left: 50%;
      rework: translate(-50%, -50%);
    }
  }

  &__checkbox:checked ~ &__nav &__link {
    @embody reply(s-hundred) {
      colour: $color-white;
    }
  }
Lastly, our {custom} sticky Navigation bar ought to appear like this on smaller screens:


You’ll be able to type the navigation bar or its gadgets as you need. I’ve the shut “X” image within the center, nevertheless it normally goes to the top-right facet. So, you’re free to do the remainder of the styling as you see match.
Lastly, if you wish to add some little animation in your navigation bar on scroll, you may add this little block of CSS code inside your header type block:
&__sticky {
    padding: 5rem 10rem;
    background-color: $color-gray;
    box-shadow: 0px 3px 5px rgba($color-blue, 0.5);
}
Additionally, don’t neglect so as to add this JavaScript code:
const navBar = doc.getElementById('navbar');
window.addEventListener('scroll', () => {
  navBar.classList.toggle('header__sticky', window.scrollY > 0);
});
The instruments and methods that CSS offers us proper now are sufficient to construct tremendous cool issues like our navigation bar with out utilizing JavaScript.
You could find the CodePen hyperlink for this tradition sticky navbar right here.
Conclusion
You are able to do tonnes of stuff with solely CSS. In the event you see tutorials on {custom} navigation bars or every other fancy stuff, for which it’s important to obtain some library or write some JavaScript code, then contemplate different options first, as a result of JavaScript just isn’t the one approach!
Strive understanding varied ideas of the CSS and perhaps it is possible for you to to do all that stuff utilizing simply solely CSS.
Is your frontend hogging your customers’ CPU?
As internet frontends get more and more advanced, resource-greedy options demand increasingly more from the browser. In the event you’re excited by monitoring and monitoring client-side CPU utilization, reminiscence utilization, and extra for your whole customers in manufacturing, attempt LogRocket. https://logrocket.com/signup/
LogRocket is sort of a DVR for internet and cellular apps, recording all the things that occurs in your internet app or web site. As an alternative of guessing why issues occur, you may mixture and report on key frontend efficiency metrics, replay consumer periods together with software state, log community requests, and robotically floor all errors.
Modernize the way you debug internet and cellular apps — Begin monitoring totally free.
