SolidJS is quick changing into the focal point within the net growth neighborhood. With its simple state administration, fine-grained reactivity, and excessive efficiency, SolidJS has put itself on a pedestal for different JavaScript frameworks.
SolidJS is the whole lot React builders have been asking for, and on this article, I’ll stroll you thru constructing a activity tracker with SolidJS. We’ll cowl the next matters:
Conditions
To comply with together with this tutorial, you’ll want information of JavaScript and TypeScript, Node.js modules, and parts in frontend frameworks.
Why SolidJS?
In case you’ve labored with React earlier than, SolidJS will look very acquainted. When React Hooks was first introduced, I used to be so blissful as a result of I assumed it might remedy our state administration disaster. Hooks made native state administration in parts simpler, however international state administration remained complicated.
It was nonetheless troublesome for disconnected parts to share information and quite a few libraries confirmed as much as try to remedy the state administration downside — which elevated growth fatigue and added pointless complexity to our codebase.
I’ve additionally seen the identical downside occur in different frontend frameworks; it’s as if international state administration is an afterthought, quite than one thing that was deliberate for from the start.
With SolidJS, issues are totally different. International state administration is as straightforward as creating state and exporting it. There’s no want for any complicated setup or third-party library.
SolidJS additionally makes use of JSX, the favored HTML-like syntax extension to JavaScript. This makes dealing with UI logic, occasions, and state adjustments simple. Coupled with that, SolidJS compiles to plain JavaScript, so there’s no want for a digital DOM, making it comparatively sooner than frameworks like React and Angular.
SolidJS additionally has a easy workflow. Parts solely render as soon as, identical to in JavaScript, so it’s simpler to foretell the end result of your code.
One other enormous benefit of SolidJS is that it builds on the shoulders of different net frameworks, so it proudly emulates the great elements and improves the not-so-good elements.
Let’s go forward and setup our SolidJS app to learn to construct an online app with SolidJS step-by-step.
Organising a SolidJS app with TypeScript
To arrange a SolidJS app in your native machine, you’ll want to put in Node.js. If you have already got it put in, working the next command in your terminal ought to return your present Node.js model:
node --version
Subsequent, let’s create a brand new SolidJS app by working the next command on our terminal:
npx degit solidjs/templates/ts task-tracker
Utilizing solidjs/templates/ts generates a Strong/TypeScript app. For JavaScript, you’ll have to vary the command to solidjs/templates/js.
After working the command, you must see a hit message that appears like this:
> cloned solidjs/templates#HEAD to task-tracker
Now, go forward and open the generated app in your code editor or IDE of selection. Right here’s what the app construction ought to appear like:
![]()
Discover that our SolidJS app makes use of Vite as its default construct instrument and pnpm because the default package deal supervisor. These instruments mixed present an awesome growth expertise for element rendering, app startup time, and package deal administration.
Our app element at present lives inside the ./src/App.tsx file:
import sort { Element } from 'solid-js'
...
const App: Element = () => {
  return (
    <div>
      ...
    </div>
  );
}

export default App
First, we import the Element sort from solid-js which is then used as the kind for our App element.
Parts in SolidJS are JavaScript features. They’re reusable and will be personalized utilizing props, that are just like operate parameters/arguments.
Inside the ./src/index.tsx file, we render our App element:
import { render } from 'solid-js/net'
import App from './App'

render(() => <App />, doc.getElementById('root') as HTMLElement)
The render() technique from solid-js/net expects two arguments:
- A operate that returns our
<App />element - An HTML aspect
While you navigate to the ./index.html file, you’ll see the foundation div and using our ./src/index.tsx file by way of the <script /> tag:
...
<physique>
  <noscript>You want to allow JavaScript to run this app.</noscript>
  <div id="root"></div>
  <script src="https://weblog.logrocket.com/src/index.tsx" sort="module"></script>
</physique>
To run our SolidJS app, we’ll must first set up our packages by working the command pnpm set up on our terminal, after which pnpm dev to begin our software in growth mode. It is best to see a hit message that appears like this:
 vite v2.9.9 dev server working at:

 > Native: http://localhost:3001/
 > Community: use `--host` to show

 prepared in 378ms.
While you navigate to http://localhost:3001 or the displayed URL in your terminal, you must see a web page just like this:
Putting in Bootstrap to fashion our SolidJS app
Now that we’ve efficiently arrange our SolidJS app, let’s set up Bootstrap for styling in order that we don’t must hassle about CSS.
To put in Bootstrap, run the next command in your terminal:
pnpm set up bootstrap
Subsequent, we’ll use the next line of code to import Bootstrap in our ./src/index.tsx file:
import 'bootstrap/dist/css/bootstrap.min.css'
We will additionally take away the present ./index.css import as we gained’t be needing it. Our index.tsx file ought to now appear like this:
import { render } from 'solid-js/net'
import App from './App'
import 'bootstrap/dist/css/bootstrap.min.css'

render(() => <App />, doc.getElementById('root') as HTMLElement)
Utilizing JSX to construction our activity tracker
Let’s use JSX to construction our activity tracker. Contained in the ./src/App.tsx file, substitute what you at present have with this:
import sort { Element } from 'solid-js'

const App: Element = () => {
  return (
    <div class="container mt-5 text-center">
      <h1 class="mb-4">Whattodo!</h1>

      <kind class="mb-5 row row-cols-2 justify-content-center">
        <enter sort="textual content" class="input-group-text p-1 w-25" placeholder="Add activity right here..." id="taskInput" required />

        <button class="btn btn-primary ms-3 w-auto" sort="submit">
          Add activity
        </button>
      </kind>

      <div>
        <h4 class="text-muted mb-4">Duties</h4>
        <div class="row row-cols-3 mb-3 justify-content-center">
          <button class="btn btn-danger w-auto">X</button>
          <div class="bg-light p-2 mx-2">Push code to GitHub</div>
          <enter sort="checkbox" position="button" class="form-check-input h-auto px-3" />
        </div>
      </div>
    </div>
  )
}
export default App
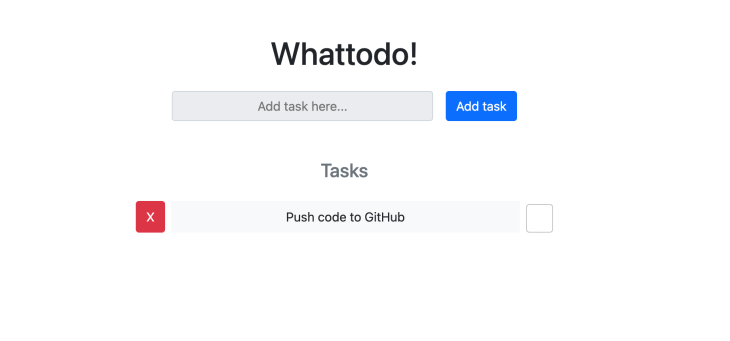
Our JSX code incorporates the shape for inputting new duties and the duties part. For now, we’re utilizing hard-coded information, however we’ll find out how we will make our app dynamic in order that when a person inputs a brand new activity within the kind and clicks the Submit button, our SolidJS app updates with the brand new information.
While you return to your browser, your web page ought to now appear like this:
Subsequent, let’s learn to create and handle state in SolidJS. We’ll do that by making a taskList state and we’ll additionally create features for including new duties to our state, eradicating them, and updating their completion standing.
Creating and updating state in SolidJS
SolidJS has a createSignal Hook to create state. For instance, let’s create a taskList state to deal with our duties. Contained in the ./src/App.tsx file, we’ll begin by creating a sort for every activity:
const App: Element = () => {
  sort Activity = {
    textual content: string
    textual content: string
    accomplished: boolean
  }

  return (...)
}
Subsequent, we’ll create our taskList state:
import { Element, createSignal } from 'solid-js'

...
const [taskList, setTaskList] = createSignal([] as Activity[])
...
The createSignal() Hook returns an array containing two variables, taskList and setTaskList. In contrast to what you’ll see with React Hooks, each variables are features. We name the taskList() operate to entry our activity information, and the setTaskList() operate to replace our taskList state.
Including duties to our state
Now that we’ve created our taskList state, let’s create a operate for including duties to our state. We’ll title it addTask:
const [taskList, setTaskList] = createSignal([] as Activity[])

const addTask = (e: Occasion) => {
  e.preventDefault()

  const taskInput = doc.querySelector('#taskInput') as HTMLInputElement

  const newTask: Activity = {
    id: Math.random().toString(36).substring(2),
    textual content: taskInput.worth,
    accomplished: false,
  }

  setTaskList([newTask, ...taskList()])
  taskInput.worth=""
}
Inside our addTask() operate, we’ve began by utilizing the e.preventDefault() technique to stop the default reload conduct after we submit our kind. We’re additionally getting our taskInput from the <enter /> aspect with an ID of “taskInput”.
For every new activity, we create an object named newTask with properties id, textual content, and accomplished. When a brand new activity is created, our operate will use the Math.random() technique to generate a random string for our activity ID and set the default accomplished worth to false.
Lastly, the setTaskList() operate shall be known as with an array as its argument, appending the newTask with the present taskList state.
Let’s additionally create a operate for deleting duties:
...
const deleteTask = (taskId: string) => {
  const newTaskList = taskList().filter((activity) => activity.id !== taskId)
  setTaskList(newTaskList)
}
Once we name our deleteTask() operate with the duty ID as its argument, it would filter via our taskList state and return each activity besides the one with the ID we need to delete. Then, the setTaskList() technique shall be known as with the brand new activity listing as its argument.
To place our addTask() operate to make use of, we’ll add an onSubmit occasion listener to our <kind /> tag within the JSX code, which can name our operate at any time when the submit button is clicked.
...
return (
 <div class="container mt-5 text-center">
    <h1 class="mb-4">Whattodo!</h1>
    <kind class="mb-5 row row-cols-2 justify-content-center" onSubmit={(e) => addTask(e)}>
     ...
    </kind>
  </div>
)
Subsequent let’s see how we will present our taskList information in our app at any time when a person provides a brand new activity.
Management stream and looping via information in SolidJS
SolidJS has a <For /> element for looping via information. Whereas the JavaScript Array.map() technique will work, our element will all the time map the taskList state when it’s up to date. With the <For /> element, our app will solely replace the precise a part of the DOM that wants updating.
Let’s substitute what we at present have within the Duties div with this:
...
<div>
  <h4 class="text-muted mb-4">Duties</h4>
  <For every={taskList()}>
    {(activity: Activity) => (
      <div class="row row-cols-3 mb-3 justify-content-center">
        <button class="btn btn-danger w-auto">X</button>
        <div class="bg-light p-2 mx-2">{activity.textual content}</div>
        <enter sort="checkbox" checked={activity.accomplished} position="button" class="form-check-input h-auto px-3" />
      </div>
    )}
  </For>
</div>
...
Discover how we’re wrapping our taskList within the <For /> element. We’ve additionally up to date the duty textual content from “Push code to GitHub” to activity.textual content from our activity parameter.
We will now go forward and use the deleteTask() technique we created earlier. We’ll add an onClick occasion listener to the Delete button:
...
<button class="btn btn-danger w-auto" onclick={() => deleteTask(activity.id)}>
  X
</button>
...
If we go over to our browser, our SolidJS app ought to now work like this:
Updating duties standing in our nested state
SolidJS has a createStore() Hook for creating and managing nested states. However earlier than we speak about it, let’s see how we will make updates to pre-existing duties in our createSignal() state. We’ll create a brand new operate named toggleStatus just below the deleteTask() operate:
...
const toggleStatus = (taskId: string) => {
  const newTaskList = taskList().map((activity) => {
    if (activity.id === taskId) {
      return { ...activity, accomplished: !activity.accomplished }
    }
    return activity
  })
  setTaskList(newTaskList)
}
Our toggleStatus() operate expects a taskId argument, which we’ll use to get the actual activity we need to mark as both accomplished or not-completed. We’re additionally utilizing the map() technique to loop via our taskList state, and if we discover the duty that has the identical ID because the parameter taskId, we’ll change its accomplished property to the alternative of what’s at present there. So, if true, we’ll make it false, and if false, true.
Lastly, we’re utilizing the setTaskList() technique to replace the taskList state with our new taskList information.
Earlier than we use our toggleStatus() operate, let’s add a distinction between accomplished duties and uncompleted duties in our JSX code. We’ll add the Bootstrap class “text-decoration-line-through text-success” to the duty textual content if its accomplished property is true. In our JSX code, just under the Delete button, let’s replace the duty textual content div to this:
<div class={`bg-light p-2 mx-2 ${activity.accomplished && 'text-decoration-line-through text-success'}`}>
  {activity.textual content}
</div>
Subsequent, we’ll add an onClick occasion listener to the checkbox enter tag, the place we’ll name the toggleStatus() technique at any time when it’s clicked:
<enter
  sort="checkbox"
  checked={activity.accomplished}
  position="button"
  class="form-check-input h-auto px-3"
  onClick={() => {
    toggleStatus(activity.id)
  }}
/>
The JSX code that our <App /> element returns ought to now appear like this:
<div class="container mt-5 text-center">
      <h1 class="mb-4">Whattodo!</h1>
      <kind class="mb-5 row row-cols-2 justify-content-center" onSubmit={(e) => addTask(e)}>
        <enter sort="textual content" class="input-group-text p-1 w-25" placeholder="Add activity right here..." id="taskInput" required />
        <button class="btn btn-primary ms-3 w-auto" sort="submit">
          Add activity
        </button>
      </kind>
      <div>
        <h4 class="text-muted mb-4">Duties</h4>
        <For every={taskList()}>
          {(activity: Activity) => (
            <div class="row row-cols-3 mb-3 justify-content-center">
              <button class="btn btn-danger w-auto" onclick={() => deleteTask(activity.id)}>
                X
              </button>
              <div class={`bg-light p-2 mx-2 ${activity.accomplished && 'text-decoration-line-through text-success'}`}>
                {activity.textual content}
              </div>
              <enter
                sort="checkbox"
                checked={activity.accomplished}
                position="button"
                class="form-check-input h-auto px-3"
                onClick={() => {
                  toggleStatus(activity.id)
                }}
              />
            </div>
          )}
        </For>
      </div>
    </div>
Once we go over to our browser, our SolidJS app ought to have the ability to work like this:
Utilizing createStore for nested reactivity in SolidJS
Earlier than we wrap up, let’s see how we will use the createStore Hook in SolidJS to create and replace nested state. As a substitute of mapping via our state, creating a brand new activity listing, and changing all of our state information with the brand new listing, we will as a substitute immediately replace the duty that wants updating utilizing its ID.
To make use of the createStore Hook, we’ll first import it from solid-js/retailer:
import { createStore } from 'solid-js/retailer'
Discover that createSignal was imported from solid-js, whereas createStore is imported from solid-js/retailer.
Subsequent, we’ll replace our taskList state creation to this:
const [taskList, setTaskList] = createStore([] as Activity[])
The shop we create with the createStore() Hook isn’t a operate, not like the one created with the createSignal() Hook. So, we’ll modify all cases of taskList in our code to simply taskList as a substitute of taskList(). The second variable, setTaskList, stays a operate, and we’ll use it to replace our retailer.
Let’s go forward and use the setTaskList() technique to change the toggleStatus() operate:
const toggleStatus = (taskId: string) => {
  setTaskList(
    (activity) => activity.id === taskId,
    'accomplished',
    (accomplished) => !accomplished,
  )
}
Within the toggleStatus() operate, we go three arguments to the setTaskList() technique:
- A operate to get the actual activity we need to replace. In our case we’re returning the duty that has the identical id because the
taskIdparameter - The property we need to modify —
accomplished - For the third argument, we’re passing one other operate that takes within the present worth of our chosen property and returns a brand new worth. Right here, we’re returning the alternative of what it at present is
Once we return to the browser, our app ought to nonetheless work as anticipated:

Conclusion
On this article, we’ve lined the fundamentals of SolidJS by constructing a activity tracker. Strong’s method to constructing net functions is kind of spectacular and comparatively simple when in comparison with different frontend frameworks like Angular and React. With direct compilation to actual DOM nodes and with out the necessity for a digital DOM, net functions constructed with SolidJS have the unusual benefit of being quick.
That stated, SolidJS remains to be new, and its ecosystem and neighborhood are small in comparison with that of frameworks like React, Vue, and Angular, so there’s a superb likelihood that you just’ll be the primary to come across issues or be in want of particular functionalities, libraries, or integrations. However SolidJS is rising quick and plenty of individuals have already began migrating present apps to the framework. The SolidJS neighborhood is pretty responsive and you shouldn’t have any downside getting assist whenever you want it.
You’ll find the repo for our activity tracker on my GitHub. I even have a SolidJS crash course on my YouTube channel, which I’d love so that you can try. And if you wish to keep up a correspondence, think about following me on LinkedIn. Preserve constructing!
Writing lots of TypeScript? Watch the recording of our current TypeScript meetup to study writing extra readable code.
TypeScript brings sort security to JavaScript. There could be a stress between sort security and readable code. Watch the recording for a deep dive on some new options of TypeScript 4.4.
