Since its inception in 2010, Three.js has been the de facto normal for constructing 3D visuals on the internet. Over time, a number of abstractions have been constructed on high of this library, consolidating its options and the big ecosystem of JavaScript libraries to create quick, gorgeous, and performant internet functions.
As Vue.js has matured, it has develop into one of many high libraries of alternative for component-based person interface improvement. Vue and Three.js are each designed with related targets; each instruments management UI components in numerous methods to create interactive visuals on the internet.
On this article, we’ll introduce Lunchbox.js, a customized renderer for Three.js. We’ll cowl every little thing it’s good to know to start out constructing 3D visuals in Vue utilizing Lunchbox.js:
Stipulations
To comply with together with this text, you need to have the next:
- Foundational information of Vue and its ideas
- Fundamental understanding of Three.js
What’s Lunchbox.js?
Lunchbox.js makes use of Vue’s component-based mannequin and declarative fashion to deal with crucial Three.js functionalities underneath the hood.
This library offers entry to primitive Three.js objects and courses by parts, akin to:
- mesh
- lights
- geometries
- group
- supplies
These parts are the constructing blocks of Lunchbox.js. They’re direct translations of Three.js courses.
For instance, when creating a typical mesh in a vanilla Three.js challenge, we’d use a geometry class like BoxGeometry() to create a cuboid form, apply colour to it with a cloth class like MeshBasicMaterial(), after which map it to the geometry by combining each objects with the Mesh() class, similar to within the following code:
// create geometry with sides of size 1
const geometry = new THREE.BoxGeometry(1, 1, 1)
// create yellow fundamental materials
const materials = new THREE.MeshBasicMaterial({ colour: 0xffff00 })
// mix geometry + materials in mesh
const mesh = new THREE.Mesh(geometry, materials)
// add that mesh to the scene (assuming you've got created a scene)
scene.add(mesh)
To create the identical mesh in a Lunchbox.js app, we‘d use the identical courses, besides as parts and, as a substitute of assigning them to variables and mixing them with a Mesh() class, we’d nest them inside a <mesh> part, like so:
<Lunchbox>
    <mesh>
        <boxGeometry :args="[1, 1 ,1]" />
        <meshBasicMaterial :colour="0xffff00" />
    </mesh>
</Lunchbox>
You’ll discover within the examples above that every <Lunchbox> part matches the corresponding Three.js class with a camelCase title.
// three.js
new THREE.Mesh()
<!-- Lunchbox -->
<mesh/>
// three.js
new THREE.BoxGeometry()
<!-- Lunchbox -->
<boxGeometry/>
Lunchbox.js and Three.js syntaxes are very a lot alike, however there are a number of variations to notice. For instance, each <Lunchbox> part takes arguments as props utilizing the args property. The argsprop takes an array of arguments and passes it to the part’s class constructor.
new THREE.BoxGeometry(1, 2, 3)
The above code above would translate to the next in Lunchbox:
<boxGeometry :args="[1, 2, 3]" />
Different Three.js object properties, such because the colour property of the MeshBasicMaterial class, may be added as a reactive prop on a <Lunchbox> part. This is rather like what we noticed within the earlier instance.
<meshBasicMaterial :colour="purple" />
Nonetheless, properties that make the most of dot notations, just like the place vector, can be set with a splash, -, in a <Lunchbox> part like so:
<mesh :position-x="3" />
Lunchbox affords inbuilt assist for many Three.js courses; you could find the checklist of parts right here.
Courses not obtainable within the included parts may be added utilizing Lunchbox’s app.lengthen technique. For instance, right here’s how we’d add the orbitControl class to Lunchbox:
import { createApp } from 'lunchboxjs'
import App from 'YourApp.vue'
//Import the category from three.js
import { OrbitControls } from 'three/examples/jsm/controls/OrbitControls'
// inform the app to increase Lunchbox to incorporate OrbitControls and mount the app
createApp(App)
    .lengthen({ OrbitControls })
    .mount('#app')
The lengthen() technique is one in every of Lunchbox’s distinctive options, courses added with the tactic inherit all of the options of a <Lunchbox> part.
We’ve seemed on the core ideas of Lunchbox.js, subsequent we’ll see how we are able to construct with Lunchbox. We’ll study extra in regards to the library’s ideas as we transfer by the tutorial.
Getting began with Lunchbox.js
To arrange a Lunchbox.js app, first set up Vue utilizing Vite’s CLI:
npm create [email protected]
After operating the command, select Vue from the checklist of libraries and provides the challenge a reputation. Subsequent, cd into the challenge folder and run the next command:
npm set up lunchboxjs three
This command will set up Lunchbox.js and Three.js as dependencies of the Vue app. You may view them contained in the package deal.json file within the root listing.
Subsequent, clear up the boilerplate codes within the challenge, open the fundamental.js file, and change the next code:
import { createApp } from 'vue'
import App from './App.vue'
createApp(App).mount('#app')
With this code:
import { createApp } from 'lunchboxjs'
import App from './App.vue'
createApp(App).mount('#app')
Right here, we imported the createApp perform from lunchboxjs as a substitute of from vue. This may rework the Vue app right into a Lunchbox setting.
Now we are able to begin constructing and rendering 3D objects in our app.
Making a scene
A scene is an object that enables us to arrange the objects which might be to be rendered. It’s like a show space the place objects may be put collectively and rendered to the browser. The next is an instance of a scene arrange in Three.js:
const scene = new THREE.Scene();
const digital camera = new THREE.PerspectiveCamera( 75, window.innerWidth / window.innerHeight, 0.1, 1000 );
const renderer = new THREE.WebGLRenderer();
renderer.setSize( window.innerWidth, window.innerHeight );
doc.physique.appendChild( renderer.domElement );
Organising a scene in Lunchbox.js is extra simple and fewer cryptic. The library offers a <Lunchbox> part that incorporates the underlying codes for making a renderer and scene in Three.js.
To set it up, go over to the App.vue fundamental part and place the <Lunchbox> part contained in the template part, like so:
<template>
  <Lunchbox>
            <!-- ... -->
  </Lunchbox>
</template>
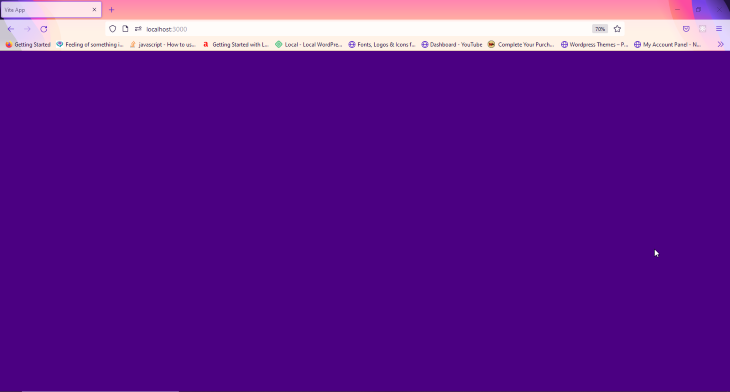
Each object nested throughout the <Lunchbox> tag might be rendered to the browser. In case you save your code and begin the event server, you need to see a black display much like the one beneath.

This black display is our app’s renderer; no matter we add to the scene might be displayed right here. You may change the background colour with a background prop, like so:
<Lunchbox background="indigo">
            <!-- ... -->
</Lunchbox>
Listed here are simply among the props you need to use on the <Lunchbox> part:
backgroundcameraPositiondigital camerazoomshadow
Including meshes
Geometries are Three.js courses used for outlining a mesh’s form. Earlier on this article, we demonstrated render a cuboid mesh utilizing the boxGeometry part. Right here, we’ll see how we are able to render extra 3D shapes to the browser.
Lunchbox.js comes with a number of auto-generated, inbuilt geometry parts, you may see the checklist of obtainable parts right here.
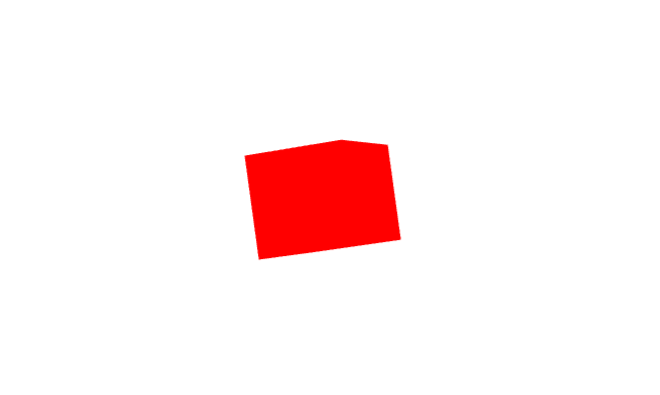
Go forward and add a <mesh> part contained in the Lunchbox tags and nest any geometry part of your alternative inside. Don’t overlook to incorporate a cloth part with a colour prop.
<Lunchbox>
  <mesh>
     <boxGeometry />
     <MeshBasicMaterial colour="purple"/>
  </mesh>
</Lunchbox>
The fabric part makes use of the Three.js Materials() class to outline the varied floor properties of the mesh.
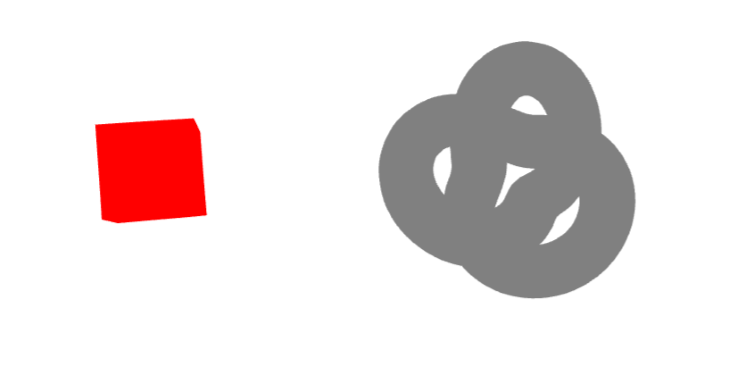
A <mesh> part solely accepts a single Geometry() and Materials() part. So as to add extra shapes to the scene, we’d must create extra meshes, one for every Geometry(), as proven beneath.
<Lunchbox>
      <mesh>
         <boxGeometry />
         <MeshBasicMaterial colour="purple"/>
      </mesh>
      <mesh>
         <torusKnotBufferGeometry />
         <MeshBasicMaterial colour="gray"/>
      </mesh>
</Lunchbox>
Alternatively, we might create separate parts for every form and import them inside the principle part like so:
<script>
      import {Sphere} from './Sphere.vue'
</script>
<template>
      <Lunchbox>
            <Sphere />
      </Lunchbox>
</template>
Every Geometry part accepts distinctive parameters that can be utilized to fine-tune and manipulate its width, top, smoothness, and different visible options. These parameters may be set in Lunchbox utilizing the args prop.
<torusKnotBufferGeometry :args="[1, 0.4, 240, 20]"/>
The <mesh> part additionally accepts a number of props. And because it serves as a container for the Geometry(), it may also be used to control the place, rotation, and extra.
<Lunchbox>
  <mesh position-x="4" position-x="4">
      ...
  </mesh>
</Lunchbox>
Within the above code, we’re including a place prop that may transfer the sphere mesh 4px to the best alongside the x-axis.
Listed here are among the mesh props that you need to use to control your shapes:
place (x, y, z)rotation (x, y, x)scale (x, y)
Meshes may also be grouped utilizing the <group> part. This part serves as a container for Geometries, and we are able to add as many <mesh> as we like inside every <group>.
<Lunchbox>
     <group>
        <mesh>
           <boxGeometry />
           <MeshBasicMaterial colour="purple"/>
        </mesh>
        <mesh>
           <torusKnotGeometry />
           <MeshBasicMaterial colour="gray"/>
        </mesh>
     </group>
</Lunchbox>
Including textures
At present, our meshes don’t look very life like. The utilized supplies make them look a bit plastic. We will apply textures, utilizing the <textureLoader> part in Lunchbox, to present every mesh a extra life like look.
The <textureLoader> part makes use of the Three.js Texture() class that lets us map life like textures to mesh surfaces underneath the hood. To exhibit the method, we’ll create a 3D mannequin of the Earth.
To create the globe, clear up the scene after which create a brand new mesh with a spherical geometry utilizing the <sphereGeometry/> part.
<Lunchbox>
  <mesh>
     <sphereGeometry />
  </mesh>
</Lunchbox>
Subsequent, add a <meshPhysicalMaterial> part contained in the mesh and nest the <textureLoader> inside it, like so:
<Lunchbox>
  <mesh>
      <sphereGeometry :args="[1, 32, 32]" />
      <meshPhysicalMaterial>
            <textureLoader />
      </meshPhysicalMaterial>
  </mesh>
</Lunchbox>
The <textureLoader> part accepts an src and an connect prop. The src prop takes in a relative or absolute path of the feel materials, whereas the connect prop accepts the mapping possibility.
We’ll be utilizing the map and bumpMap choices for this instance. In different phrases, we now have to declare a second <textureLoader> contained in the mesh part.
Seize the beneath photographs and place them contained in the /public folder in your challenge:
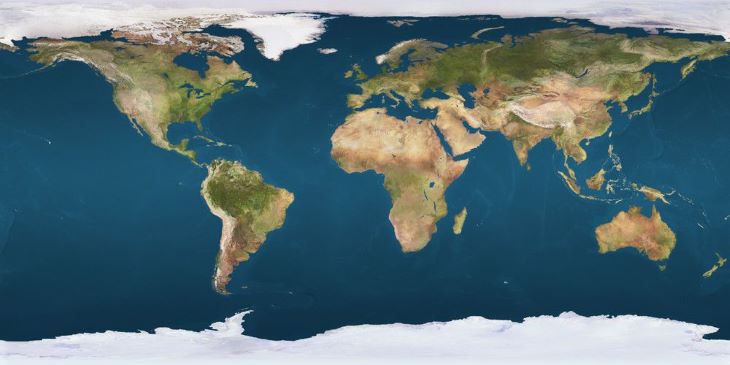
Subsequent, add the primary picture’s path to the src prop of the primary <textureLoader> part and provides the connect prop a "map" worth.
<meshPhysicalMaterial>
      <textureLoader src="https://weblog.logrocket.com/first-image" connect="map" />
      <textureLoader ... />
</meshPhysicalMaterial>
In case you save the challenge proper now, a spherical silhouette will seem within the browser. It is because our scene doesn’t have a light-weight supply.
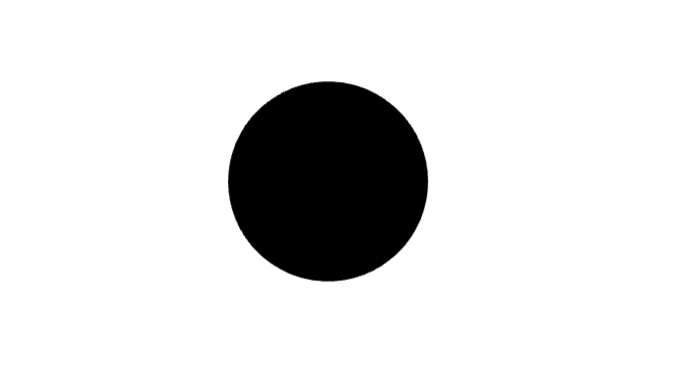
To repair this, add <pointLight /> and <directionalLight /> parts contained in the <Lunchbox> part.
<Lunchbox>
  <directionalLight />
  <pointLight />
  <mesh>
      ...
  </mesh>
</Lunchbox>
Now, should you save the challenge and return to the browser, you need to see one thing much like the picture beneath:
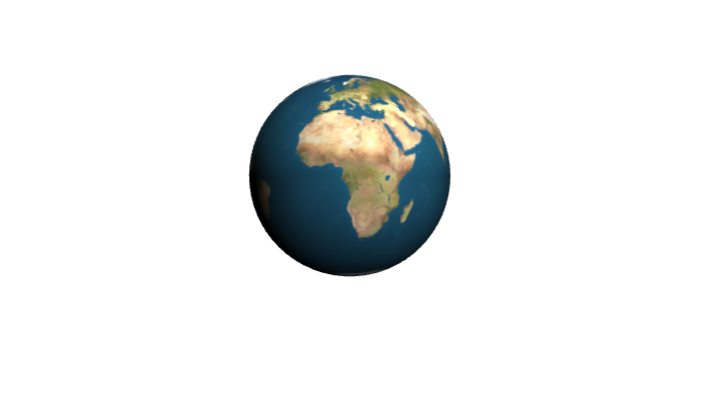
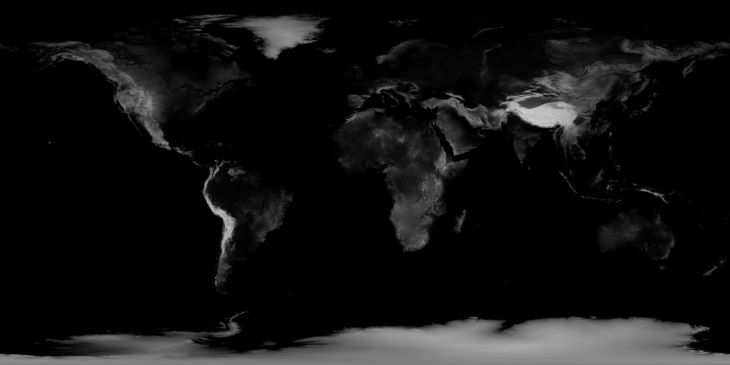
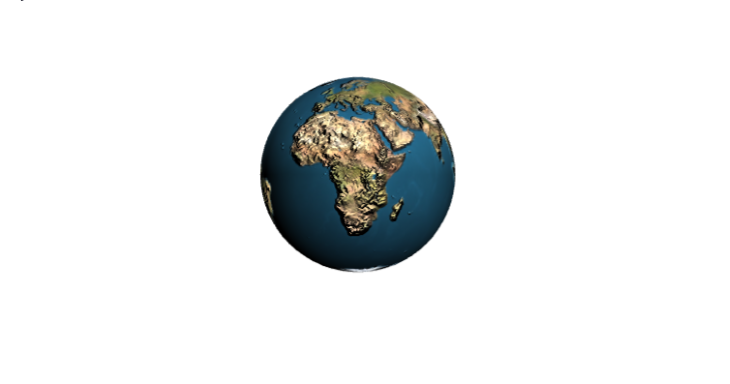
To make the picture extra attention-grabbing and visually gorgeous, we’ll use the second picture so as to add life like contours to the globe.
We’ll go about this equally to how we dealt with the primary picture. Add the picture’s path to the src prop, however this time round give the connect prop a "bumpMap" worth.
Including animation
Lunchbox.js offers an onBeforeRender perform that is named for each body earlier than or after render. With this perform, we are able to animate our globe by including a price to its rotation property on each body.
Go to the script part of the App.vue part and import ref from Vue and the onBeforeRender perform from Lunchbox.
import {ref} from 'vue'
import {onBeforeRender} from 'lunchboxjs'
Subsequent, assign the ref to a rotation variable and move it an object with the next property:
const rotation = ref({y: 0});
Then, name the onBeforeRender perform and add the next code:
onBeforeRender(() =>{
   rotation.worth.y += 0.02
})
Right here, we’re including 0.02deg to the y-axis rotation of the article on each body. Lastly, add a rotation-y prop to the globe’s mesh and move it the rotation.y worth, like so:
<mesh rotation-y="rotation.y">
        <sphereGeometry />
        <meshPhysicalMaterial>
              <textureLoader ... />
              <textureLoader ... />
        </meshPhysicalMaterial>
  </mesh>
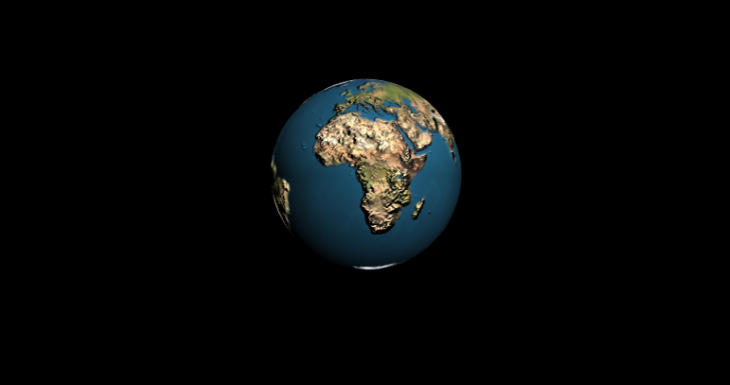
Now, should you save the challenge, your globe ought to animate properly just like the beneath instance.
You may add extra rotation animations by together with the x and z properties to the ref, onBeforeRender perform, and the globe’s mesh.
Including occasions
We will add occasion listeners to <Lunchbox> parts simply as we’d some other component in Vue. To exhibit, we’ll add a click on occasion that’ll pause our globe’s animation when it’s triggered.
Go forward and create an onClick occasion on the globe mesh like so:
<mesh rotation-y="rotation.y" @click on="">
    ...
</mesh>
Subsequent, create a variable with ref and move it a Boolean worth of true. Wrap the declaration contained in the onBeforeRender perform with an if assertion:
const lively = ref(true)
onBeforeRender(() =>{
 if(lively){
   rotation.worth.y += 0.02
  }
})
Right here, we’re assigning the lively variable because the if assertion’s situation. When the worth is about to false, the code throughout the assertion won’t be executed and the animation will pause.
Lastly, add the next code to the onClick occasion on the <mesh> part:
<mesh rotation-y="rotation.y" @click on="lively = !lively">
    ...
</mesh>
Now the globe’s animation will pause and play when it’s clicked, as proven beneath:
That’s it! We’ve efficiently constructed 3D visuals in Vue!
As a problem, attempt including a black background with stars to the scene to present the globe an much more life like really feel. You may simply obtain this by including a airplane geometry to the scene and mapping a texture of the evening sky. Good luck!
Conclusion
On this article, we launched the core ideas of Lunchbox.js and demonstrated use this software to create 3D visuals in Vue. In our tutorial, we created a scene, constructed totally different mesh geometries, added textures to meshes, animated meshes, and added occasion listeners to things in a scene.
Lunchbox.js remains to be a piece in progress, but it surely’s prepared for manufacturing. You may ship it together with your functions fear free. To study extra in regards to the library, go to the official docs and take a look at some pattern tasks constructed with Lunchbox.js.
Expertise your Vue apps precisely how a person does
Debugging Vue.js functions may be troublesome, particularly when there are dozens, if not lots of of mutations throughout a person session. In case you’re focused on monitoring and monitoring Vue mutations for all your customers in manufacturing, attempt LogRocket. 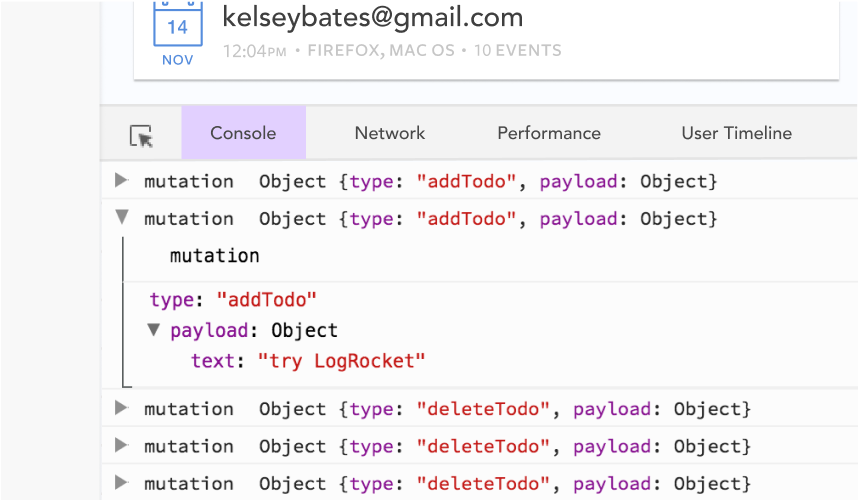 https://logrocket.com/signup/
LogRocket is sort of a DVR for internet and cellular apps, recording actually every little thing that occurs in your Vue apps together with community requests, JavaScript errors, efficiency issues, and rather more. As a substitute of guessing why issues occur, you may mixture and report on what state your utility was in when a difficulty occurred.
The LogRocket Vuex plugin logs Vuex mutations to the LogRocket console, supplying you with context round what led to an error, and what state the applying was in when a difficulty occurred.
Modernize the way you debug your Vue apps – Begin monitoring at no cost.
