Bluetooth is a know-how that has swept over the music business. From headsets to audio system, bluetooth has made life straightforward for music lovers. On the identical time, the associated fee for bluetooth enabled merchandise has additionally elevated. This DIY exhibits how one can create your individual Bluetooth speaker and music participant(utilizing the SD card module).
Each the bluetooth participant and speaker can play audio recordsdata. It will possibly additionally assist the SD card module.

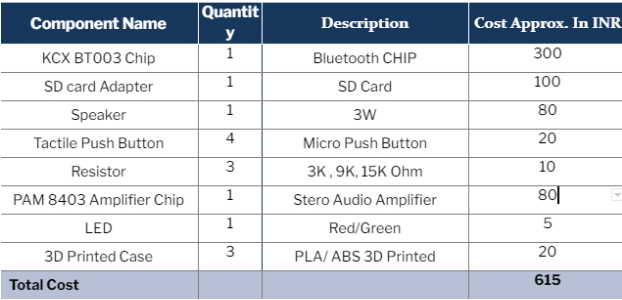
Invoice Of Supplies
Be aware:- KCXBT003 Chip is of two varieties out there (Rx is Bluetooth receiver and Tx is transmitter). Since a speaker is being made, the Rx Chip is used for the speaker. Having an SD card module is elective. The SD card is skipped right here, within the examined design.However its inclusion or exclusion doesn’t have an effect on the challenge.
Designing
The outer physique must be designed first, to carry and defend the elements. Subsequent the working circuit must be designed. PCB is elective until it’s a PCB solely circuit, then the elements may be linked with wires and soldering.
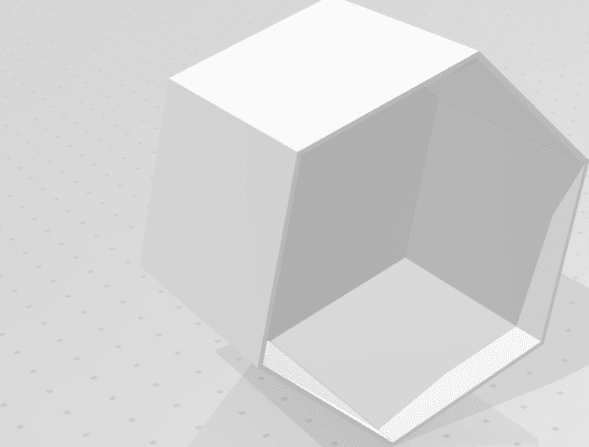
Case Designing
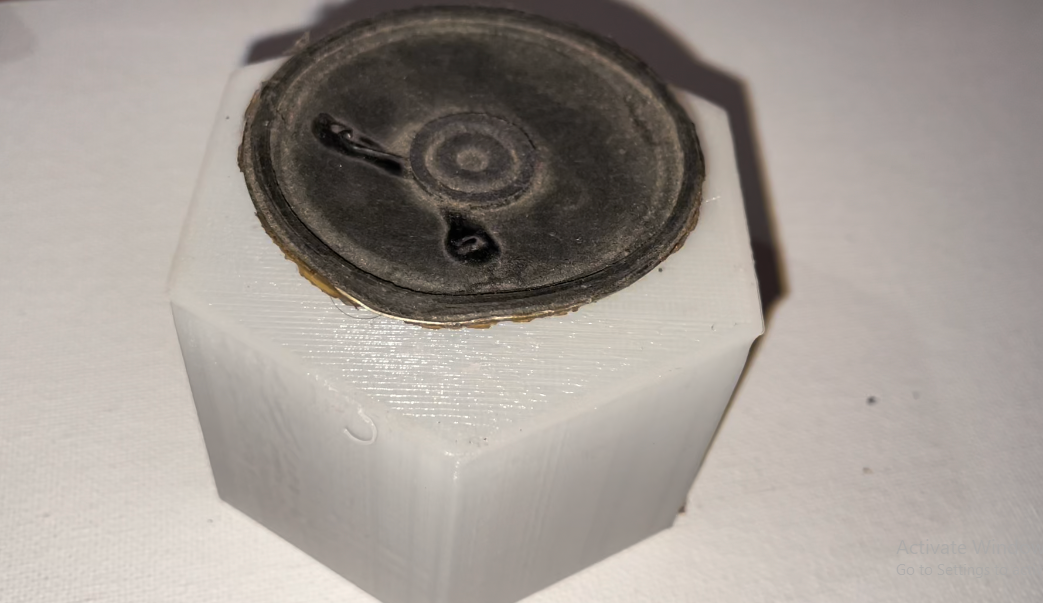
Any design would work, right here the design is within the form of a hexagon having a cavity to put to elements.
Circuitry Design
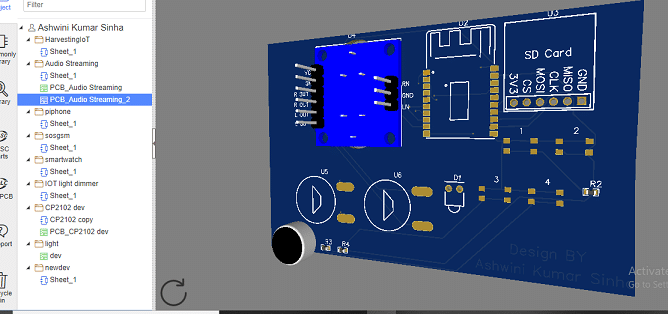
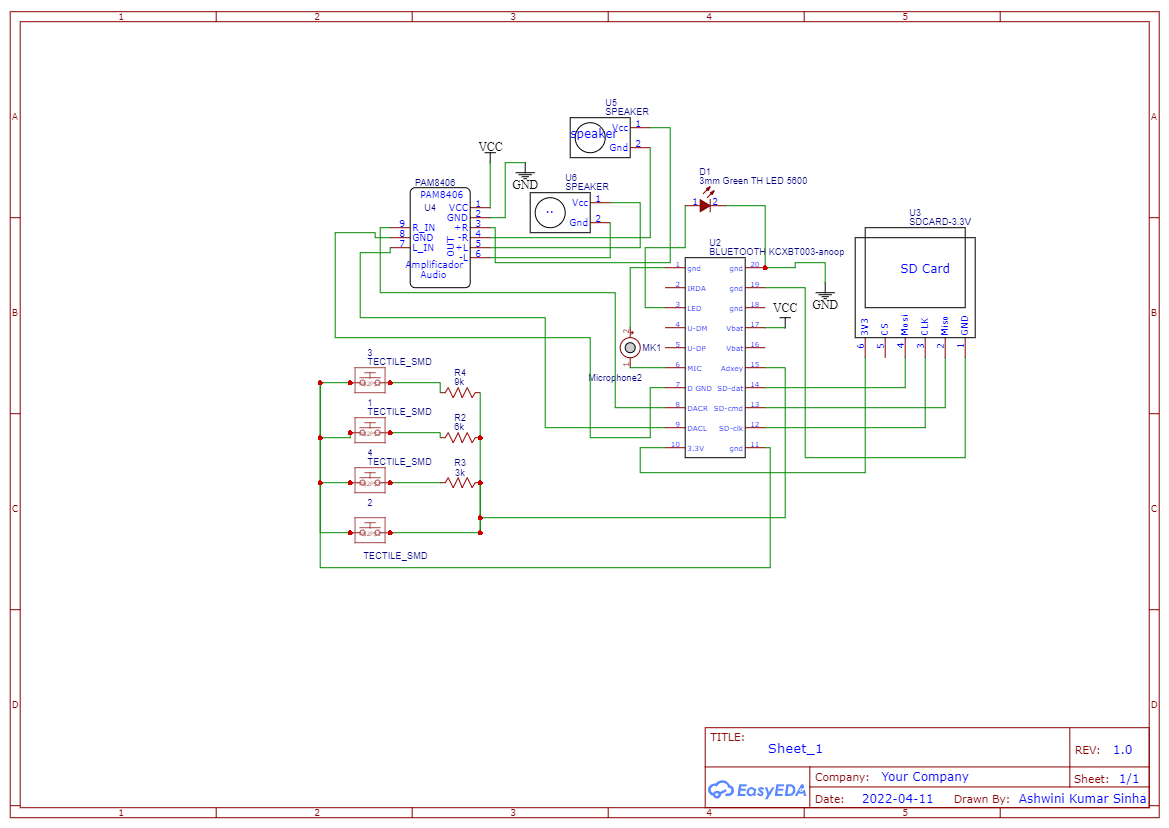
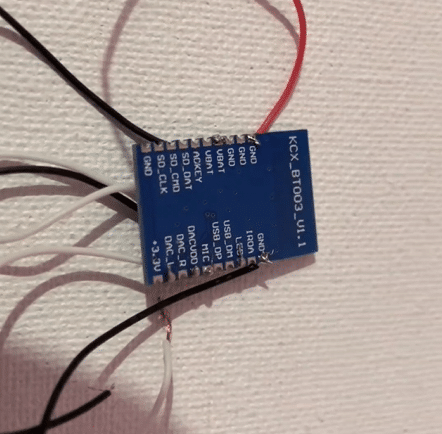
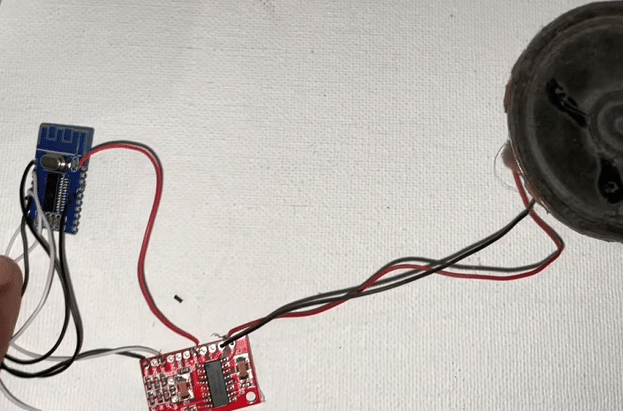
The KCX 0003 Rx module is used for receiving and processing the audio. Determine 4 exhibits the datasheet for a similar. As per the sheet, the DAC pin can be utilized for receiving audio from the USB. The SD pins can be utilized for accessing and enjoying audio from the SD card. The LED pin signifies the ability, bluetooth connection and whether or not or not an audio is enjoying. The IR pin is for the IR receiver to regulate the module utilizing an IR distant. 4 switches will also be added for ‘play’, ‘pause’ and ‘subsequent music’ buttons. A mic pin for transmitting and utilizing the mic possibility can also be given.
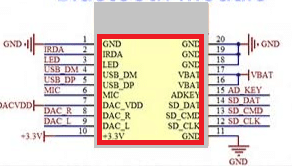
To design the circuit, we first add the SD card module and join it. The CS pin is linked to the clock line. MOSI and MISO are linked for command, information line and Vcc(3.3V) of the KCX BT CHP and GND(floor) pin with GND. We add an amplifier (PAM 8406) as in determine 5. PAM 8406 has the AUX pin, Lin, Rin and GND. These pins we use for the audio enter and join them with Ldac, Rdac and GND pins respectively. The output of the BT Chip is linked as an enter to the PAM 8406 CHIP.
Then we join the microphone and switches which have a resistance distinction of 3K Ohm with the change. That’s change #1 could have a zero resistance, change 2 could have 3K ohm, change 3 with 6K Ohm and so forth. Then KCX BT Chip may be powered with both a battery and charging module or with a 5V DC energy provide utilizing Vbat pin. The USB plug is used right here, therefore it’s plugged to a 5V USB adapter(or laptop computer) to energy the speaker as wanted.
Be aware:- You may ask the writer for permission from the next hyperlink for modification and private makes use of. The license is for private use and with out guarantee underneath GPL license Ashwini Kumar Sinha
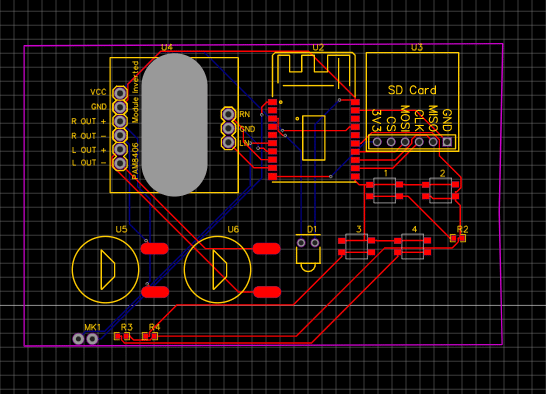
The design can now be transformed to PCB with the copper layer being added to it. The PCB may be ordered from any PCB manufacturing companies.
Be aware :- Writer has not finished the ultimate take a look at of PCB. Permission may be requested for cloning and enhancing from the writer.
Connection
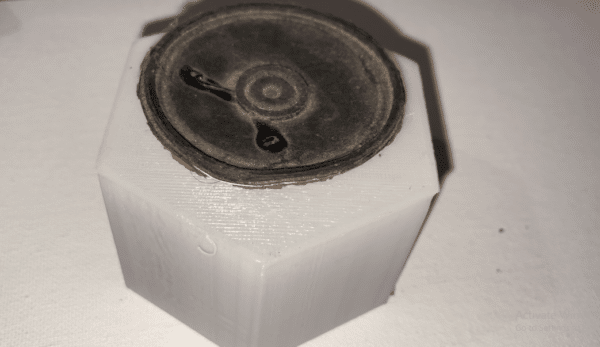
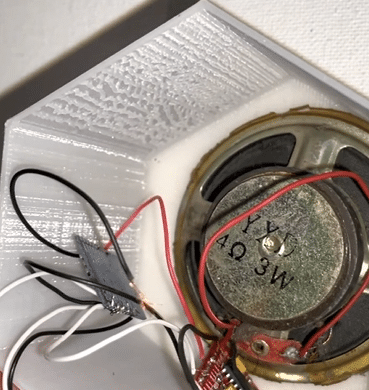
The elements need to be linked and soldered in keeping with the circuit diagram(determine 8). The elements can then be mounted contained in the casing as proven in figures 9,10,11 and 12.

Testing
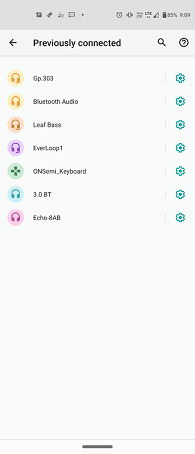
As soon as mounted, activate the bluetooth speaker and bluetooth possibility on the telephone. The title of the bluetooth speaker will probably be ‘AUDIO’. After pairing each the gadgets, your bluetooth speaker is prepared.
Obtain 3D Printable Design
