
Phoenix is an Elixir-based net improvement framework that makes use of the server-side Mannequin View Controller (MVC) design sample. Its implementations (parts and constructs) are akin to that of different well-known frameworks, together with Ruby on Rails, Node’s Specific.js, and Python’s Django. Phoenix leverages well-known net improvement constructs, making it easy to be taught for those who’ve already labored within the subject.
On this tutorial, we are going to discover ways to add authentication to a Phoenix software utilizing the phx.gen.auth generator. The phx.gen.auth generator is extensively used due to its flexibility, safety, and its implementation of Elixir’s greatest practices. Phx.gen.auth is included within the Phoenix framework and is the really helpful manner so as to add authentication to Phoenix purposes.
We’ll cowl:
Conditions
To put in Elixir in your system, go to the Elixir docs and observe the set up instruction on your working system.
Getting began with Phoenix
Run the next command to put in Phoenix in your system:
combine archive.set up hex phx_new
The command above instructs Combine to put in the Phoenix framework. Just like different mainstream programming languages, Elixir gives the Combine construct instrument to assist with compiling, creating, and testing purposes, in addition to putting in, updating, and uninstalling dependencies. It will be unimaginable to make use of Elixir with out a instrument like Combine.
Making a Phoenix software
By offering the --no-ecto flag with the phx.new command, a Phoenix software will be created with out a database, however as a result of we want knowledge persistence, we’ll be utilizing a database as a substitute. The database of selection for this lesson is PostgreSQL, the usual choice for Phoenix apps.
To put in PostgreSQL, check with the docs or you may go to this tutorial to put in and run utilizing Docker:
combine phx.new todo_app
Right here, todo is the title of the applying we want to create. When prompted to Fetch and set up dependencies? [Yn], choose sure. After fetching the dependencies, we nonetheless have a few steps to get our software up and working.
To begin with, we have now to enter our newly created app listing:
cd todo_app
Updating database credentials
Subsequent, we have now to configure our database, find the config/dev.exs, and
replace the next line to replicate our Postgres database username and password:
username: "postgres",
password: "postgres",
Then, run the next command to create your database:
combine ecto.create
Lastly, we will run our server utilizing this command:
combine phx.server
Go to http://localhost:4000 to see your Phoenix software:
Producing MVC for an HTML useful resource utilizing phx.gen.html
Phoenix gives a manner for us to generate controllers, views, and context for an HTML useful resource:
combine phx.gen.html Todo Job duties title:string accomplished:boolean
We offer a few arguments to the phx.gen.html generator, the primary of which is the context module, adopted by the title of the schema module, and eventually, the plural title of the schema (the title for use because the schema desk title). The title:string and accomplished:boolean are the 2 fields that will likely be created within the duties desk.
Trying on the terminal, we will see the directions supplied by Phoenix:
First, we have now to repeat the assets "/duties", TaskController into our lib/todo_app_web/router.ex file:
defmodule TodoAppWeb.Router do
use TodoAppWeb, :router
...

scope "https://weblog.logrocket.com/", TodoAppWeb do
pipe_through(:browser)
get("https://weblog.logrocket.com/", PageController, :index)
assets "/duties", TaskController #up to date
finish
...
The assets characterize completely different HTTP strategies — moderately than writing every technique out explicitly, Phoenix gives assets.
Then, we have now to replace our database to replace the modifications made by phx.gen.html:
combine ecto.migrate
Lastly, to entry the generated job route, go to http://localhost:4000/duties:
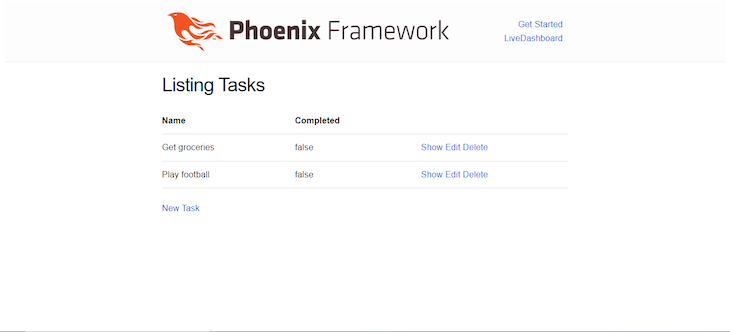
Within the screenshot above, I added a few uncompleted duties. Be happy to do the identical and mess around with the applying a bit. Phoenix gives CRUD capability out of the field with these generated assets, so with none extra items of code, we will create, replace, and delete duties from the database.
Authentication with phx.gen.auth
Phoenix gives an easy manner so as to add authentication to our software utilizing the phx.gen.auth generator. Let’s see how to do this.
In your terminal, run:
combine phx.gen.auth Accounts Consumer customers
With this command, an Accounts context is created with a module for the Accounts.Consumer schema. The final argument is the plural type of the schema module, which creates database desk names and route helpers. The combine phx.gen.auth generator is akin to the combine phx.gen.htm``l generator, with the exception that it doesn’t settle for a listing of additional fields so as to add to the schema and that it generates much more context capabilities.
Taking a look at our terminal, we will see that Phoenix has generated a few recordsdata and likewise up to date current recordsdata. We are going to take a look at a few of these recordsdata in a second, particularly the lib/todo_app_web/router.ex file, however let’s rapidly run a few instructions.
In your terminal, run:
combine deps.get
This command updates your software dependencies. We additionally must replace our database to replicate the modifications made by the phx.gen.auth generator.
Now, run this command:
combine ecto.migrate
If we examine our software working within the browser, we will see the Register and Log in generated by the phx.gen.auth generator:

Register on the applying and it is best to see a “person created efficiently” pop-up message.
Exploring the recordsdata created by phx.gen.auth
Let’s take a look at a number of the recordsdata created by phx.gen.auth.
The router file at lib/todo_app_web/router.ex already existed, the phx.gen.auth generator simply added a few strains of code to it:
...
## Authentication routes
  scope "https://weblog.logrocket.com/", TodoAppWeb do
    pipe_through [:browser, :redirect_if_user_is_authenticated]
    get "/customers/register", UserRegistrationController, :new
    publish "/customers/register", UserRegistrationController, :create
    get "/customers/log_in", UserSessionController, :new
    publish "/customers/log_in", UserSessionController, :create
    get "/customers/reset_password", UserResetPasswordController, :new
    publish "/customers/reset_password", UserResetPasswordController, :create
    get "/customers/reset_password/:token", UserResetPasswordController, :edit
    put "/customers/reset_password/:token", UserResetPasswordController, :replace
  finish

  scope "https://weblog.logrocket.com/", TodoAppWeb do
    pipe_through [:browser, :require_authenticated_user]
    get "/customers/settings", UserSettingsController, :edit
    put "/customers/settings", UserSettingsController, :replace
    get "/customers/settings/confirm_email/:token", UserSettingsController, :confirm_email
  finish

  scope "https://weblog.logrocket.com/", TodoAppWeb do
    pipe_through [:browser]
    delete "/customers/log_out", UserSessionController, :delete
    get "/customers/affirm", UserConfirmationController, :new
    publish "/customers/affirm", UserConfirmationController, :create
    get "/customers/affirm/:token", UserConfirmationController, :edit
    publish "/customers/affirm/:token", UserConfirmationController, :replace
  finish
...
The :require_authenticated_user and :redirect_if_user_is_authenticated are known as plugs. The routes that happen after adhere to the foundations they state.
The :require_authenticated_user plug permits us to guard routes from being accessed by unauthenticated customers, whereas the :redirect_if_user_is_authenticated plug permits us to forestall authenticated customers from visiting sure routes.
Each the :require_authenticated_user and :redirect_if_user_is_authenticated plugs are from the libtodo_app_webcontrollersuser_auth.ex controller:
def redirect_if_user_is_authenticated(conn, _opts) do
    if conn.assigns[:current_user] do
      conn
      |> redirect(to: signed_in_path(conn))
      |> halt()
    else
      conn
    finish
  finish
  @doc """
  Used for routes that require the person to be authenticated.
  If you wish to implement the person e-mail is confirmed earlier than
  they use the applying in any respect, right here could be a great place.
  """
  def require_authenticated_user(conn, _opts) do
    if conn.assigns[:current_user] do
      conn
    else
      conn
      |> put_flash(:error, "You have to log in to entry this web page.")
      |> maybe_store_return_to()
      |> redirect(to: Routes.user_session_path(conn, :new))
      |> halt()
    finish
Including authentication to our /duties routes
At the moment, our /duties routes don’t require customers to be authenticated earlier than they will entry them. If we would like, we will separate our /duties route into its completely different HTTP strategies. Due to this fact, the road that has only a single useful resource to entry all strategies:
assets "/duties", TaskController
is similar as:
get "/duties", TaskController, :index
publish "/duties", TaskController, :create
get "/duties/new", TaskController, :new
get "/duties/:id", TaskController, :present
get "/duties/:id/edit", TaskController, :edit
put "/duties/:id/replace", TaskController, :replace
delete "/duties/:id/delete", TaskController, :delete
In an effort to make these routes require person authentication, all we have now to do is put the assets behind the :require_authenticated_user plug:
scope "https://weblog.logrocket.com/", TodoAppWeb do
    pipe_through [:browser, :require_authenticated_user]
    ...
    assets "/duties", TaskController
  finish
Log off of the applying, then attempt to entry the http:localhost:4000/duties routes. You’ll be redirected to the login route with an error message displayed:
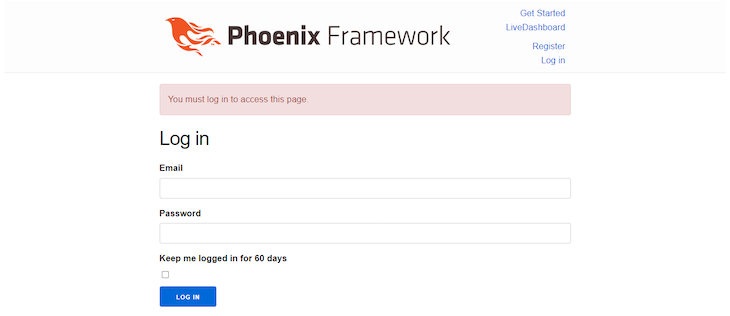
You possibly can solely entry these routes if you log in. And that’s it! We’ve achieved authentication in our Phoenix app.
Conclusion
On this tutorial, we discovered the right way to implement authentication in Phoenix purposes through the use of the phx.gen.auth generator to generate authentication for our software and perceive the middleware it gives to us. Hopefully, with the assistance of this tutorial, you may obtain far more with Phoenix.
LogRocket: Full visibility into your net and cellular apps

LogRocket is a frontend software monitoring resolution that permits you to replay issues as in the event that they occurred in your individual browser. As a substitute of guessing why errors occur, or asking customers for screenshots and log dumps, LogRocket permits you to replay the session to rapidly perceive what went flawed. It really works completely with any app, no matter framework, and has plugins to log extra context from Redux, Vuex, and @ngrx/retailer.
Along with logging Redux actions and state, LogRocket information console logs, JavaScript errors, stacktraces, community requests/responses with headers + our bodies, browser metadata, and customized logs. It additionally devices the DOM to document the HTML and CSS on the web page, recreating pixel-perfect movies of even probably the most advanced single-page and cellular apps.
