
Arduino is an AVR microcontroller made easier for rookies in embedded techniques. Whereas the Arduino UNO is used on this article, it’s simpler to comply with the process specified right here for different boards.
Rust is a techniques programming language that completely fits low stage techniques and communicates correctly with {hardware} techniques. It was designed to be a modern-day different to C++, however with extra reminiscence security and effectivity, in addition to pace.
This tutorial is aimed toward beginner- to intermediate-level Rust or embedded techniques builders seeking to discover ways to run Rust on a microcontroller. The conditions for going by this text consists of:
- Information of Rust language
- Growth atmosphere for Rust language
- Primary data of Arduino
- Primary utilization of a Linux atmosphere
Leap forward:
Why Rust for embedded techniques?
Embedded techniques expertise has lacked novelty for many years. The language of selection for programming lightning-fast, embedded units has been C/C++ for a very long time, however Rust offers even quicker improvement assist.
Rust is a good match for embedded techniques improvement as a result of it’s:
- Extremely interoperable with C codebases
- Moveable and light-weight
- A strong concurrency mannequin
- Sturdy assist for various microcontrollers
- Reminiscence protected, so there might be no issues attributable to reminiscence
When you’ve got already programmed Arduinos in C++, it is going to be comparatively simple to transition to doing so with Rust, when you grasp the fundamentals. You’ll be able to be taught extra about embedded Rust right here. You can even see the obtainable microcontroller crates right here.
What’s the Arduino UNO?
The Arduino UNO relies on the ATMega328P below the AVR microcontrollers household developed by Atmel. The Arduino will be programmed with its programming language, which is derived from C++ utilizing the Arduino IDE editor, however since it’s also an open supply challenge, different systems-compatible programming languages will also be used to program the Arduino.
The conventional process for embedded techniques improvement with the Arduino entails the next steps:
- Sketching {the electrical} diagram of the supposed circuit
- Connecting {the electrical} elements to match the diagram
- Writing this system logic to regulate the circuit as desired
- Connecting the microcontroller through the USB twine to the pc
- Flashing (or importing) this system from the pc onto the board’s Flash reminiscence
This text focuses on the third by fifth steps, however the wiring for the tutorial might be made obtainable.
To comply with this text, you’ll need some software program put in together with some {hardware}.
Software program wants
- A machine for writing, compiling and flashing this system to the board
- Cargo put in (see https://rustup.rs)
- Rust nightly compiler model put in
{Hardware} wants
Set up and setup
Utilizing Avrdude
A {Hardware} Abstraction Layer (HAL) is required to run Rust on AVR microcontrollers and different widespread boards. To get this, you want the nightly Rust compiler that compiles Rust code to AVR in your machine. Run the command beneath to put in it:
rustup toolchain set up nightly
On Home windows
On Home windows, you’ll need to put in Scoop through Powershell utilizing the command:
Set-ExecutionPolicy RemoteSigned -Scope CurrentUser # Wanted to run a distant script the primary time
irm get.scoop.sh | iex
The output on the finish needs to be:
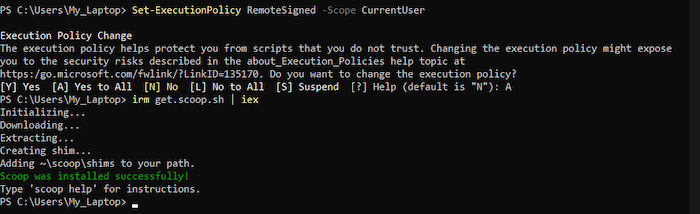
Afterwards, run the next instructions to put in avr-gcc and avrdude:
scoop set up avr-gcc
scoop set up avrdude
On macOS
On macOS, merely arrange the homebrew-avr faucet and run the next instructions:
xcode-select --install # for the fist time
brew faucet osx-cross/avr
brew set up avr-binutils avr-gcc avrdude
On Linux
In case you use a Linux distribution like Ubuntu, the command is:
sudo apt set up avr-libc gcc-avr pkg-config avrdude libudev-dev build-essential
There’s an set up information for all working techniques right here, must you come throughout an impediment following the information above.
After both of those steps, the subsequent step is to put in the ravedudesoftware for flashing the microcontroller board in opposition to cargo:
cargo +steady set up ravedude
This software handles all the things from discovering the board, flashing the board, and listening to connections. You merely must run the cargo run command.
Beginning a brand new Arduino challenge with avrdude
Beginning a brand new challenge is made easier with the cargo-generate crate. Merely run the next instructions consecutively to create a brand new challenge:
cargo set up cargo-generate
cargo generate --git <https://github.com/Rahix/avr-hal-template.git>
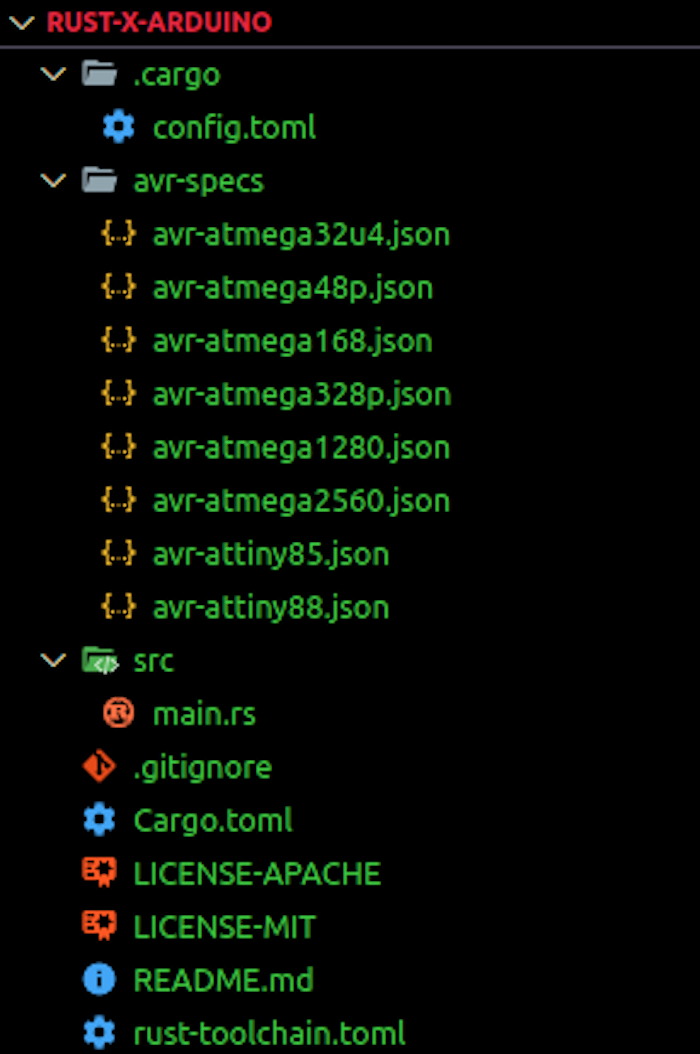
After operating the command, it’s best to see an enter area to specify a reputation in your challenge. This text makes use of rust-x-arduino because the challenge title.
After inputting your most popular title, click on Enter. The following log reveals an inventory of microcontrollers obtainable below the avrdude template. This text makes use of the Arduino UNO, a variant that’s available to everybody.
Navigate into the challenge after the construct, and open the folder as a challenge in your most popular code editor. The challenge construction ought to appear to be the picture beneath:
NB: If there’s an error in putting in the libudev-sys crate, you’ll have to embody it in your cargo.toml file below dependencies:
[dependencies]
libudev-sys = "0.1"
The libudev Rust binding is a crate that gives declarations and linkage for the libudev C library. It’s Linux-specific, so it’s not obtainable for Home windows or OSX working techniques.
Alternatively, you’ll be able to run the command beneath to put in the libudev-sys crate:
sudo apt-get set up libudev-dev
You’ll be able to seek the advice of the libudev-sys repository in case of additional points arising from pkg-config.
Shifting on, you’ll be able to construct the challenge with the construct command:
cargo construct
It takes some time, since it’s a CPU-intensive activity. Afterward, one can find a .elf file below goal/avr-atmega328p/debug/. To run your individual program, you’ll be able to edit the important.rs file, which already accommodates an instance code for a fundamental LED Blinking program:
#![no_std]
#![no_main]

use panic_halt as _;

#[arduino_hal::entry]
fn important() -> ! {
    let dp = arduino_hal::Peripherals::take().unwrap();
    let pins = arduino_hal::pins!(dp);

    let mut led = pins.d13.into_output();

    loop {
        led.toggle();
        arduino_hal::delay_ms(1000);
    }
}
Understanding the above embedded Rust code
From the primary two traces of code, it’s clear that there isn’t a commonplace library and no important, since it’s an embedded challenge with no working system.
The road #[arduino_hal::entry] specifies the entry level in this system. The road makes use of panic_halt as _; is used to deal with panics.
In the primary operate, the Peripherals are unwrapped. In embedded Rust, Peripherals consult with the elements that make sense of their environment and work together with people. They embody sensors, actuators, motor controllers, in addition to the basic elements of the microcontroller just like the CPU, RAM, or Flash Reminiscence. You’ll be able to be taught extra about Peripherals within the embedded Rust e-book.
Subsequent, we acquire entry to the pins within the Arduino board with the intention to set the digital output for the default pin (D13) to excessive.
Each Arduino program accommodates the void setup() and the void loop(). We now have simply gone by the setup; the opposite a part of the code reveals the looping.
The toggle technique within the loop is used to show the LED on and off, whereas the delay_ms technique is used to delay the loop by the desired milliseconds.
Configuring the microcontroller for flashing
When working with the Arduino microcontroller within the official Arduino IDE, you merely have to put in writing this system in Arduino, which is C++-based, and add this system supply file to the board through the USB port.
With Rust, we might be following an extended however related process. Begin by itemizing the open USB ports in your machine with the Linux command:
lsusb
When you’ve got your Arduino board plugged into your machine through the USB, it’s best to see the title of the USB linked to the Arduino board like within the picture beneath:

Subsequent, we might be setting the serial com port for ravedude with the script:
export RAVEDUDE_PORT=/dev/ttyUSB0
This tells ravedude which port the Arduino is linked to. Working the command beneath will construct and flash this system into the Arduino:
cargo run
Output on the microcontroller
When this system is uploaded into the microcontroller, the Arduino will behave as programmed. On this case, the LED lights on the board will blink based on the time intervals laid out in this system.

Different initiatives
It’s value mentioning that there’s an examples listing on the avr-hal crate/repository, the place you could find instance Arduino challenge packages to check out. For instance, in case you are utilizing the Arduino UNO, you’ll be able to choose it, navigate to the src/bin listing, and discover totally different packages suitable with the Arduino UNO board.
In case you want to write your individual challenge, you must generate the AVR-HAL template like we did within the earlier part.
Additional assist for embedded Rust improvement
The official documentation for embedded Rust improvement is offered right here, and the e-book is right here. There’s additionally a GitHub repository the place all assets associated to embedded Rust are saved; it might function a helpful start line for attempting out new issues. It’s primarily based off of the official Rust on Embedded Units Working Group.
In case you want to go additional into embedded improvement with Rust, you’ll be able to take a look at a whole playlist by Vers Binarii right here.
LogRocket: Full visibility into manufacturing Rust apps
Debugging Rust purposes will be tough, particularly when customers expertise points which are tough to breed. In case you’re keen on monitoring and monitoring efficiency of your Rust apps, robotically surfacing errors, and monitoring sluggish community requests and cargo time, attempt LogRocket. 
LogRocket is sort of a DVR for net and cell apps, recording actually all the things that occurs in your Rust app. As a substitute of guessing why issues occur, you’ll be able to mixture and report on what state your utility was in when a problem occurred. LogRocket additionally displays your app’s efficiency, reporting metrics like shopper CPU load, shopper reminiscence utilization, and extra.
Modernize the way you debug your Rust apps — begin monitoring at no cost.
