
A desk of contents (TOC) can function a abstract in your web page and allow readers to shortly navigate its contents.
It’s possible you’ll be considering, “boring, this has been a great deal of time earlier than and is straightforward”. Really, I’ve seen nothing clear and concise written about this subject, particularly one thing that’s beginner-friendly, and that considers accessibility correctly. Typically, the examples deal with doing one thing fancy reminiscent of having the desk of contents (TOC) show your present place within the doc.
So, let’s cowl the fundamentals very well and provide you with a spring-board to get fancy.
Options for producing a TOC
Lots of the common static website turbines (SSGs) and content material administration methods have this performance built-in, obtainable as a plugin, or via the markdown processor that they use. What is often generated for you is an ordered lists (ol) of hyperlinks that time to the headings within the web page. ID technology is required to make your headings (or sections) referencible. Often an distinctive slug, a human-readable ID, is generated and added to every heading of their id attribute. We are going to cowl the precise HTML within the subsequent part.
You in all probability have some choices to configure the TOC reminiscent of:
- You’ll be able to specify the situation of the TOC with a category title or via some particular markup,
- Embody solely sure heading ranges,
- Select to make it an ordered listing (
ol) or unordered listing (ul), - Exclude particular headings.
What most options do for you is so as to add the HTML for the TOC to your webpage. It’s as much as you to fashion it, and add performance.
Listed here are what the options provided by among the common SSGs:
- Jekyll has the jekyll-toc plugin. I can vouch for this one, as I apply it to an energetic web site. It has wonderful configuration choices. It is likely one of the few I’ve seen the place you’ll be able to exclude particular person headings inside a web page, so you’ll be able to slim down the scale of the desk of contents.
- The Kramdown markdown parser-converter that’s utilized by Jekyll, has the power to generate a TOC. If all is need is a TOC, it does the job.
- Eleventy has the eleventy-plugin-toc plugin.
- Hugo has built-in help for including a TOC.
When you use a JavaScript utility framework reminiscent of Gatsby (React) or Subsequent (React) or Nuxt (Vue), you can find that folks have in all probability made a plugin, or posted an answer for including the performance. For instance, Gatsby has the gatsby-remark-table-of-contents plugin.
WordPress has a number of choices. For instance, there’s the Straightforward Desk of Contents plugin.
Primary HTML and types
Let’s take a look at the HTML generated usually and see if we should always add something to it.
HTML
That is typical of the HTML that’s generated for you:
<ol id="toc-list">
  <li>
    <a href="#how-do-i-use-shortcuts">How do I exploit shortcuts?</a>
  </li>
  <li>
    <a href="#how-to-add-and-modify-keybindings">How you can add and modify keybindings</a>
  </li>
  <!-- Extra listing gadgets right here, which can comprise nested lists -->
</ol>
Since we’ve got a bunch of hyperlinks that we use to navigate to totally different sections of the web page, it is sensible to wrap them in a nav factor.
As MDN says:
The
<nav>HTML factor represents a bit of a web page whose function is to supply navigation hyperlinks, both throughout the present doc or to different paperwork. Widespread examples of navigation sections are menus, tables of contents, and indexes.
We wrap our ol with a nav, and embody a h2 heading, as under:
<nav class="toc" aria-labelledby="secondary-navigation">
  <h2 id="secondary-navigation">Desk of Contents</h2>
  <ol id="toc-list">
      <!-- identical as earlier than -->
   </ol>
</nav>
Since a nav is a landmark factor, we should always give it a label. We must always label our nav in order that it may be recognized by assistive applied sciences reminiscent of display screen readers.
We are able to label our nav utilizing the aria-labelledby attribute that factors to the heading. The worth of the id is supplied as the worth to aria-lablledby to hyperlink them. The h2 ought to concisely describe the aim of the part for use because the label.
When you do not need a heading (you need to), or it doesn’t concisely describe the nav, you should utilize the aria-label attribute on the nav as a substitute.
Kinds
Our weblog posts could have a single column structure. That is the commonest structure.
Elsewhere across the net, you will have seen a two column structure with the TOC in a sidebar. That is extra frequent for documentation-centric web sites like MDN net docs. They have a tendency to cover the TOC for smaller display screen sizes.
We can’t get into totally different layouts. We are able to contact on some choices of displaying the TOC in a different way within the Fancy options part.
Our TOC is a bunch of nested lists. So, you’ll be able to fashion it as a listing any approach you need! You need to use list-specific properties for the next:
- You’ll be able to change the fashion of the markers (the bullets or numbers) with the
list-style-typeproperty, - change the looks of the markers via the
::markerpsuedo-element, - have photos for markers via
list-style-imageproperty, - and even make you personal numbering scheme via CSS counters.
Primarily based on the default browser types, our desk of contents will look one thing like this:
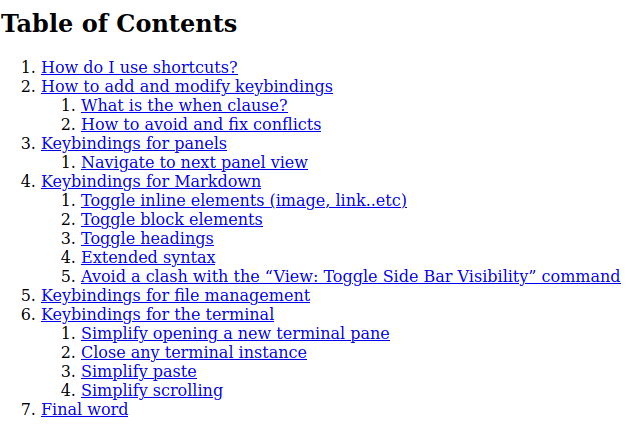
It’s a bit ugly!
The numbering of the nested lists makes it a bit complicated to learn. The numbers restart at 1 at each degree. It’s in all probability higher to take away the numbers and use the indentation to indicate the degrees, or to make use of an ordinal numbering scheme.
Let’s begin by giving it a transparent look as its personal part.
Primary look
First, we are going to add some types to make it stand out a bit. We may give the nav a darker background color, a refined border, and we are going to around the corners with border-radius .
nav {
  background-color: #fffff9;
  border: 1px strong lightgrey;
  border-radius: 5px;

  show: flex;
  flex-direction: column;
  align-items: middle;
  row-gap: 1rem;
}
Subsequent, we are going to make it a flexbox container (show: flex), primarily in order that we will middle the gadgets. We alter the flex-direction to “column” to have the gadgets in a single column. Then, we middle all the pieces with align-items: middle; and we will additionally management the area between the gadgets with row-gap.
Let’s fashion the hyperlinks. I feel eradicating the underline and utilizing a much less saturated color can be an enchancment. You need to use the hsl() coloration operate and scale back the second quantity to get a much less saturated coloration.
.toc a {
  text-decoration: none;
  coloration: hsl(193, 46%, 39%);
}
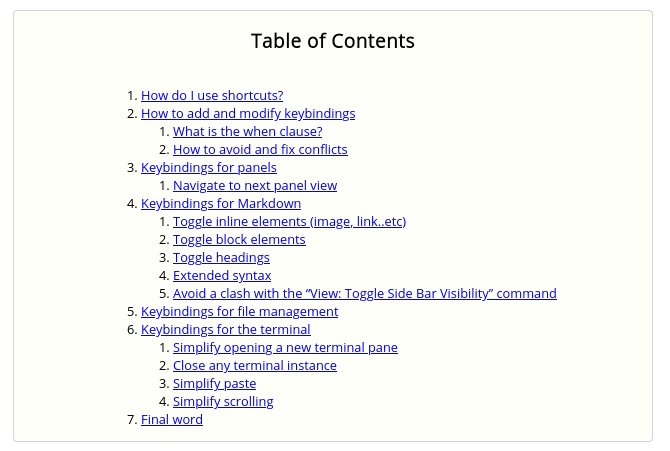
And it seems to be like this:
The spacing seems to be a bit off. By default, the h2 and ol have a margin-top and margin-bottom. Let’s take away these by setting margin to zero, and we are going to simply be counting on row-gap to set the area between them. Nonetheless, now the heading and listing proper on the sides of the nav, so let’s add padding to the desk of contents itself to allow them to breathe a bit!
.toc h2,
.toc ol {
  margin: 0;
}

.toc nav{
   /* identical types as earlier than */

   padding: 1rem;
}
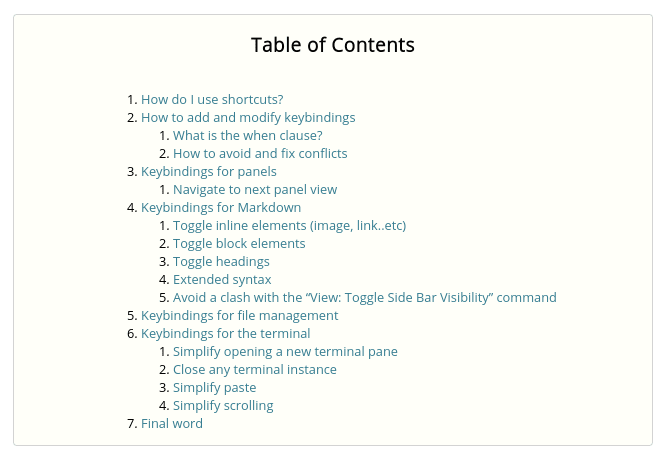
It seems to be extra organised, proper?
Good, however we’re not accomplished!
The subsequent factor we are going to in all probability wish to change is the numbered markers. Let’s discover 2 choices for this. First, we are going to have a look at eradicating the markers and use indentation to indicate the hierachy. Then, we are going to have a look at utilizing an ordinal numbering scheme for the markers.
Take away markers and indent
To take away the markers is easy. You simply use list-style-type:none; on the ol factor.
Now, let’s think about the padding. By default, an ol has a padding-right, the worth is 40 pixels in Firefox. We are able to activate the flex define within the Firefox’s devtool to see the areas. I examine the field as circled in inexperienced within the screenshot under to indicate the define.
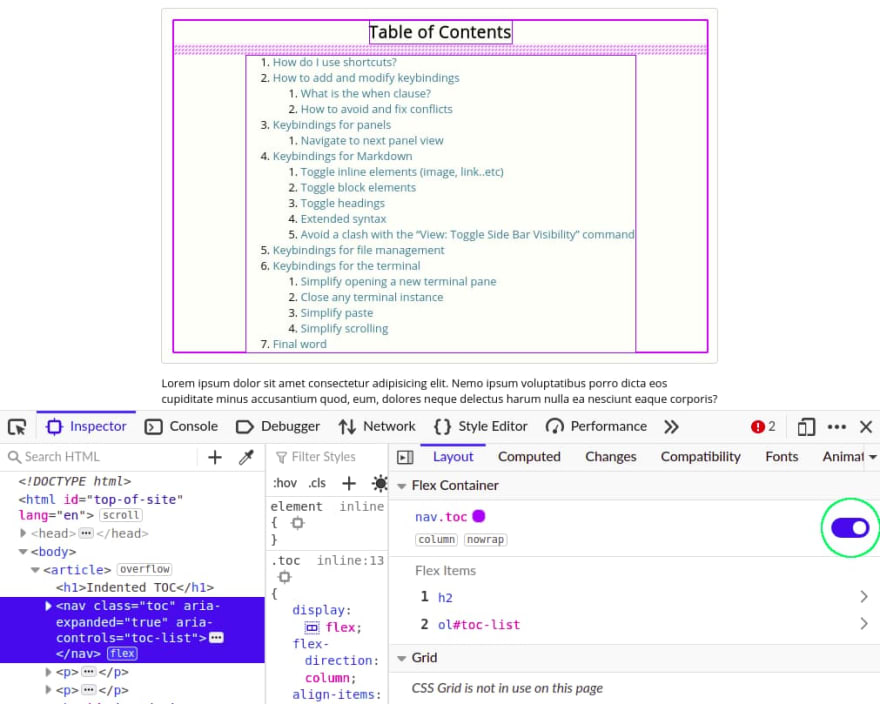
What I would love is for the highest ol to haven’t any padding, and any nested ol to have padding-right of two rem. We are able to add a padding-right of two rem to all ol with the selector .toc ol. And subsequently we will goal the highest ol to offer it a padding of zero by utilizing the > baby combinator, the selector can be .toc > ol.
I feel it’s a good behavior to make use of logical properties as a result of the browser help is excellent now. Logical properties enable declaring types that work with all writing methods, so I’ll use paddding-inline-start as a substitute of padding-right! This implies the CSS under ought to give the specified consequence for a right-to-left language reminiscent of Arabic, in addition to a left-to-right language reminiscent of English
.toc ol {
  list-style-type: none;
  padding-inline-start: 2rem;
}

.toc > ol {
  padding: 0;
}
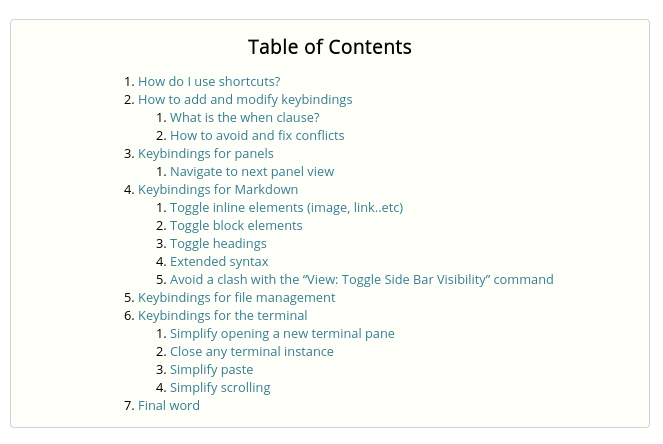
Right here is the outcome:
I feel it’s a good enchancment from what we had initially! You should still wish to tweak it, or take it in one other course!
Ordinal numbering
Possibly the commonest fashion that I’ve seen for a desk of contents is an ordinal numbered listing. What do I imply by ordinal numbering?
Every merchandise is numbered in keeping with the order of its heading degree, starting with the primary h2 heading. That is normally within the format of <h2-sequence-number>.<h3-sequence-number>.<h4-sequence-number>. . It’s in all probability simpler to know by exploring a particular instance!
Under is an instance of desk of contents from Wikipedia, an article concerning the River Lee:
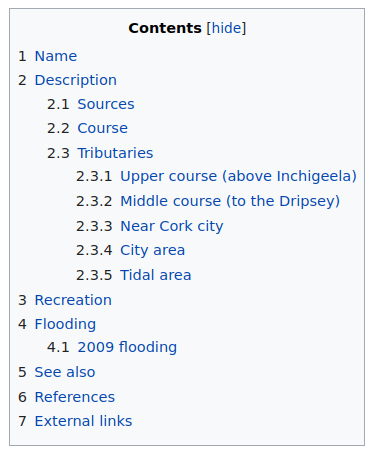
You’ll be able to see how the numbers corresponds to the headings. The hyperlink to the primary h2 is given the quantity 1. The hyperlink to the second h2 is given the quantity 2, with it is first h3 given the quantity 2.1, and so forth.
However keep in mind, the default styling for nested ordered lists restarts the numbering for every listing (as under)!
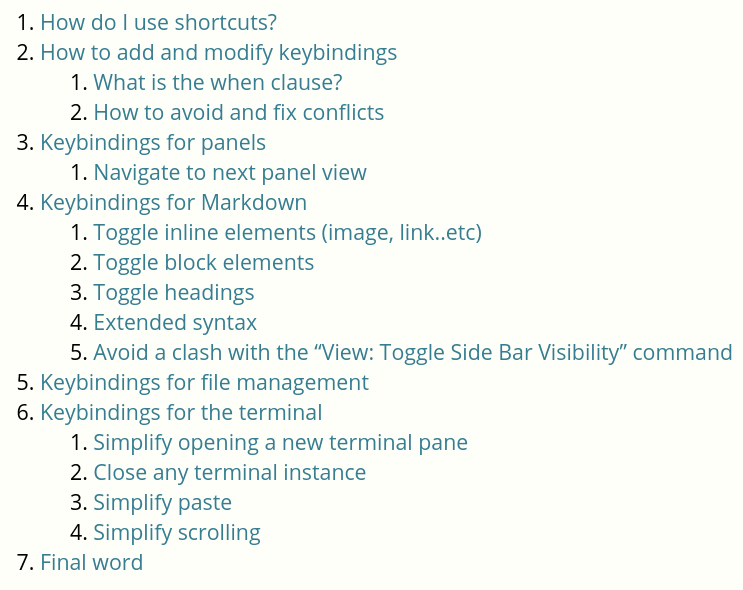
We are able to use CSS counters to quantity the gadgets the way in which we want.
To make use of a counter, it should first be initialized with the counter-reset property. Under we initialize a counter and title it toc-counter . By default, counters have an preliminary worth of 0, and depend up from the preliminary worth.
.toc ol {
    list-style-type: none;

    /* initialise counter */
    counter-reset: toc-counter;
}
We take away the prevailing numbers for our listing by setting list-style-type: none;. We’re going to put our customized numbers right into a ::earlier than pseudo-element as a substitute.
As soon as initialized, a counter’s worth may be incremented utilizing counter-increment. We increment the counter in a ::earlier than pseudo-element for the listing gadgets. The worth of the counter may be displayed utilizing the counters() operate within the content material property of the pseudo-element, as under.
.toc li::earlier than {
  /* show the counter formatted as our ordinal fashion */
  content material: counters(toc-counter, ".") " ";

  counter-increment: toc-counter;

  coloration: hsl(14, 51%, 54%); /* reddish brown coloration */
}
The counters() operate has two types: counters(<counter-name>, <separator>) and counters(<counter-name>, <separator>, <counter-style>). We are going to use the latter kind. Our separator might be a dot (interval). For the counter-style, we offer an area. This provides an area to the top of the counter textual content that can separate the quantity from the textual content content material of the listing merchandise.
And that is the outcome:
Easy scrolling to sections
When clicking inner hyperlinks, it may be a extra nice expertise to easily scroll all the way down to the part reasonably immediately leaping to it. To attain this, you’ll be able to add this to your stylesheet:
html {
    scroll-behavior: clean;
}
Collapsible performance
It will be good to have the ability to present the TOC in a minimized or maximized state. If it’s a larger TOC, we might favor to have the content material hidden initially, and let it as much as the consumer to indicate it.
This performance is an instance of the disclosure UI sample. There are two major approaches to implementing this, and neither is ideal. It’s a type of areas that has some shortcomings and ought to be simpler by now!
Choice 1) Use particulars and abstract
We are able to use the mix of the particulars and abstract components to supply this performance. These two collectively are normally known as a “disclosure widget”.
HTML
<div class="toc">
    <particulars open>
        <abstract>
            <h2>Desk of Contents</h2>
        </abstract>
        <nav aria-label="desk of contents">
            <ol id="toc-list">
                <!--items here-->
            </ol>
        </nav>
    </particulars>
</div>
We have to wrap all the pieces in a div, in order that we will fashion it later. You can’t structure particulars as a flexbox or grid container as you’ll anticipate. The abstract factor is handled like an implicit factor, so it isn’t laid out as a flexbox/grid merchandise.
By default, the disclosure widget is closed. We add the open attribute to indicate the contents.
I added an aria-label to the nav to offer it an accessible label, nonetheless I’m not positive whether it is potential to make this instance absolutely accessible. The problem is that abstract has an implicit ARIA position of button, which means it eats the semantics of components inside it. So our h2 contained within the abstract is handled like a span actually! In instances the place the TOC is in a closed state, it is not going to be introduced by display screen readers.
If of a transparent approach to make this absolutely accessible, let me know!
CSS
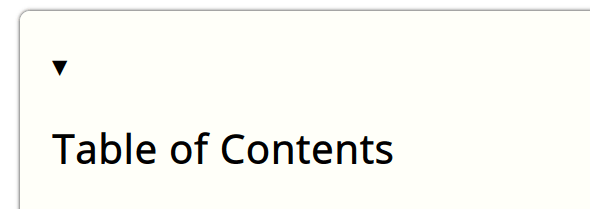
The default look of the abstract is:
- When the content material is hidden, it’s styled with a right-pointing triangle to trace that activating the button will show extra content material.
- When the content material is seen, the triangle factors down.
Left unstyled, disclosure widgets current us with two points:
- The
abstractcursor icon: Although theabstractpart is an interactive factor, the factor’s default cursor is a textual content choice icon reasonably than the pointing hand that you could be anticipate. The pointing hand hints to a consumer that clicking is feasible. That is fascinating! - Block components in
abstractare positioned on the road under the marker, like within the screenshot under.
To rectify these points, we will add the next types to “reset” the conduct to what we might usually anticipate:
abstract {
  cursor: pointer;
  user-select: none;
}

abstract > * {
  show: inline;
}
To middle all the pieces, we wrap our nav in a div, and make it a flexbox container. We nonetheless want to make use of text-align:middle; on the h2 to middle it as it’s a rogue factor!
To create area between the h2 and the nav, we add a margin-block-start to the nav. We can’t use row-gap due to the abstract challenge.
.toc {
  show: flex;
  flex-direction: column;
  align-items: middle;
}

nav {
  margin-block-start: 1rem;
}

h2{
    text-align: middle;
}
Execs
This resolution has no JavaScript.
It helps keyboard interplay when it has focus. Enter or House prompts the disclosure management and toggles the visibility of the disclosure content material.
Cons
Accessibility is a combined bag. The abstract factor is sort of a button and buttons don’t respect the semantics of kid components. Some screenreaders will deal with all the pieces contained in the abstract factor like a span. So our h2 is not going to be introduced correctly to a consumer with a display screen reader. Dave Rupert discusses this additional in his article, Why particulars is Not an Accordion. You’ll be able to see the newest accessibility testing outcomes to see the present state on this.
Styling is a bit awkward. Not having the ability to make particulars a flexbox or grid container is limiting.
Styling of the marker is a bit restricted too. Surprisingly, it’s accomplished via list-style properties, you’ll be able to present a picture to list-style-image. Whenever you specify your personal marker, you can not add any transitions when it adjustments from an open to closed state.
Total, the implementation of particulars and abstract is a bit ragged actually.
Choice 2) Use a button and JavaScript for interactivity
HTML
<nav class="toc" aria-labelledby="toc-heading">
    <header>
        <h2 id="toc-heading">Desk of Contents</h2>
        <button aria-controls="toc-list" aria-expanded="true">Disguise</button>
    </header>
    <ol id="toc-list">
        <!-- gadgets right here -->
    </ol>
</nav>
We add the next aria attributes to make it absolutely accessible:
-
aria-labelledby="IDREF": Added to thenavto offer it an accessible title. We hyperlink it to theh2. -
aria-expanded: Signifies that the container managed by the disclosure button is hidden when the worth isfalseand visual when the worth istrue. Set the worth totrueas we present the contents by default. -
aria-controls="IDREF": The disclosure button controls visibility of the container recognized by theIDREFworth. Alternatively, you may use aria-owns.
CSS
There are some ways to cover components in CSS.
We would like the next:
- We would like the area to break down when the content material is hidden (no empty area left behind),
- The content material to be hidden from the accessibility API when it’s a hidden state. I’m not completely positive if that is essential if we use
aria-expanded.
When you additionally wish to animate the transition as nicely, it’s trickier to discover a resolution that checks all 3 packing containers.
With out animation, taking a look at our choices:
-
visibility:collapsehas points, in keeping with MDN: “Help for visibility: collapse is lacking or partially incorrect in some fashionable browsers.” - The properties
rework,coloration,opacity,visibility: hiddenandclip-pathall depart empty area once we are within the “hidden” state. Overlaying a pseudo-element has this challenge additionally. - Decreasing dimensions reminiscent of
peakmeans the content material is at all times accessible. We may toggle the worth ofaria-hiddenourselves. It triggers rerendering the web page structure, which we favor to keep away from if potential. -
show: noneis probably the most generally used. Resetting to the earlier fashion is normally fantastic, however understand that it has many choices reminiscent ofblockandinline. It triggers rerendering the web page structure, which we favor to keep away from if potential. - Absolute positioning to maneuver it offscreen, however you’ll in all probability want to mix it with
opacityfor it to work successfully.
There isn’t a clear winner! We are going to go along with show: none to maintain issues easy (sigh).
.cover{
    show:none;
}
We are able to toggle this class in JavaScript.
JavaScript
const button = doc.querySelector(".toc button");
const content material = doc.querySelector("#toc-list");

button.addEventListener("click on", toggleTableOfContents);

operate toggleTableOfContents() {
  content material.classList.toggle("cover");

  if (button.innerText === "Disguise") {
    button.innerText = "Present";
    button.setAttribute("aria-expanded", false);
  } else {
    button.innerText = "Disguise";
    button.setAttribute("aria-expanded", true);
  }
}
The button helps keyboard interplay when it has focus by default, so we don’t have to do add any keybindings. We alter the state of aria-expanded, in order that its state is on the market to the assistive applied sciences.
Execs
This resolution is fully accessible (right me if I missed one thing).
We’ve got full management over the fashion of the disclosure button.
Cons
JavaScript is required.
Choice 3) Use a hyperlink (a factor) and JavaScript for interactivity
Do not do it! Go along with choice 2 as a substitute of this selection!
Why?
A very good rule of thumb is: buttons are for actions (“do one thing for me”), whereas hyperlinks are for navigation (“take me to a special location)”. Chris Ferdinandi spoke about this just lately in his HTML semantics every day tip. Not everyone seems to be taught this, so I’m glad that this message is being put on the market extra usually.
It’s possible you’ll be considering however would not Wikipedia use a hyperlink for this behaviour?
Sure, they do. And don’t copy them! 😁
Which choice ought to I selected?
Choice 1 is the best and being JavaScript-free is at all times nice. Nonetheless, for those who care about maximizing the accessibility of your web site (you need to), then choice 2 is the higher choice for now. I’m not accessibility professional, however I do not see a approach to get it proper for the time being with choice 1.
Fancy options
Right here I’ll skim via some examples of fancy issues you are able to do. I’ll solely contact on the code, however I’ll level to a tutorial if there’s a good one on the market. I could sort out one of many fancy examples in one other publish, you may make a request if you want!
Sticky single column structure
It may be useful to the reader to have the TOC at all times in view.
The best approach to do that is to make add place: sticky; to the TOC. You in all probability need it to stay to the highest of the window, so you’ll be able to it use together with the high property.
.toc {
    place: sticky;
    high: 0;
}
One factor to remember is that in case your TOC is inside a grid or flex container, you could wish to add self-align:begin to it to make sure it isn’t out of attain to turn out to be sticky! You want to have the ability to scroll past a component for it to change to a hard and fast place, so generally for those who align or justify a component, it could actually hamper this from taking place.
The apparent downside of this strategy is that you do not need the TOC to hog the display screen when the consumer needs to learn the article. Right here we’ve got it in a minimized state initially and depart it as much as the consumer to view in the event that they wish to.
I feel that that is alright, nevertheless it might be taken additional to make it a greater consumer expertise. It may be a bit complicated whenever you wish to scroll the TOC to see the opposite gadgets, and truly the web page scrolls within the background as a substitute. It relies on the place the main focus is! An overlay that freezes the scrolling of the web page would make it simpler to make use of.
An alternate is to have the TOC shrink to a button, as soon as it turns into sticky. Pawel Cislo does one thing like this. The TOC is maximised inline within the article till you scroll down a certain quantity, after which it seems minimized as a button in the fitting of the article. You’ll be able to see within the video under, or go to this weblog publish to see in motion your self.
I feel it will profit from a transition impact of the TOC to a button to make it clearer to the consumer what occurred. There’s a massive distance between the unique place and new place.
Hashnode has a pleasant variation of this. Hashnode is a running a blog platform in case you are unfamiliar with it. By default, the TOC is maximised. Whenever you scroll past the TOC, the TOC is minimized and turns into sticky tab pinned to the highest of the window. You’ll be able to see it in motion within the video under, or go to this weblog publish to check out your self.
It fairly a chic resolution for a single column structure. Though, I feel the transition is a bit abrupt.
Ben Holmes takes a special tack on his weblog. A button pops up as you scroll via the publish. Beneath the button, it reveals the title of the part you might be in. Urgent the button will open the TOC with the present part highlighted. You’ll be able to see it in motion within the video under.
It really works fairly nicely. Particularly, he has made sensible use of area on smaller screens by placing the button and part heading right into a sticky nav bar.

The one criticism I’ve is you could’t scroll via the TOC actually. The precise web page scrolls as a substitute. An overlay may work right here to allow focused scrolling.
Sticky two column structure
It’s fairly frequent to have a sticky TOC in a sidebar, just like the MDN net docs, as within the screenshot under.

MDN hides the TOC for smaller display screen sizes when it switches to a single column structure. You need to use a media question to do that.
I want to see to see a change to one thing much like our single column structure for smaller display screen sizes if it may be executed nicely.
Present your progress within the web page (scrollspy)
One other fancy factor individuals like so as to add is a progress scrollspy. As you undergo the article, the part you might be in might be highlighted within the TOC. That is normally applied in a 2-column structure with the TOC within the sidebar.
You’ll be able to see this within the wild within the following locations:
- Ben Holmes: As proven beforehand, Ben has this on his weblog,
- MDN net docs: The TOC is simply seen on screens greather than 800px,
- Josh Comeau’s weblog: The TOC is simply seen on screens better than 1100px.
Bramus Van Damme has a pleasant tutorial on methods to make this your self. He covers semantic markup, methods to implement a lot of the performance with HTML and CSS, after which methods to do the final bit with JavaScript.
Under is the entire instance from that tutorial:
There are a lot of variations on this too. It’s a common little bit of blink individuals prefer to implement.
I do not know if it’s all that helpful although!
Wrapping up
We coated a number of floor! I hope I used to be capable of break down the totally different concerns of including a TOC to your weblog.
From the outset, it seems to be easy. Nonetheless, to make it look good, and make it accessible to as many individuals as potential, it requires extra effort. And naturally, there are many methods you’ll be able to costume it up! 🎩🧐
