
On the prototyping stage of product improvement, particularly in high-fidelity prototypes, we’re usually working with instruments which can be as near the manufacturing stage of our apps as doable. Knowledge offered by way of REST is as near manufacturing as that will get (at the very least, when engaged on frontend apps).
A number of the well-liked choices that exist for advert hoc REST servers are Categorical, Fastify, Koa, Nest, and Hapi. We even have choices for creating custom-made servers or consuming mock APIs, which is often a time-consuming and unreliable job.
One of many new candidates and the topic of this submit is ChiselStrike, a scalable backend-as-a-service platform that simplifies the backend improvement course of and eases the progress from prototyping to manufacturing.
ChiselStrike brings to the desk a number of helpful options that velocity up app prototyping and is backed by a robust API that permits customization for every of your initiatives.
As we unravel what ChiselStrike provides when prototyping inside this submit, we’re going to cowl the next:
What’s ChiselStrike?
ChiselStrike is a general-purpose platform for creating and internet hosting net providers backends; it may be used for any net or cell software that you can host within the cloud.
On high of this, ChiselStrike is scalable and extensively simplifies the backend improvement course of when constructing apps. You may develop ChiselStrike apps in TypeScript, bringing all the syntactical benefits provided by the JavaScript superset into the event course of.
To show how ChiselStrike points simplification, right here is an instance of the ChiselStrike code that will implement all the CRUD operations for a BlogPost knowledge mannequin:
import { ChiselEntity } from "@chiselstrike/api"

export class BlogPost extends ChiselEntity {
  title: string
  cowl: string
  content material: string
  publishedAt: quantity = Date.now()
  updatedAt?: quantity
}

export default BlogPost.crud()
The above code creates each a BlogPost mannequin for our datastore and an endpoint for our REST API, /blogpost, that may deal with all CRUD requests made towards it with just a few further issues.
ChiselStrike permits us to work each offline (in our improvement atmosphere) and on the cloud (for manufacturing apps) utilizing an SQLite database and a Postgres-like database respectively.
Benefits to ChiselStrike
ChiselStrike has many apparent benefits. However out of all of them, the next stand out:
- Fast prototyping: ChiselStrike works completely as a fast prototyping device, as we’ll see with our instance. It reduces the majority of API endpoints’ code to the info mannequin definition and two traces of code
- Seamless knowledge mannequin migrations: ChiselStrike makes it straightforward emigrate knowledge fashions since we should not have to take care of or maintain observe of the SQL recordsdata. Migrations are as straightforward as including new entity lessons or modifying entity class knowledge properties
- Transition to manufacturing: Since ChiselStrike holds the perfect practices of REST API improvement, you’ll be able to migrate to manufacturing inside ChiselStrike or different internet hosting platforms whereas preserving your app’s API contract, holding no considerations for platform lock-in
How ChiselStrike works: Utilizing it for a product prototype
To keep away from making this a chronological submit about ChiselStrike’s options, we’ll undergo it intuitively by attempting to work on a real-life product prototype that obtains its knowledge from a ChiselStrike server. And, whereas working by way of this app’s prototype, we’ll find out about ChiselStrike’s necessary ideas and API.
Let’s take inspiration from the next prototype of an ecommerce app.
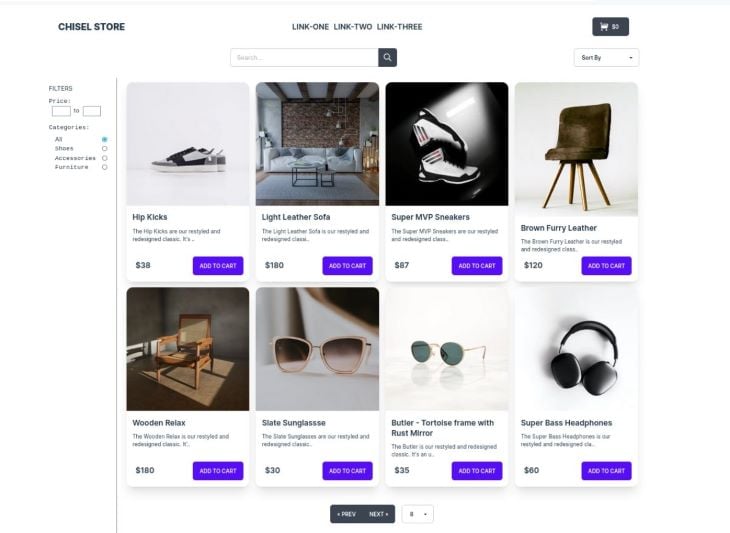
What we see above, is a high-fidelity format of a product web page for Chisel Retailer, our imaginary ecommerce website.
We’ll break down this retailer’s prototype into 5 sections by their functionalities, which we’re going to show by offering knowledge with ChiselStrike.
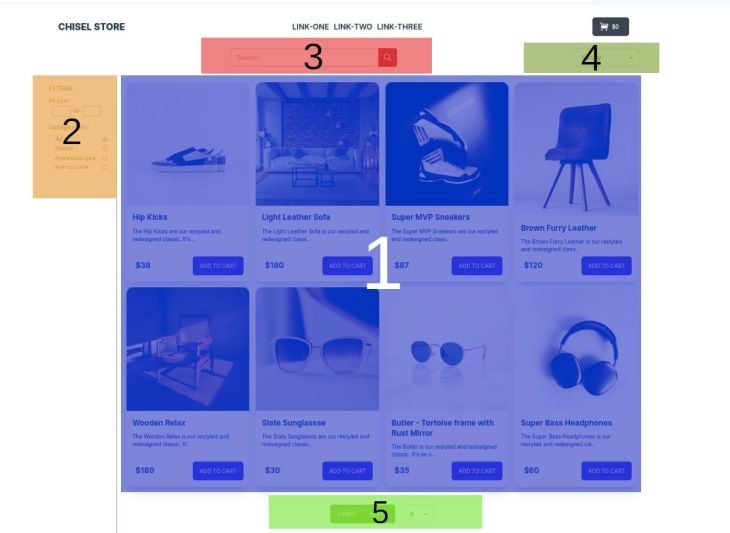
For brevity, let’s title the numbered sections by their functionalities so we will simply talk what we’ll be engaged on:
- Product listings
- Product filters
- Product search
- Product sorting
- Pagination
Making a ChiselStrike undertaking
N.B., the stipulations to work with ChiselStrike are Node v14.18.0 or above and npm. TypeScript information is useful however not required. Relying in your working atmosphere, an HTTP shopper may also be helpful when you fancy fast testing of the ChiselStrike server’s endpoints. Data of HTTP and its strategies can also be a bonus when working with REST APIs.
We have to create a brand new ChiselStrike undertaking, which goes to supply knowledge for our frontend net app, Chisel Retailer. To take action, we have to run the next command on the terminal inside our goal listing:
npx [email protected] chisel-store
When the command has completed working, cd into the newly created listing chisel-store. That is the format of the undertaking recordsdata you can see inside:
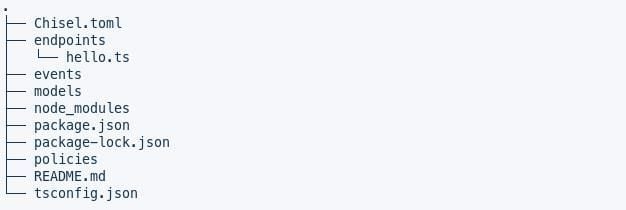
Chisel.toml is ChiselStrike’s configuration file the place all important top-level directories are specified (endpoints,fashions,insurance policies,occasions), whereas tsconfig.json is the undertaking’s TypeScript configuration. We’ll see the makes use of of a lot of the top-level directories as we proceed.
To run the ChiselStrike server regionally, run the shell command npm dev contained in the undertaking’s listing, subsequently working the dev script inside package deal.json:
npm run dev
Inside package deal.json, you’ll discover that ChiselStrike put in two dependencies, @chiselstrike/api and @chiselstrike/cli. @chiselstrike/api offers the runtime API for interacting programmatically with chiseld (the ChiselStrike server) inside a ChiselStrike undertaking, whereas @chiselstrike/cli offers the ChiselStrike CLI used throughout improvement, facilitating the chisel dev script we’ve run to begin our native server.
The above command began the server, which is accessible by way of the 8080 port. Therefore, all of our API endpoints will use localhost:8080 as the bottom URL, prefixed with /dev (we’ll see later why API endpoints are prefixed with /dev).
Be aware, we’ll be referring to localhost:8080 as BASE_URL from right here onward.
Attempt visiting localhost:8080/dev/hey to see the favored “Hi there, world!” phrase because the ensuing JSON output.
Developing endpoints
To fetch knowledge for our Chisel Retailer undertaking, we’d like to have the ability to assemble endpoints by way of which we’ll be consuming knowledge inside our app.
In ChiselStrike, endpoints are created by a mixture of TypeScript .ts recordsdata positioned contained in the /endpoints and entities discovered inside the /entities top-level directories respectively.
Extra nice articles from LogRocket:
ChiselStrike endpoints
Endpoints are created by including a TypeScript file contained in the /endpoints listing, the place the title of the file turns into a part of the endpoint’s path title: BASE_URL/dev/[TS_FILE_NAME].
These TypeScript recordsdata are adequate to create an endpoint as we’ve witnessed with the /dev/hey endpoint above. Opening its .ts file, /endpoints/hey.ts, we discover the next code:
// hey.ts
export default async perform(req) ;
This endpoint file implements a node module that’s exporting a single default perform to invoke for every incoming HTTP request. The perform accepts a single ChiselRequest parameter that describes the shopper’s request. The ChiselRequest parameter is a subclass of the Request class from the Fetch API.
To create a product itemizing’s endpoint for the Chisel Retailer app, we’ll create the next merchandise.ts file underneath the /endpoints listing:
// endpoints/merchandise.ts
export default async perform(req) {
  return []
}
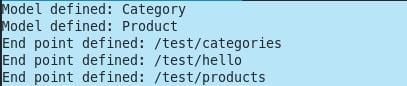
When saving this file, chiseld provides you with a nod by logging the message Finish level outlined: /dev/merchandise on the working terminal initiated with the npm run dev command.
ChiselStrike Entities
Visiting the BASE_URL/dev/merchandise endpoint we created, we obtain an empty JSON output. We anticipate this since we’re returning an empty array contained in the endpoint perform. However since we’d like working knowledge, we’ll want software knowledge of some type, on this case merchandise’ knowledge being returned to our Chisel Retailer software.
So, regardless of that the /merchandise endpoint was created above and is acknowledged by our undertaking, it’s inadequate for us. To make it helpful, we have to couple it with a respective knowledge mannequin.
ChiselStrike offers us with a quite simple strategy to outline knowledge fashions inside initiatives. All we have to do is export a mannequin class extending the @chiselstrike/api‘s ChiselEntity inside a TypeScript file from inside the fashions listing.
Let’s create a Merchandise mannequin for our app as follows:
// fashions/Product.ts
import { ChiselEntity } from "@chiselstrike/api"
// import { Class } from "./Class"

export class Product extends ChiselEntity {
  title: string
  worth: quantity
  picture: string
  particulars?: string
  soldOut: boolean = false
  // class: Class = new Class()
  createdAt: quantity = Date.now()
}
Identical to with the merchandise.ts file, saving the above file will immediate chiseld to present us a Mannequin outlined: Product message on the working terminal.
Throughout the above class, we’ve got outlined title, worth, particulars, soldOut, and createdAt because the properties of our Product mannequin. We’ve got declared particulars as an non-compulsory property by suffixing it with a ? as is completed with non-compulsory TypeScript properties, that means we’re not required to supply a price for it when creating a brand new Product entity.
We’ve got given false as a default worth to soldOut and added the present date in milliseconds to the createdAt property.
For now, ignore the commented code as a result of we’ll speak extra about that later.
The ChiselEntity class acquired from ChiselStrike’s runtime API is a base class for all entities that we outline in a ChiselStrike undertaking. This class offers some features for working with the entity programmatically.
The Product entity declared above provides us a adequate knowledge mannequin to work with when attempting to populate the Chisel Retailer’s product itemizing part. All we’d like is to discover a strategy to make this knowledge mannequin pair with the /merchandise endpoint. We’ve got seen this already within the introduction above once we have been displaying off ChiselStrike’s options.
To perform this, substitute the code contained in the endpoint file endpoints/merchandise.ts with the next:
// endpoints/merchandise.ts
import { Product } from "../fashions/Product.ts"

export default Product.crud()
Creating and studying knowledge
Visiting the /dev/merchandise endpoint once more, we’ll get this output:
{
  "outcomes": []
}
As we will see, an HTTP GET request has been dealt with on this occasion.
Let’s strive submitting knowledge to this endpoint.
Along with your HTTP shopper of selection, submit the next JSON knowledge with an HTTP POST request to the /dev/merchandise endpoint:
{
  "title": "Tremendous Bass Headphones",
  "worth": 60,
  "picture": "https://asset-train.twic.pics/photographs/headphone-1.jpg"
}
We must be getting the next JSON response if all the pieces is so as:
{
  "id": "f8ab8028-661e-46fd-b926-96f5ec74bcb2",
  "title": "Tremendous Bass Headphones",
  "worth": 60,
  "picture": "https://asset-train.twic.pics/photographs/headphone-1.jpg",
  "soldOut": false,
  "createdAt": 1664742791088
}
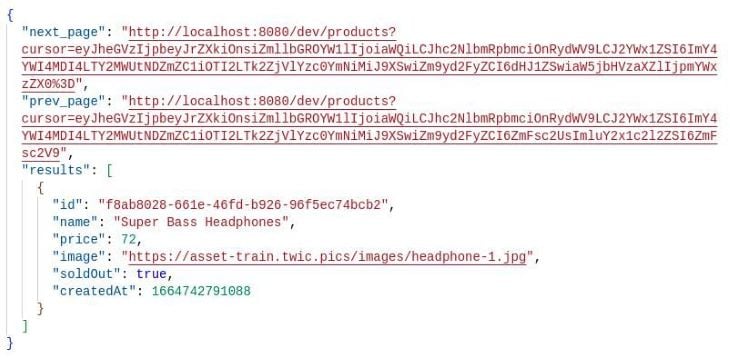
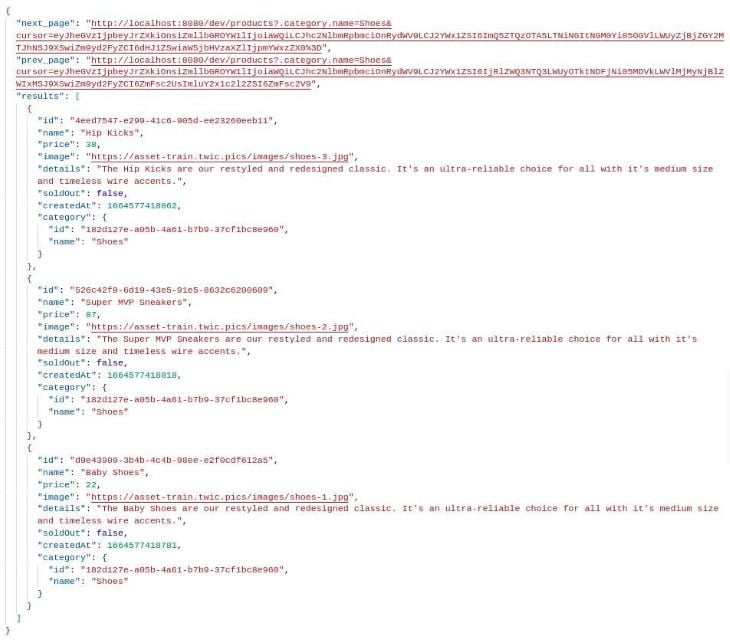
Now, strive accessing the BASE_URL/dev/merchandise endpoint as soon as extra. Under is the ensuing JSON response to this request to our endpoint:
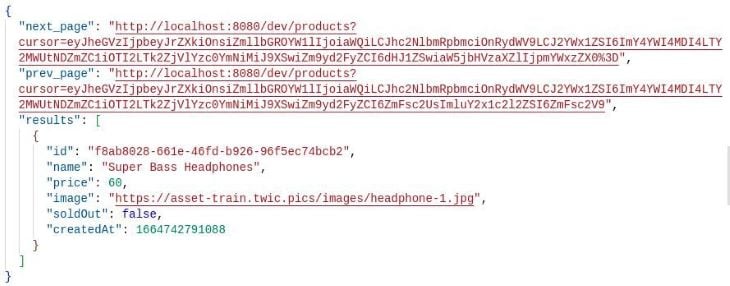
We’ll talk about the next_page and prev_page properties later. Inserting our deal with the outcomes property for now, we will see that the info we added on the earlier POST request is listed as an merchandise on this array.
The crud() technique handed from the ChiselEntity class handles all of the CRUD HTTP operations we anticipate from an endpoint — i.e., the creation, studying, updating, and deletion of information.
That is one in every of ChiselStrike’s strongest options as a result of, with the 2 traces of code contained in the merchandise.ts file, we will deal with all the fundamental HTTP operations that may be despatched to our endpoints. This might make for a clean transition to manufacturing since we would like CRUD operations dealt with when working not solely on prototypes however to a significant extent when additionally working our manufacturing apps.
Updating and deleting knowledge
We’ve got already seen the creation and studying of information, so now we’ll cowl the half on updating and deleting created entities.
To replace the info added to the datastore, we merely must make an HTTP PATCH request towards our endpoint, including the distinctive id of the product we try to replace because the final a part of the endpoint path BASE_URL/dev/merchandise/product_id.
Utilizing the info we added final to our datastore, extract the obtained id from the POST response and place it on the product_id a part of the endpoint above. Along with your HTTP shopper, make a PATCH request utilizing the next JSON knowledge because the payload:
{
  "worth": 72,
  "soldOut": true
}
We must always obtain the next JSON response:
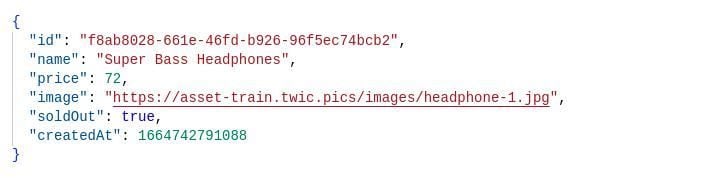
Earlier than continuing with a deletion request, go to the BASE_URL/dev/merchandise as soon as extra to see the info we at the moment have. We are able to additionally see the adjustments that we made by way of the earlier request:
To delete this piece of information from our datastore, all we’d like is to make an HTTP DELETE request passing the gadgets’ id identical to we did within the PATCH request.
If we go to the merchandise endpoint after making the delete request, we see this JSON output:
"Deleted ID f8ab8028-661e-46fd-b926-96f5ec74bcb2"
Accessing the BASE_URL/dev/merchandise afterward provides us an empty outcomes property array as we had initially:
{
  "outcomes": []
}
This half finalizes the primary part of our Chisel Retailer software on product listings. We’ll be populating the part with knowledge obtained by way of making HTTP GET requests to our ChiselStrike server in a short time; we simply must cowl yet another idea first.
Entity relationships
To cowl the second part of our Chisel Retailer prototype, product filters, we have to implement one other of ChiselStrike’s helpful options: entity relationships. Since our product filtering part expects an inventory of classes {that a} customer might use to filter, we have to add a Class entity that can be used to put the merchandise into their associated group.
This is the reason we commented out the class property of our Product entity.
Create a Class.ts file contained in the /fashions listing and add the next code inside it:
// fashions/Class.ts
import { ChiselEntity } from "@chiselstrike/api"

export class Class extends ChiselEntity {
  title: string
}
Head to the /endpoints listing and create an endpoint for this entity:
// fashions/classes.ts
import { Class } from "../fashions/Class.ts"

export default Class.crud()
The 2 recordsdata created above create an endpoint that handles all CRUD operations for the /dev/classes endpoint.
Now, again inside our fashions/Product.ts entity file, remark out the 2 traces dealing with the Class entity import and declaration of the class property:
// fashions/Product.ts
import { ChiselEntity } from "@chiselstrike/api"
import { Class } from "./Class"

export class Product extends ChiselEntity {
  title: string
  worth: quantity
  picture: string
  particulars?: string
  soldOut: boolean = false
  class: Class = new Class()
  createdAt: quantity = Date.now()
}
The phrases “referred entity” and “referenced entity” are used to explain class and Product respectively within the code above, and that is how entity relationships are created in ChiselStrike.
To create a referenced Class entity as we create a brand new product, we have to go its particulars on the class property.
Attempt making an HTTP POST request that’s passing the next JSON payload to the /dev/merchandise endpoint to see the outcomes:
{
  "title": "Child Sneakers",
  "worth": 22,
  "picture": "https://asset-train.twic.pics/photographs/shoes-1.jpg",
  "class": {
    "title": "Sneakers"
  }
}
Right here is the anticipated JSON response:
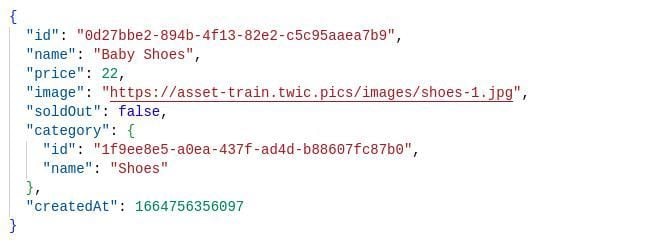
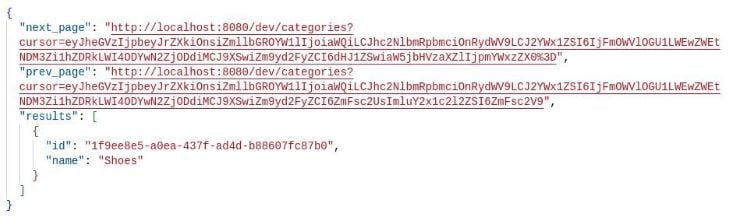
As we will see, a brand new class entity has been created per the outcome payload, and we will examine on its existence by visiting the /dev/classes endpoint, getting the output under:
Entity migrations
Including a Class as a referenced entity to the present referencing entity, Product, is an outline of a ChiselStrike migration. This wouldn’t work if the Product entity had current knowledge. That is primarily as a result of we have been including a brand new required knowledge property, a conduct that ChiselStrike wouldn’t permit. You may learn extra on ChiselStrike entity migrations on this web page.
Now that we’ve got the Class mannequin arrange and working, we will use it inside product filtering inside our app. We are able to now seed some knowledge to our datastore.
To proceed working with the Chisel Retailer instance, you’ll be able to clone its GitHub repository and run npm run dev contained in the undertaking to deploy the native server, adopted by working node utils/seed.js to seed some knowledge to our datastore. Or, when you don’t need to clone this repository, copy the code from the repo’s utils/seed.js file, which has some knowledge we will use to seed the native ChiselStrike datastore with.
Filtering, limiting, and ordering endpoint outcomes
Let’s see how we will implement the filtering, limiting, and ordering of ChiselStrike endpoint outcomes. We need to cater to the functionalities the remaining sections of our Chisel Retailer app want.
Endpoint filters
So as to add product filtering — an important function inside any ecommerce web site’s product itemizing web page — we have to know methods to implement filters on the ChiselStrike server’s endpoints.
ChiselStrike provides us entry to a number of filters that we will go as parameters to our endpoints, in the end filtering the returned JSON outcomes.
We are able to go as many filtering parameters to the endpoint as allowed to get our meant outcomes. The endpoint filters will be roughly grouped into comparability and equality filters.
Comparability filters
The supported comparability filters in ChiselStrike are as follows:
lt: lower thanlte: lower than or equal togt: better thangte: better than or equal tolike: just like SQLLIKE, contains wildcards%and_not like: just like SQLNOT LIKE, contains wildcards%and_
We apply comparability filters by prefixing the property in query with a interval, .property_name, and suffixing it with the tilde-prefixed comparability filter ~. We then assign a related filter worth to this advanced question parameter.
Observing the product filtering part of our Chisel Retailer app, we have to filter the merchandise being listed by worth vary and class.
We are able to filter the merchandise by a worth vary in three doable methods, relying on the info being offered by the consumer:
- If the consumer solely offers the decrease restrict product
worth, we have to filter the returned merchandise by making use of solely thegteoperator on theworthproperty, therefore passing the question.worth~gtewith the offered worth. To get all merchandise above50$, we might want to assemble the endpoint url intoBASE_URL/dev/merchandise?.worth~gte=50 - If the consumer solely offers the upper restrict product
worth, we have to filter the returned merchandise by making use of solely thelteoperator on theworthproperty. To get all merchandise under or equal to120$, we might want to assemble the endpoint url to beBASE_URL/dev/merchandise?.worth~lte=120 - If the consumer offers each the upper and decrease limits of the product’s
worth, we’ll must go two filters,gteandltefilters, assigning them the decrease and betterworths respectively. Borrowing the earlierworthlimits, we find yourself with the ultimate endpoint:BASE_URL/dev/merchandise?.worth~gte=50&.worth~lte=120
We are able to apply the like comparability filter to deal with the product search part of our app. The like filter is appropriate for dealing with search operations and behaves identical to its SQL counterpart. In our case, our search outcomes endpoint can be constructed as BASE_URL/dev/merchandise?.title~like=%search_term%.
N.B., as of this second (@chiselstrike/api - v0.12.1), the like filter operates on one property per endpoint name.
This covers half of our merchandise filter and finalizes the product search functionalities for the app.
Equality filters
The equality filter, =, operates by filtering entity properties with the precise worth because the one handed because the parameter. Just like the like filter, it solely helps filtering one property per endpoint request.
Right here is how we will assemble an endpoint to filter the product classes for the remaining half of the product filters part: BASE_URL/dev/merchandise?.class.title=category_name.
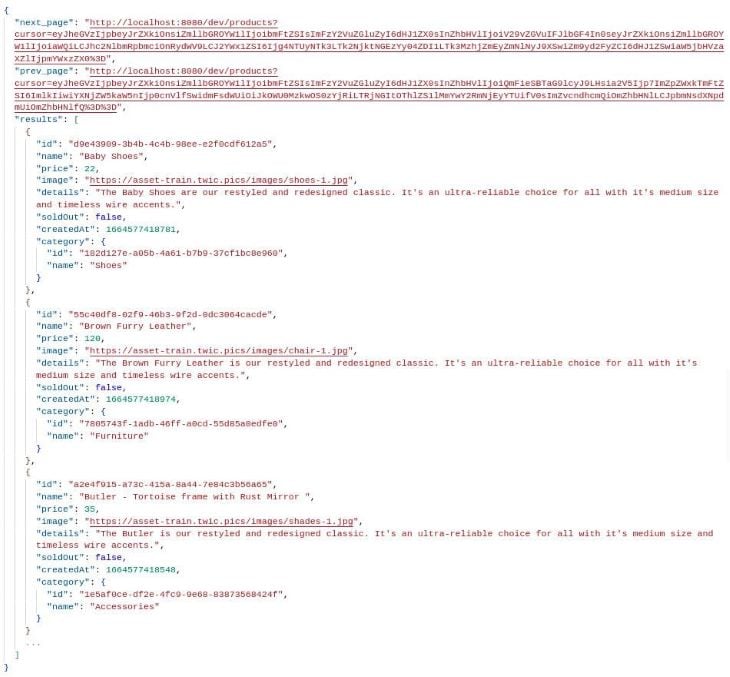
Attempting to checklist solely the merchandise belonging to the sneakers class per the seed knowledge offered above, we will go to this endpoint: BASEURL/dev/merchandise?.class.title=categoryname. We must always find yourself with the next outcomes:
This completes the product filters part for our app. You may learn extra in regards to the endpoint filtering properties that ChiselStrike helps right here.
Sorting endpoint outcomes
Onto our app’s fourth part, product sorting. We’re going to allow sorting listed merchandise by passing the type parameter to our /merchandise endpoint.
To type merchandise within the order of a selected property, we have to go the title of an current entity property as the worth of the type parameter.
For instance, to type the returned merchandise by the order of their titles in our app, we have to assemble the endpoint as BASE_URL/dev/merchandise?.class.type=title. Fetching this endpoint will give us the next JSON output:
As you will have seen, queried outcomes are in ascending order by default. To get the type in a descending order, prefix the property being handed with a minus - signal. On this case, we’d modify our endpoint to BASE_URL/dev/merchandise?.class.type=title.
This covers the product sorting part of our ecommerce prototype.
Nobody desires to see an infinite web page of outcomes, and we will implement lazy loading outcomes to raised this, however typically customers are simply scrolling all the way down to entry your footer and never attempting to see extra gadgets. Therefore, when not thoughtfully applied, lazy loading might account for simply as dangerous of a consumer expertise.
Pagination isn’t solely a great frontend implementation, however likewise with backend knowledge fetching. You don’t need a shopper to fetch 1,000,000 rows of information from a backend as a result of that could be an costly transaction for each events, the server and shopper.
ChiselEntity class’s crud() technique paginates fetched knowledge by capping the returned knowledge at a thousand parts per web page. This is the reason we noticed the next_page and prev_page properties accompanying all the GET requests made to the server in earlier examples.
The cursor question accompanying the following and former pages is ChiselStrike’s implementation of cursor-based paging. Briefly, the cursor ensures that you simply solely get entities that come after the final factor on the present web page and avoids pitfalls akin to getting duplicates if insertions or deletions occur as we transition between pages.
To change Chisel Retailer’s default paging capability, we use the page_size question parameter. This parameter units up the variety of gadgets we would like returned per request.
To implement pagination for Chisel Retailer, we go an inexpensive quantity as the worth for the page_size parameter.
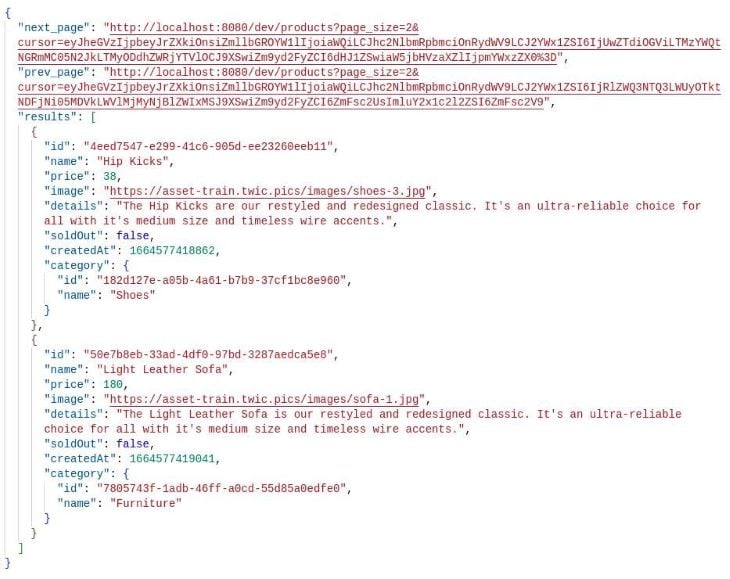
Passing 2 because the page_size to the merchandise endpoint, BASEURL/dev/merchandise?pagesize=2, we get the next outcome:
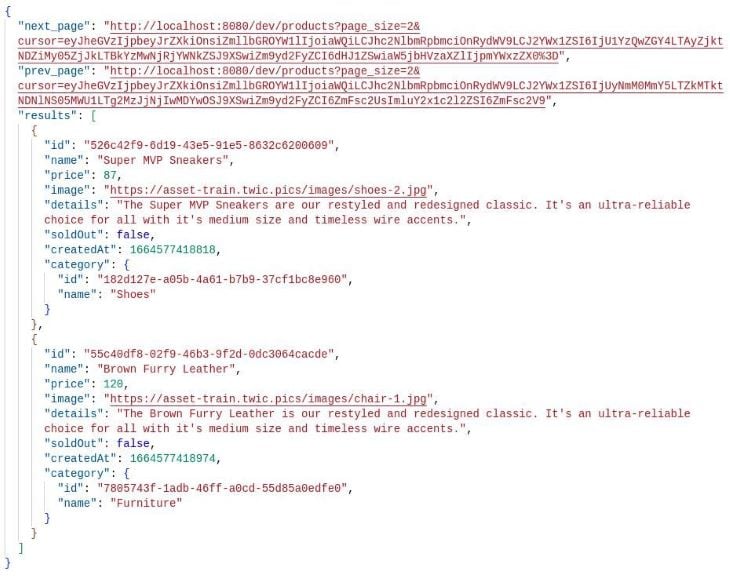
Visiting the endpoint offered within the next_page property of the outcome takes us to the following web page within the knowledge pagination order, which has this knowledge:
Then, following the prev_page endpoint from the second outcome returns us to the info web page from the sooner response.
We are able to then implement this on the pagination part of our app, utilizing the earlier web page button to set off knowledge fetching from the prev_page URL and likewise with the following web page pagination button with the respective next_page URL.
This in the end sums up the pagination part of our app, and the ultimate a part of the functionalities we intend to implement on this prototype.
As we will see on this undertaking, a high-fidelity ecommerce prototype, we have been capable of accomplish the duty of offering the info to make it totally dynamic and presentable sufficient to proceed to the following part in its improvement lifecycle. We have been ready to do that with out having to scour by way of all of ChiselStrike’s API.
This quick demonstration lays out how straightforward it’s to hold out fast prototyping with ChiselStrike.
You may go to the GitHub repository for our Chisel Retailer app right here.
Extra on ChiselStrike’s capabilities
Not solely does ChiselStrike offers us with an outstanding place to begin for prototyping initiatives, however it additionally goes past that preliminary stage by facilitating a clean transition into manufacturing.
Let’s see a few of its options.
Customizing CRUD endpoints
Past easy CRUD requests, ChiselStrike permits us to customise our strategies to go well with distinctive use circumstances.
We are able to simply customise a CRUD endpoint to limit sure HTTP strategies. Let’s take a look at this instance:
// endpoints/merchandise.ts
import { crud, standardCRUDMethods, responseFromJson } from "@chiselstrike/api";
import { Product } from "../fashions/Product";

export default crud(
  Product,
  ":id",
  {
    customMethods: {
      DELETE: standardCRUDMethods.methodNotAllowed
    },
    createResponses: {
      GET: (physique: unknown, standing: quantity) => {
        if (standing < 400) return responseFromJson({ knowledge: physique["results"] }, standing);
        return responseFromJson({ error: physique, standing);
      },
    }
  }
)
We’ve restricted entry to DELETE requests to the /dev/merchandise endpoint and modified the info being returned to be inside a knowledge property, stripping out the pagination properties for profitable requests and returning error info for unsuccessful ones.
After we make HTTP DELETE requests to the /dev/merchandise endpoint, we are going to obtain this response:
"Technique Not Allowed"
We are able to go additional and totally customise our endpoints:
import { Product } from "../fashions/Product"
import { ChiselRequest } from "@chiselstrike/api"

export default async perform (req: ChiselRequest) : Promise<Product> {
    const id = req.pathComponents()[0];
    if(id) return Product.findOne({id})
    return Product.findAll()
}
The above code, very similar to the default CRUD implementation, will get the primary parameter off the /dev/merchandise endpoint path, which is anticipated to be an entity’s id. If this id is out there, it returns a single merchandise from the datastore with the desired id when discovered (nothing when the id is unknown). If not, it returns all the gadgets inside the datastore.
Secrets and techniques
ChiselStrike helps the applying including and sizzling reloading secrets and techniques accessed at runtime.
N.B., at all times deal with secrets and techniques with care and apply security practices each time utilizing them in a VCS atmosphere.
So as to add secrets and techniques to a ChiselStrike undertaking, create a .env file on the root of our undertaking and add the secrets and techniques in JSON:
{
  "secret": "Not so secretive",
  "vcs": {
    "randomkey": "livingdangerously",
    "githubkey": "stageandcommitmeatyourownperil"
  }
}
We are able to then entry the keys through the use of the getSecret technique exported from @chiselstrike/api as follows. Create a brand new secrets and techniques endpoint inside our ChiselStrike app, then go to it to see the secrets and techniques info returned:
// endpoints/secrets and techniques.ts
import { getSecret, responseFromJson } from "@chiselstrike/api";

export default async perform (req) {
    const secret = getSecret("secret");
    return responseFromJson({req, secret})
}
API versioning
Typically, we should be engaged on completely different branches of our initiatives, attempting new options and experimenting inside branches which can be extra prone to expertise errors.
ChiselStrike allows us to model our API into greater than the preliminary /dev/ root endpoint we’ve been accessing. The /dev endpoint itself is a model of the API since ChiselStrike treats API versioning as a first-class citizen.
No matter API versioning being a production-oriented workflow, we will strive it inside our native initiatives; we simply must make ample adjustments to what we’ve been working with.
Add a brand new begin script to the undertaking’s package deal.json file:
{
  "scripts": {
    "dev": "chisel dev",
    "begin": "npx chisel begin"
  }
}
Halt the npm run dev command we have been working initially and run npm run begin as an alternative. Our undertaking ought to resume as regular, with the /dev endpoints accessible.
To create a brand new department, check, in our undertaking listing, run:
npx chisel apply --version check
Chisel ought to report all the beforehand added fashions and endpoints now prefixed with /check.
Visiting the /check/merchandise endpoint ought to return an empty response, whereas the previous /dev endpoints must be working as regular.
To populate the check model of our API, we will make the identical knowledge inhabitants requests we made to the dev API, solely ensuring that we’re changing the dev with check for the newly created API model endpoints.
We are able to additionally select emigrate the info from our previous dev datastore to check:
npx chisel populate --version check --from dev
On profitable knowledge migration, we should always obtain an OK message from the terminal.
Attempt visiting the check department’s /merchandise endpoint as soon as extra. It ought to now comprise a carbon copy of the info returned when accessing the dev API /merchandise endpoint.
Learn extra on ChiselStrike API versioning right here.
Since not all the pieces can match into this submit, here’s a checklist of extra of ChiselStrike’s options.
- Streaming — ChiselStrike integrates with Kafka streaming
- Knowledge insurance policies — Setting guidelines for the way knowledge is served from storage
- Person login — ChiselStrike consumer authentication utilizing NextAuth.js
- Cursors — ChiselStrike’s cursor API for constructing superior queries past
findMany()andfindOne()
Conclusion
Not solely does ChiselStrike allow environment friendly prototyping, however it additionally includes as small of a supply code footprint as doable. ChiselStrike covers important operations with the ability of the ChiselEntity class and its highly effective crud() technique.
You’ve gotten a sampling of what ChiselStrike can do with our demo, however be happy to strive ChiselStrike in different apps, like these with read-only interfaces or dynamic options like types and polls.
