Do you need to add a companies part to your WordPress web site?
When potential prospects arrive at your web site, they need to know what companies you supply. A companies part can talk this info in a fast and simple manner, so guests can determine whether or not they need to study extra about your enterprise.
On this article, we’ll present you the right way to simply create a companies part in WordPress. We’ll additionally share the right way to get extra leads by including a quote request kind to your companies part.

Why Create a Providers Part in WordPress?
To get extra gross sales, it’s necessary to present guests all the knowledge they should perceive what companies you supply.
This could embody every part from costs and advantages to detailed technical specs, relying on the companies you promote.
That’s plenty of info, so we suggest making a customized web page in WordPress for every service you supply.
You’ll be able to then add a companies part to your homepage or touchdown web page, which is able to present a quick overview of all of your companies, in a compact space.
That manner, guests can rapidly determine whether or not they need to study extra about your companies.
You’ll be able to then embody hyperlinks to the completely different service pages, so guests can discover every service in additional element.
An alternative choice is to incorporate a robust name to motion, akin to requesting a callback or filling out a kind to get a customized quote.
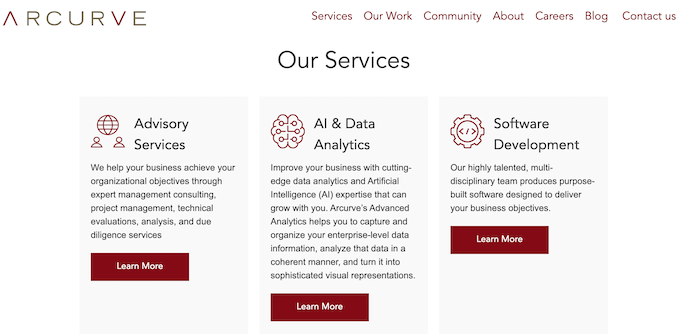
The next picture reveals an instance of a name to motion, which seems instantly beneath a companies part.

That being mentioned, let’s check out the right way to simply create a companies part in WordPress after which add it to any web page in your web site. Merely use the fast hyperlinks under to leap to the tactic you need to use.
Methodology 1. The right way to Create a Providers Part with SeedProd (Really helpful)
One of the best ways to create a companies part is by utilizing a web page builder.
web page builder plugin will permit you to add as many companies as you need, and prepare these companies in a pleasant format. You too can encourage guests to study extra about your companies by including CTAs, hyperlinks, buttons, and extra.
SeedProd is one of the best drag-and-drop web page builder for WordPress. It comes with greater than 180 professionally-designed templates and ready-made sections which can be excellent for selling your companies.
SeedProd additionally works with many common third-party instruments that you could be already be utilizing to get and handle conversions. This contains prime electronic mail advertising companies, WooCommerce, Google Analytics, and extra.
First, it’s essential set up and activate the SeedProd plugin. For extra particulars, see our step-by-step information on the right way to set up a WordPress plugin.
Notice: There’s additionally a free model of SeedProd however we’ll be utilizing SeedProd Professional because it has extra templates and blocks. It additionally works with all of the finest electronic mail advertising companies.
After activating the plugin, SeedProd will ask on your license key.
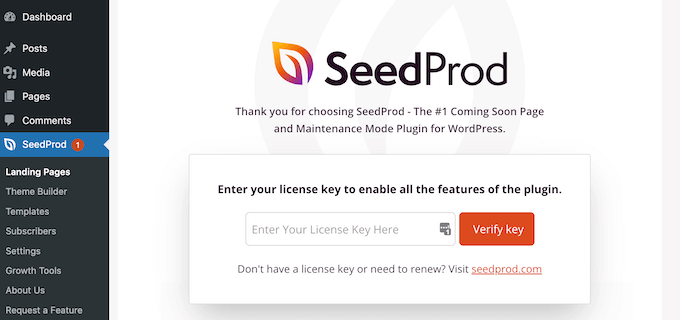
You will discover this info below your account on the SeedProd web site. After coming into the license key, go forward and click on on ‘Confirm Key.’
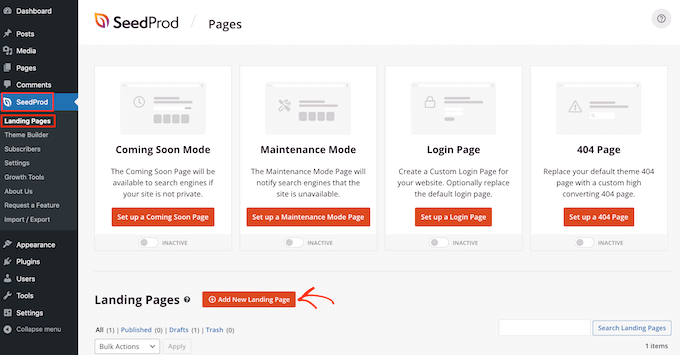
The subsequent step is creating a brand new web page the place you’ll add the companies part. To do that, go to SeedProd » Touchdown Pages in your WordPress dashboard.
When you’ve completed that, click on on the ‘Add New Touchdown Web page’ button.
Now you can select any of SeedProd’s ready-made templates.
That will help you discover the proper template, SeedProd’s designs are organized into completely different marketing campaign sorts, akin to ‘squeeze,’ ‘ead,’ and ‘coming quickly.’
You’ll be able to click on the tabs on the prime of the display to filter the templates based mostly on marketing campaign kind.
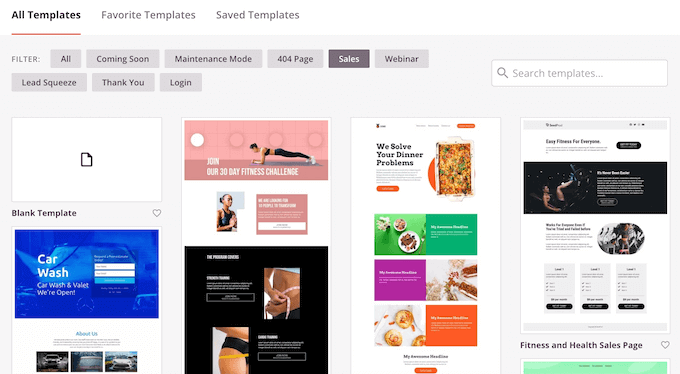
For those who choose to begin from scratch, then SeedProd additionally has a Clean Template, which doesn’t have any default content material or design parts.
To take a more in-depth take a look at a design, merely hover your mouse over the template after which click on on the little magnifying glass icon.
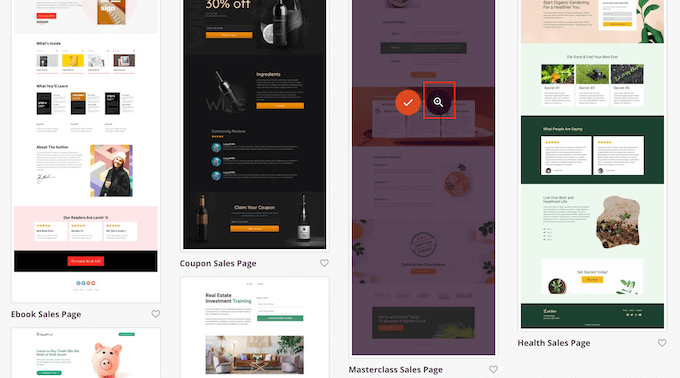
Once you discover a format that you simply need to use, click on on ‘Select This Template.’ We’re utilizing the ‘Masterclass Gross sales Web page’ template in all our photos, however you should use any template you need.
After selecting a template, kind in a reputation on your customized web page. SeedProd will create a URL routinely utilizing the title, however you’ll be able to change this in order for you.
A descriptive URL helps search engines like google perceive what a web page is about, to allow them to ship that web page to people who find themselves trying to find content material similar to yours.
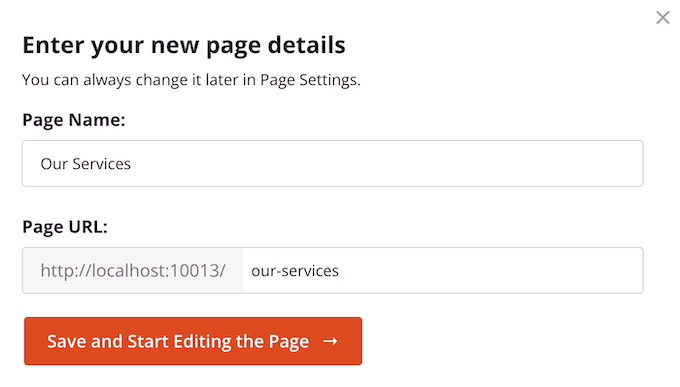
To offer your web page one of the best probability of showing in related search outcomes, you might need to add some related key phrases to the URL. Once you’re proud of the knowledge you’ve entered, click on on the ‘Save and Begin Enhancing the Web page’ button.
This masses the SeedProd drag-and-drop web page builder. It reveals a stay preview of your web page to the precise, and a few settings on the left.

Most SeedProd templates already include some blocks, that are a core a part of any SeedProd format.
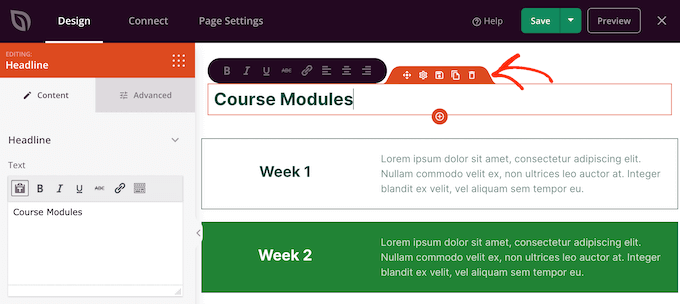
To customise any block, merely click on to pick it. The left-hand menu will then present all of the settings you should use to edit the block, akin to altering the font measurement or changing a inventory picture.
If you wish to take away a block from the design, then merely click on on that block.
Subsequent, go forward and click on on the small trash icon within the menu bar that seems.
So as to add new blocks to your design, simply click on on the block within the left-hand menu and drag it onto the editor.
You’ll be able to then click on to pick the block and make any adjustments within the left-hand menu.
You’ll be able to repeat these steps to create any type of web page, akin to a homepage or Google Advert touchdown web page. The probabilities are countless.
SeedProd additionally comes with ‘Sections.’ These are rows and block templates for widespread internet design parts. For instance, SeedProd has sections for incessantly requested questions, footers, and buyer testimonials.
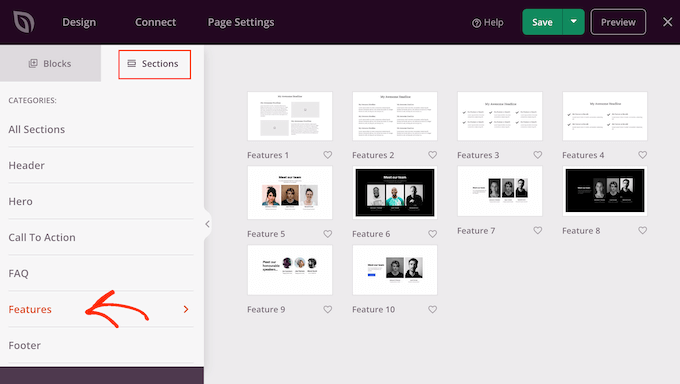
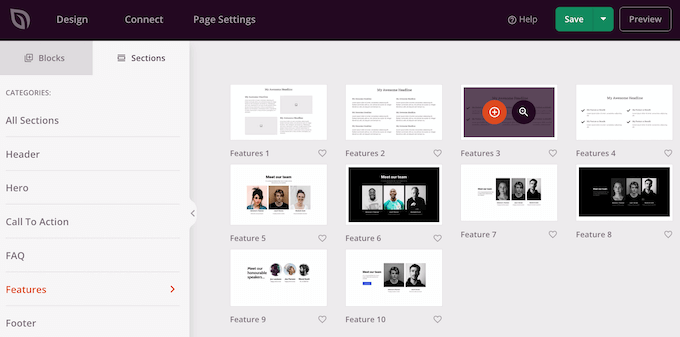
It additionally has varied sections which can be excellent for making a companies part in WordPress. To check out the completely different sections, go forward and click on on the ‘Sections’ tab.
These mini templates are organized into completely different classes, however since we need to create a companies part, we suggest having a look on the ‘Options’ class.
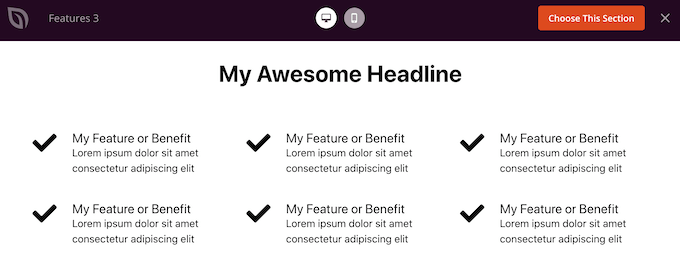
Right here, you’ll discover sections that use paragraphs, subheadings, and pictures in a pleasant format.
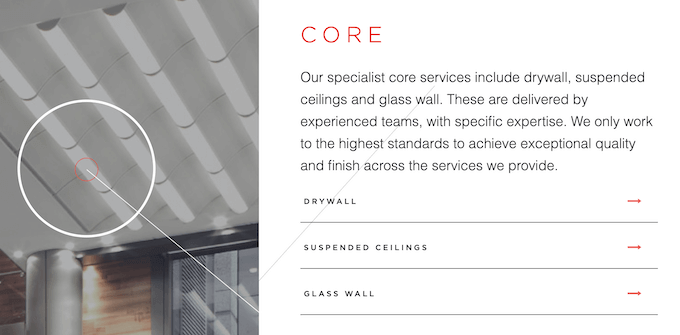
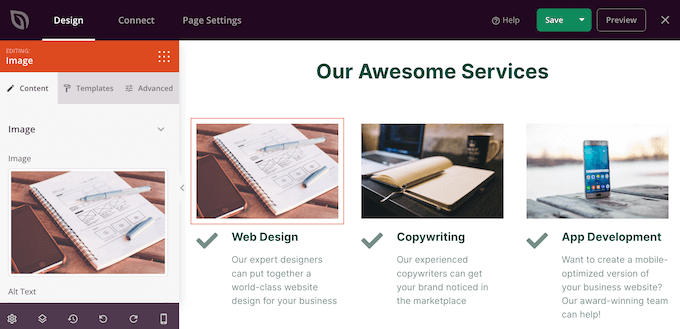
Within the following picture, you’ll be able to see the ‘Options 3’ part. To show this right into a companies part, you merely want so as to add your individual textual content and pictures.
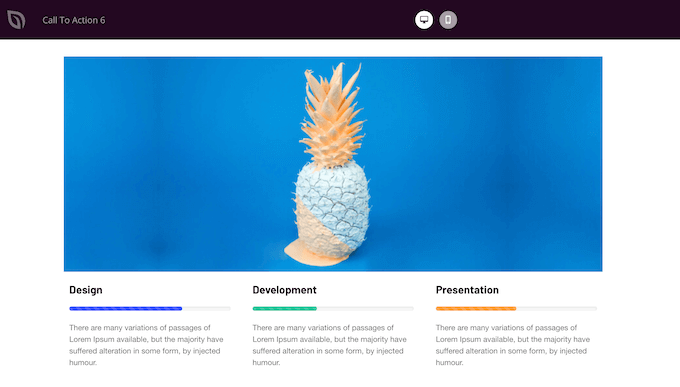
You might also need to take a look at the ‘Name To Motion’ class. This class has plenty of completely different sections, together with just a few that you should use to promote your companies.
Within the following picture, you’ll be able to see the ‘Name To Motion 6’ part, which already has house for 3 companies.
To preview a piece, simply hover your mouse over it after which click on on the magnifying glass icon that seems.
Once you discover a part that you simply need to use, merely transfer your mouse over that part and click on on the little ‘+’ icon.
This provides the part to the underside of your web page, however you’ll be able to transfer sections and blocks round your design utilizing the drag-and-drop function.
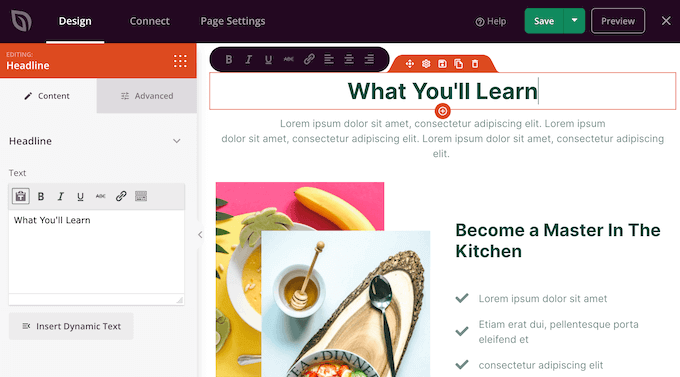
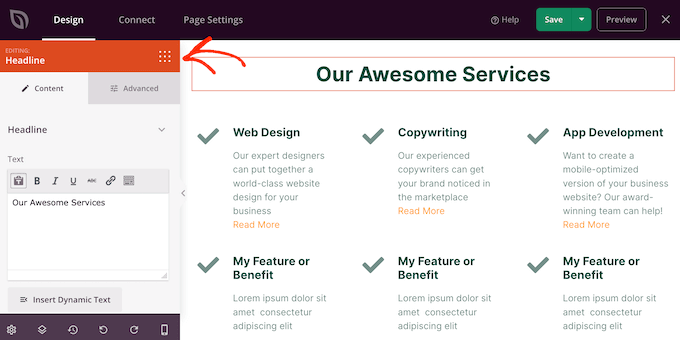
After including a piece, merely can click on on any block inside that part to customise it. To begin, you’ll sometimes need to kind in some details about your companies.
To do that, simply click on on any ‘Textual content,’ ‘Headline,’ or comparable part. Then kind into the textual content subject that seems to the left of the builder.

You’ll be able to format the textual content, just like the way you model textual content in the usual WordPress publish editor.
It’s additionally a good suggestion to add hyperlinks to pages the place guests can study extra about every service.
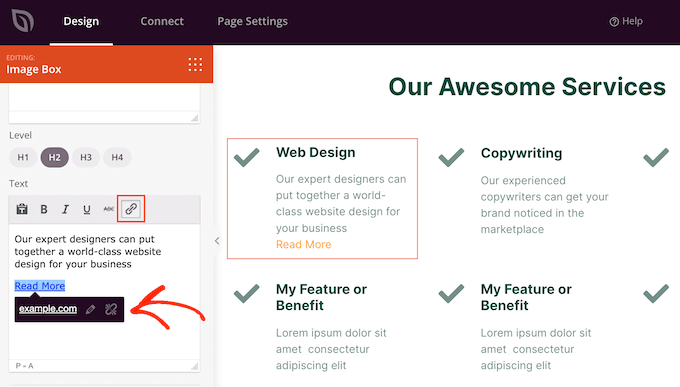
An alternative choice is to make use of a ‘Name to Motion’ button. Even when the part doesn’t include buttons, it’s simple so as to add them.
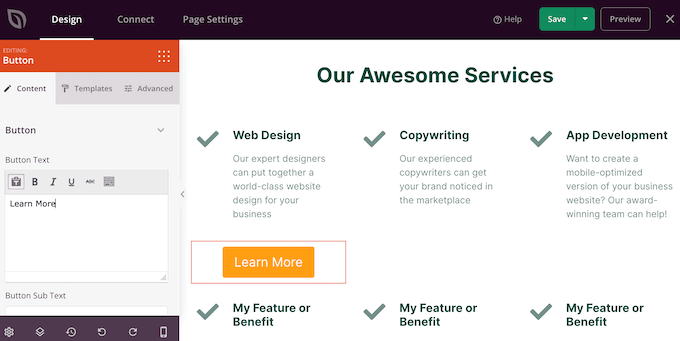
Within the left-hand menu, simply click on on the ‘Blocks’ icon, which seems like a sq. of small dots.
You’ll be able to then drag and drop a ‘Button’ block into your part.
For those who do ‘Button’ blocks, then you’ll be able to customise them in precisely the identical manner you edit any block. Simply click on on it, after which make your adjustments within the left-hand menu.
You’ll be able to add extra blocks by following the identical course of described above.
For instance, you may add images exhibiting every service in motion utilizing an ‘Picture’ block.
Once you’re proud of how the web page seems, it’s time to publish it by clicking on the dropdown arrow subsequent to the ‘Save’ button.
Then, choose the ‘Publish’ choice.

Your web page will now go stay in your WordPress web site and guests can see all of your companies at a look.
Methodology 2. Making a Providers Part in WordPress utilizing Block Editor
You too can construct a companies part utilizing the free Service Field Showcase plugin, after which add it to any web page or publish utilizing shortcode.
You’ll need to make use of one of many plugin’s pre-made service part layouts, so this isn’t probably the most customizable methodology.
Nonetheless, the plugin does allow you to create a service part utilizing the acquainted WordPress content material editor instruments, so it’s fast and simple.
First, it’s essential set up and activate the free Service Field Showcase plugin. For extra particulars, see our step-by-step information on the right way to set up a WordPress plugin.
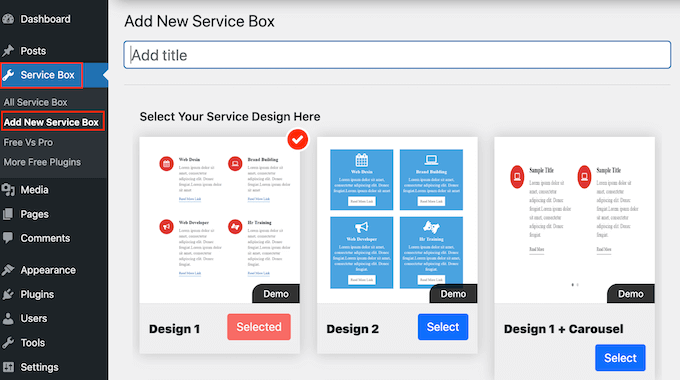
Upon activation, head over to Service Field » Add New Service Field in your WordPress admin panel.
To begin, you’ll have to kind in a title on your companies part. This can solely seem within the dashboard and never in your web site, so this title is on your reference solely.
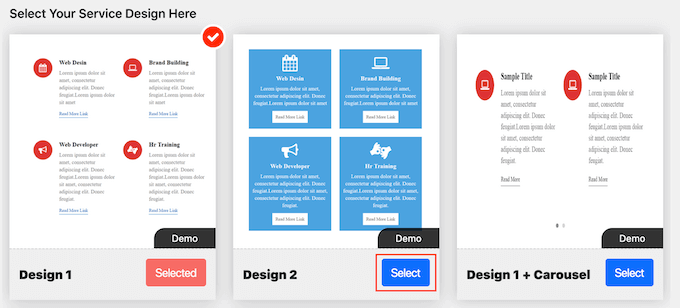
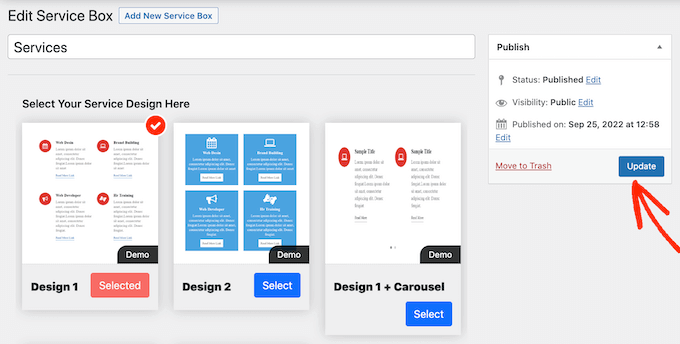
After that, discover the format that you simply need to use and click on on its ‘Choose’ button.
Subsequent, scroll to ‘Add Service Field,’ which has two companies by default.
So as to add extra companies to the part, go forward and click on on ‘Add New Service Field.’
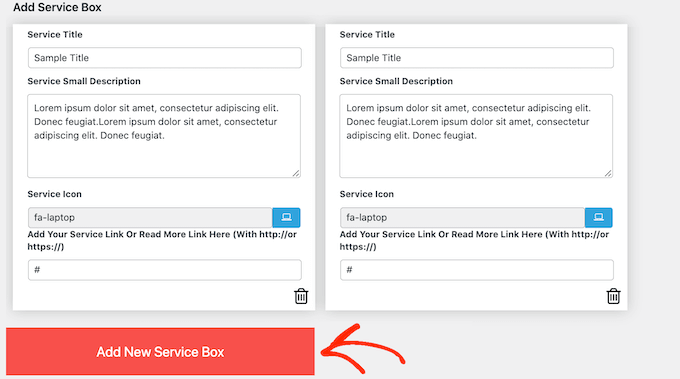
When you’ve completed that, you’ll be able to kind in a title for every service and add an outline.
That is the textual content that may seem on the entrance finish of your web site, so be sure to give guests all the knowledge they want.
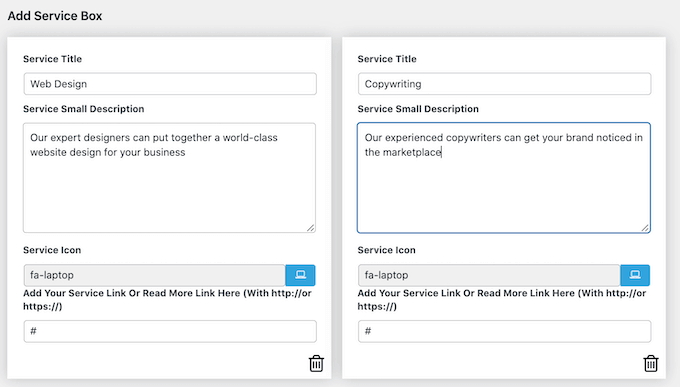
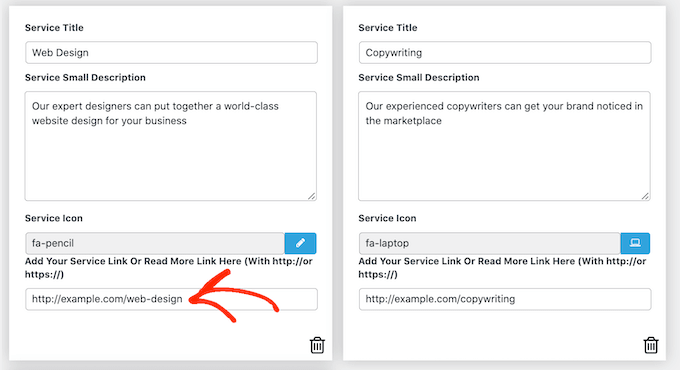
By default, the plugin provides the identical icon to every service. It’s a good suggestion to alter these icons to one thing that’s distinctive to every service.
To see the completely different icons that you should use, click on on the ‘Service Icon’ subject. This opens a popup the place you’ll be able to scroll by the completely different footage and click on the one you need to use.
It’s additionally a good suggestion so as to add a hyperlink to a web page the place guests can study extra about every service, or perhaps a web page that has a contact kind.
To do that, merely kind the hyperlink into the ‘Add Your Service Or Learn Extra Hyperlink Right here’ subject.
After including all this info, you’ll be able to change how your service part seems utilizing the ‘Service Field Settings.’
Most of those settings are pretty easy. For instance, you’ll be able to change the font measurement and magnificence. You too can change the hyperlink coloration, plus the colour of the title, description, and extra.
For those who don’t need to use any icons within the companies part, then you’ll be able to take away them by clicking on the ‘Show Icon’ change.
There are many completely different settings and what seems good could range relying in your WordPress theme. With that being mentioned, you’ll be able to all the time come again to the ‘Service Field Settings’ and make some adjustments for those who’re sad with how the companies part seems in your web site.
Once you’re proud of how the companies field is ready up, merely click on on the ‘Publish’ button on the prime of the web page to save lots of your adjustments.
Now you can add the companies part to your WordPress weblog utilizing a shortcode. Merely scroll to ‘ServiceBox Shortcode’ and replica the code.
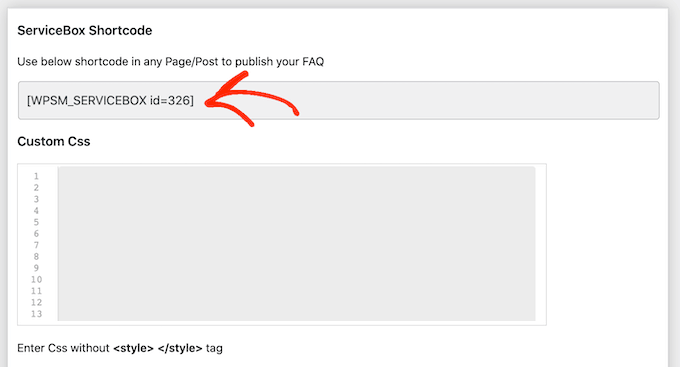
You’re now prepared so as to add the companies field to any publish or web page. For extra particulars on the right way to place the shortcode, you’ll be able to see our information on the right way to add a shortcode in WordPress.
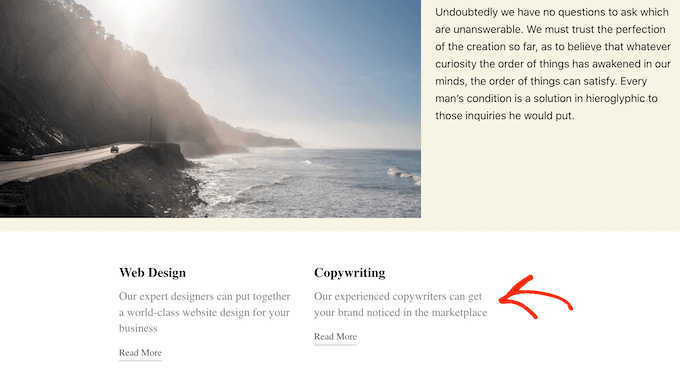
When you’ve pasted the shortcode, simply click on ‘Replace’ or ‘Publish’ to push adjustments stay. Then, for those who go to your web site you’ll see the companies part in motion.
At this level, you might notice that you simply need to make some adjustments akin to utilizing a special background coloration or including extra columns.
To make these adjustments, merely go to Service Field » All Service Field. You’ll be able to then hover your mouse over the service field and click on on the ‘Edit’ hyperlink when it seems.
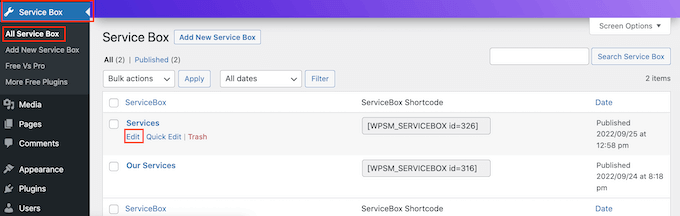
Now, make your adjustments utilizing the ‘Service Field Settings’ and different sections.
Once you’re proud of the adjustments you’ve made, don’t overlook to click on on ‘Replace.’
Now, for those who go to the web page or publish the place you added the companies field, you’ll see your adjustments on the positioning.
BONUS: Creating Request a Quote Type In your Providers
A companies part provides guests an outline of your organization and what you supply, to allow them to determine whether or not they need to study extra.
When you’ve caught the customer’s consideration, the following step is popping them into leads and prospects. You are able to do this by including a ‘Quote Request Type’ to your web site.
That is just like a contact kind, however it has an additional space the place guests can kind in some details about themselves or what they’re searching for.
This will help you promote extra companies. For instance, you may suggest a specific service, create a singular bundle for that buyer, or ship them a customized electronic mail based mostly on the knowledge they’ve entered.
The best strategy to create a quote request kind is by utilizing WPForms. It’s the finest WordPress kinds plugin and means that you can add any kind of kind to your web site utilizing a easy drag-and-drop editor.
WPForms even has a ready-made ‘Request a Quote Type’ that has every part it’s essential flip guests into leads.
First, it’s essential set up and activate the WPForms plugin. For extra particulars, see our step-by-step information on the right way to set up a WordPress plugin.
Notice: There’s a free model of the WPForms plugin, however we will probably be utilizing the Professional model as a result of it comes with the ‘Request a Quote’ kind template.
Upon activation, head over to WPForms » Settings and enter your license key.
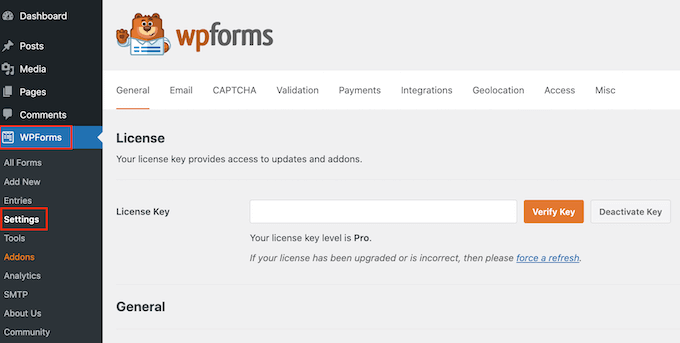
You will discover the license key below your account on the WPForms web site. It’s additionally within the electronic mail you bought once you bought WPForms.
After coming into the license key, click on on the ‘Confirm Key’ button. After just a few moments, you will note a message confirming that you simply’ve entered the precise license key.
When you’ve completed that, go to WPForms » Add New.

Right here, kind in a reputation on your kind. That is simply on your reference so you’ll be able to go forward and use any title you need.
Subsequent, kind ‘request a quote’ into the search subject. This can carry up the ‘Request a Quote Type’ within the outcomes.
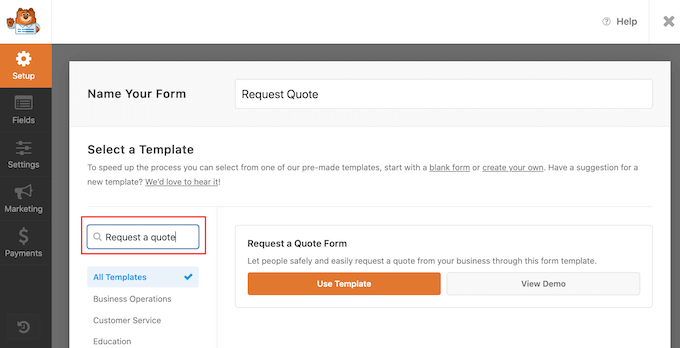
Now you can go forward and click on on the ‘Use Template’ button.
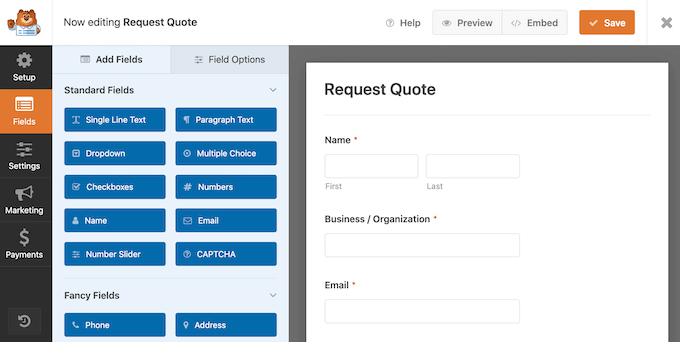
This can load the WPForms editor, with the shape on the precise and all the completely different settings on the left.
The ‘Request a Quote Type’ template has fields the place the customer can enter their info, akin to their identify, electronic mail deal with, and telephone quantity.
There’s additionally a piece the place they will kind of their particular request.
The default kind ought to work nicely for many web sites, however it’s simple to customise the shape if it’s essential.
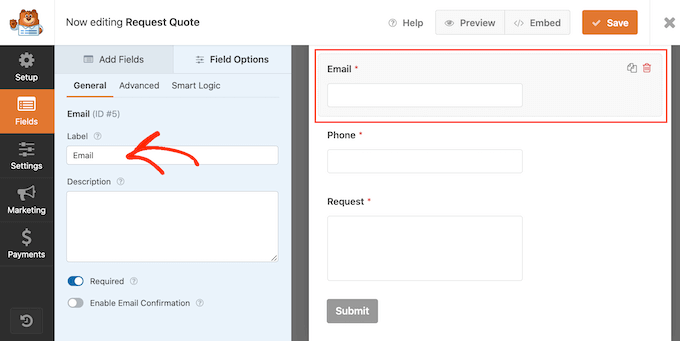
To edit a subject, merely click on to pick it. The left-hand menu will then present all of the settings you should use to customise this subject.
For instance, you’ll be able to change the textual content that seems above any subject by altering the textual content within the ‘Label’ subject.
You too can add extra fields by deciding on the ‘Add Fields’ tab.
Then, merely drag and drop any subject block onto the shape.
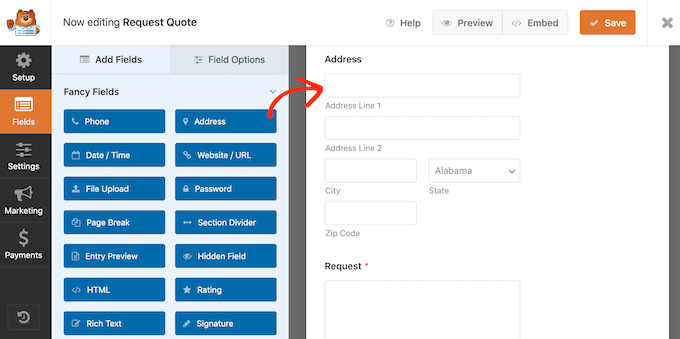
You too can change the order that the fields seem in your kind utilizing drag and drop.
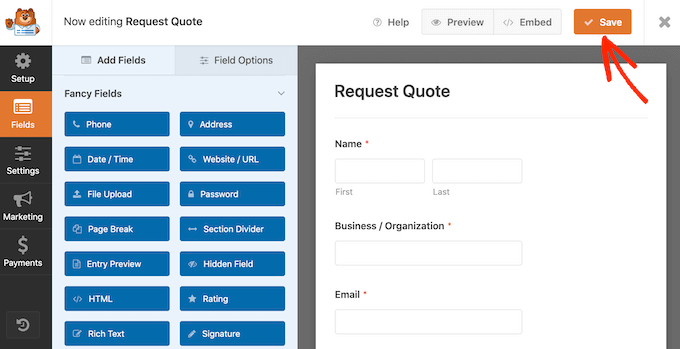
Once you’re proud of how the shape seems, go forward and click on on the ‘Save’ button.
Now you can add this kind to any WordPress publish or web page utilizing the WordPress content material editor.
Merely open the web page the place you need to add the shape after which click on on the ‘+’ button.
Subsequent, kind ‘WPForms’ and click on on the block so as to add it to your web page.
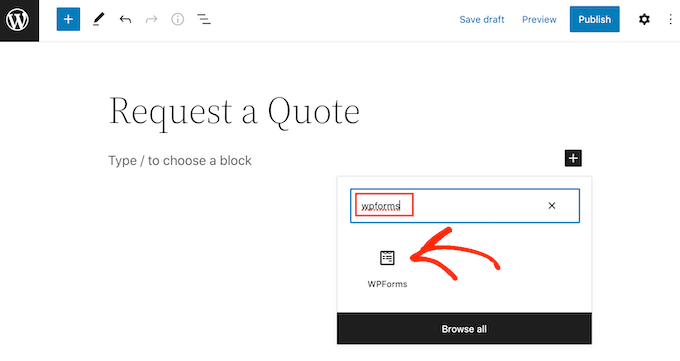
Lastly, open the dropdown menu and choose the quote request kind.
WPForms will present a preview of the shape on the display. For those who’re proud of how the shape seems, then you’ll be able to go forward and save or publish the web page.
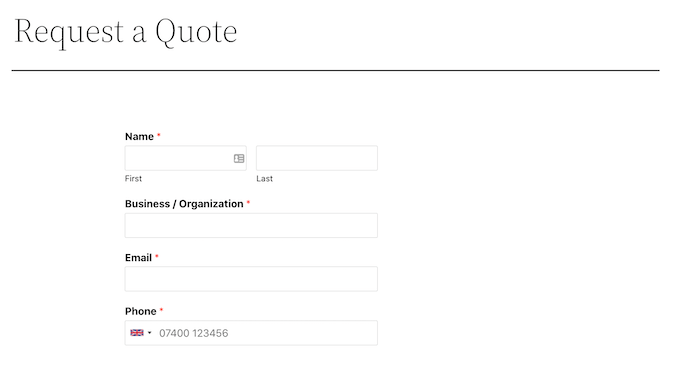
The quote request kind will now be stay on your guests to make use of.
We hope this text helped you learn to create a companies part in WordPress. You may also like to take a look at our article on the finest stay chat software program and the right way to create an electronic mail e-newsletter.
For those who appreciated this text, then please subscribe to our YouTube Channel for WordPress video tutorials. You too can discover us on Twitter and Fb.
