
Animation supplies a compelling person expertise for contemporary internet apps, bringing them to life and avoiding that dreaded flat look. However, after all, including animations generally is a troublesome and time-consuming process, and in case your app has a number of elements, it will get worse!
On this article, we‘re going to be having a look at how one can add animation to React elements with a single line of code utilizing the AutoAnimate library.
Let’s get straight into it.
Leap forward:
What’s AutoAnimate?
AutoAnimate is an open-source animation utility library with zero configuration that provides easy transitions to React elements whereas additionally being very light-weight (2.3KB).
Why not use different animation libraries?
Most animation libraries require extra configuration, and a few require altering the prevailing element construction to use animations.
AutoAnimate, nevertheless, requires solely a single line of code to animate elements and doesn’t require altering any present elements. It additionally gives the advantage of being easy to combine with an present code base.
AutoAnimate makes for a easy expertise when a component modifications within the DOM. I wish to examine AutoAnimate with React Transition Group, which is a straightforward transition library for element getting into and exiting, however with some extra configurations.
Let’s create an alert message with React Transition Group and AutoAnimate so you possibly can see the distinction between the libraries for your self.
Alert message utilizing React Transition Group
The next element reveals how you can add animation utilizing React Transition Group.
App.jsx
import React, { useState, useRef } from 'react';
import { createRoot } from 'react-dom/shopper';
import { Container, Button, Alert } from 'react-bootstrap';
import { CSSTransition } from 'react-transition-group';

import 'bootstrap/dist/css/bootstrap.min.css';
import './types.css';

operate Instance() {
  const [showButton, setShowButton] = useState(true);
  const [showMessage, setShowMessage] = useState(false);
  const nodeRef = useRef(null);

  return (
    <Container type={{ paddingTop: '2rem' }}>
      {showButton && (
        <Button
          onClick={() => setShowMessage(true)}
          measurement="lg"
        >
          Present Message
        </Button>
      )}
      <CSSTransition
        in={showMessage}
        nodeRef={nodeRef}
        timeout={300}
        classNames="alert"
        unmountOnExit
        onExited={() => setShowButton(true)}
      >
        <Alert
          ref={nodeRef}
          variant="major"
          dismissible
          onClose={() => setShowMessage(false)}
        >
          <Alert.Heading>
            Animated alert message
          </Alert.Heading>
          <p>
            This alert message is being transitioned in and
            out of the DOM.
          </p>
          <Button
            variant="major"
            onClick={() => setShowMessage(false)}
          >
            Shut
          </Button>
        </Alert>
      </CSSTransition>
    </Container>
  );
}
const container = doc.getElementById('root');
const root = createRoot(container);
root.render(<Instance />);
Add the next types so as to add the transition:
//types.css
.alert-enter {
  opacity: 0;
  remodel: scale(0.9);
}
.alert-enter-active {
  opacity: 1;
  remodel: translateX(0);
  transition: opacity 300ms, remodel 300ms;
}
.alert-exit {
  opacity: 1;
}
.alert-exit-active {
  opacity: 0;
  remodel: scale(0.9);
  transition: opacity 300ms, remodel 300ms;
}
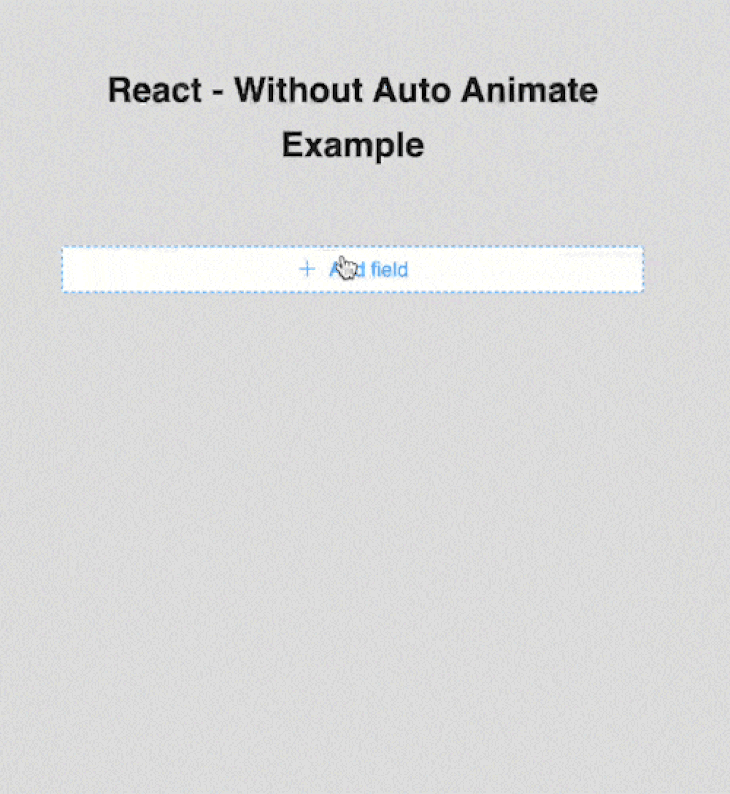
The above code will produce the next output:

So as to add this transition, we now have added a couple of strains of CSS and handed a couple of props to the CSS transition element.
Now, let’s reproduce the identical animation utilizing AutoAnimate with zero configuration.
N.B., you’ll find the above demo right here at CodeSandbox
Alert message utilizing AutoAnimate
The next element reveals you how you can add an animation utilizing AutoAnimate.
//App.jsx

import React, { useState, useRef } from 'react';
import { createRoot } from 'react-dom/shopper';
import { Container, Button, Alert } from 'react-bootstrap';
import { useAutoAnimate } from '@formkit/auto-animate/react';

import 'bootstrap/dist/css/bootstrap.min.css';

operate Instance() {
//Auto Animate
  const [parent] = useAutoAnimate(/* optionally available config */);

  const [showButton, setShowButton] = useState(true);
  const [showMessage, setShowMessage] = useState(false);
  const nodeRef = useRef(null);

  return (
    <Container type={{ paddingTop: '2rem' }}>
      {showButton && (
        <Button
          onClick={() => setShowMessage(true)}
          measurement="lg"
        >
          Present Message
        </Button>
      )}
      <div ref={mum or dad}>
        {showMessage && (
          <Alert
            ref={nodeRef}
            variant="major"
            dismissible
            onClose={() => setShowMessage(false)}
          >
            <Alert.Heading>
              Animated alert message
            </Alert.Heading>
            <p>
              This alert message is being transitioned in
              and out of the DOM.
            </p>
            <Button
              variant="major"
              onClick={() => setShowMessage(false)}
            >
              Shut
            </Button>
          </Alert>
        )}
      </div>
    </Container>
  );
}
const container = doc.getElementById('root');
const root = createRoot(container);
root.render(<Instance />);
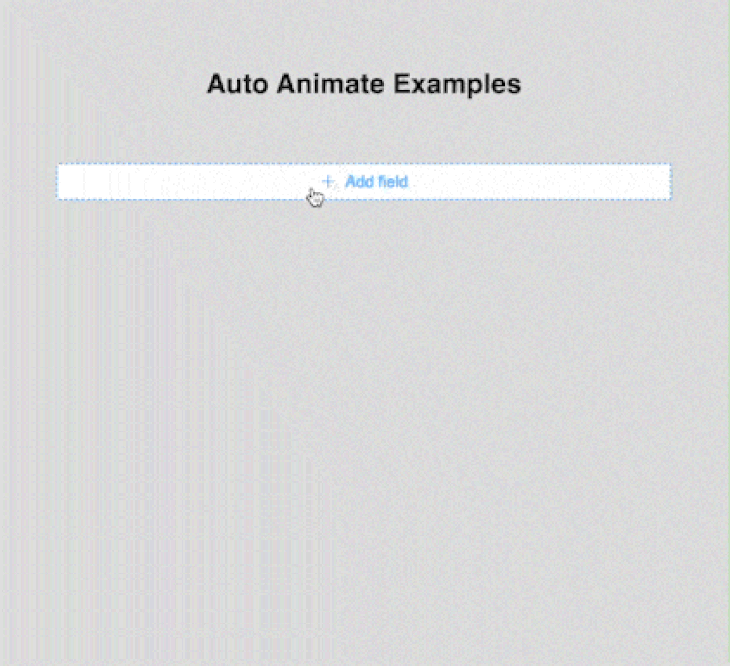
Right here, we now have used the identical code that we used for React Transition Group. We now have included the AutoAnimate library and added the useAutoAnimate hook ref to the Alert mum or dad component (<div>).
That’s all we have to do! It’s not needed for us so as to add the CSS or transition length. Let’s see the output right here:

We are able to see right here that we’ve created the identical animation with zero configuration — that is how AutoAnimate differs from different libraries!
N.B., you’ll find the above demo right here at CodeSandbox
How does it work?
AutoAnimate is a single-function utility that accepts a mum or dad component of the element which must be animated. The animation is then utilized to the instant little one parts of the mum or dad component.
AutoAnimate triggers the animations when the next occasions happen:
- A toddler component is inserted into the DOM
- A toddler component is faraway from the DOM
- A toddler component is moved within the DOM
Fast setup and utilization
Now, let’s arrange AutoAnimate to be used in your tasks.
Set up AutoAnimate utilizing the next command:
yarn add @formkit/auto-animate
Import the useAutoAnimate hooks into the element which you need to animate, as proven right here:
import { useAutoAnimate } from '@formkit/auto-animate/react
To animate a element, we have to add the reference returned by the useAutoAnimate hook to the mum or dad component, as seen right here:
//App.jsx

import { useState } from 'react'
import { useAutoAnimate } from '@formkit/auto-animate/react'

const App = operate () {
  const [items, setItems] = useState([0, 1, 2])
  const [parent] = useAutoAnimate()
  const add = () => setItems([...items, items.length])
  return
  <>
  <ul ref={mum or dad}>
    {objects.map(
      merchandise => <li key={merchandise}>{ merchandise }</li>
    )}
  </ul>
  <button onClick={add}>Add quantity</button>
  </>
}

export default App
Right here, we now have handed the reference of the mum or dad component <ul> to useAutoAnimate. When clicking the Add Quantity button, the newly added record can be animated.
Subsequent, we’ll check out some extra examples.
Extra nice articles from LogRocket:
Animate a dynamic Type element
Most apps have dynamic enter Type elements. Now, we’ll create a dynamic element, so add the next code:
N.B., I’ve used the Ant Design
Typefor the sake of simplicity for this walkthrough
//DynamicForm.jsx

import { MinusCircleOutlined, PlusOutlined } from '@ant-design/icons';
import { Button, Type, Enter, Area } from 'antd';
import React from 'react';

const DynamicForm = () => {
    return (
            <Type title="dynamic_form_nest_item" autoComplete="off" >
                <Type.Listing title="customers">
                    {(fields, { add, take away }) => (
                        <div>
                            {fields.map(({ key, title, ...restField }) => (
                                <Area
                                    key={key}
                                    type={{
                                        show: 'flex',
                                        marginBottom: 8,
                                    }}
                                    align="baseline"
                                >
                                    <Type.Merchandise
                                        {...restField}
                                        title={[name, 'first']}
                                        guidelines={[
                                            {
                                                required: true,
                                                message: 'Missing first name',
                                            },
                                        ]}
                                    >
                                        <Enter placeholder="First Title" />
                                    </Type.Merchandise>
                                    <Type.Merchandise
                                        {...restField}
                                        title={[name, 'last']}
                                        guidelines={[
                                            {
                                                required: true,
                                                message: 'Missing last name',
                                            },
                                        ]}
                                    >
                                        <Enter placeholder="Final Title" />
                                    </Type.Merchandise>
                                    <MinusCircleOutlined
                                      onClick={() => take away(title)}
                                      />
                                </Area>
                            ))}
                            <Type.Merchandise>
                                <Button
                                    sort="dashed"
                                    onClick={() => add()}
                                    block
                                    icon={<PlusOutlined/>
                                    }>
                                    Add subject
                                </Button>
                            </Type.Merchandise>
                        </div>
                    )}
                </Type.Listing>
            </Type>
    );
};

export default DynamicForm;
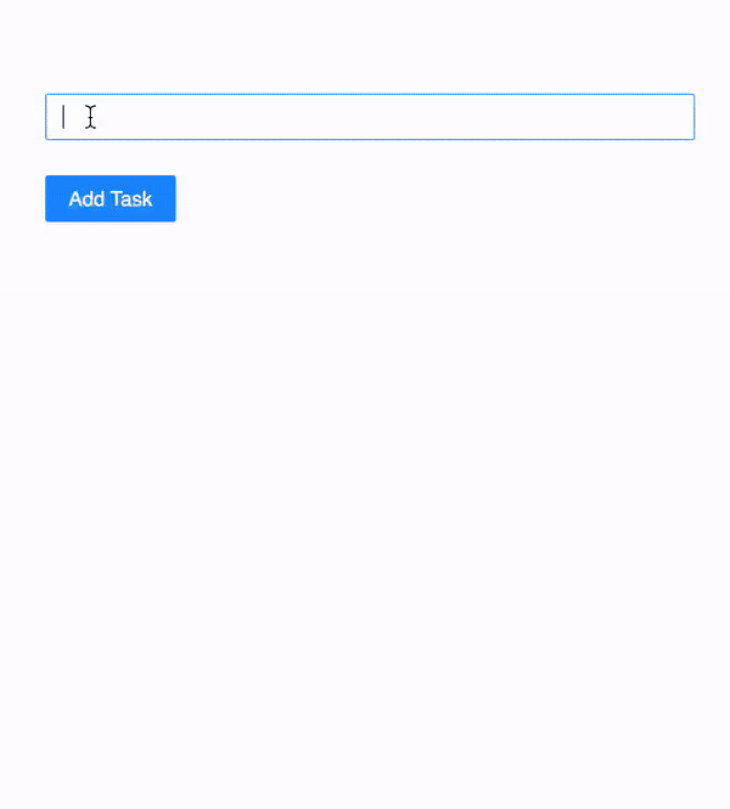
Now, we’ll see the next output after we run the element. Once we click on on Add subject, the inputs are added in a fraction of a second; it appears like dangerous UX to me!
Let’s animate the shape with AutoAnimate utilizing a single line. Import the AutoAnimate library utilizing the code within the DynamicForm element:
import { useAutoAnimate } from '@formkit/auto-animate/react'
Subsequent, add the useAutoAnimate hook, as demonstrated right here:
const [parent] = useAutoAnimate(/* optionally available config */)
Then, move the reference for the mum or dad component <div>, as under:
<div ref={mum or dad}>
Now, run the code once more; you possibly can see the magic of AutoAnimate in motion!
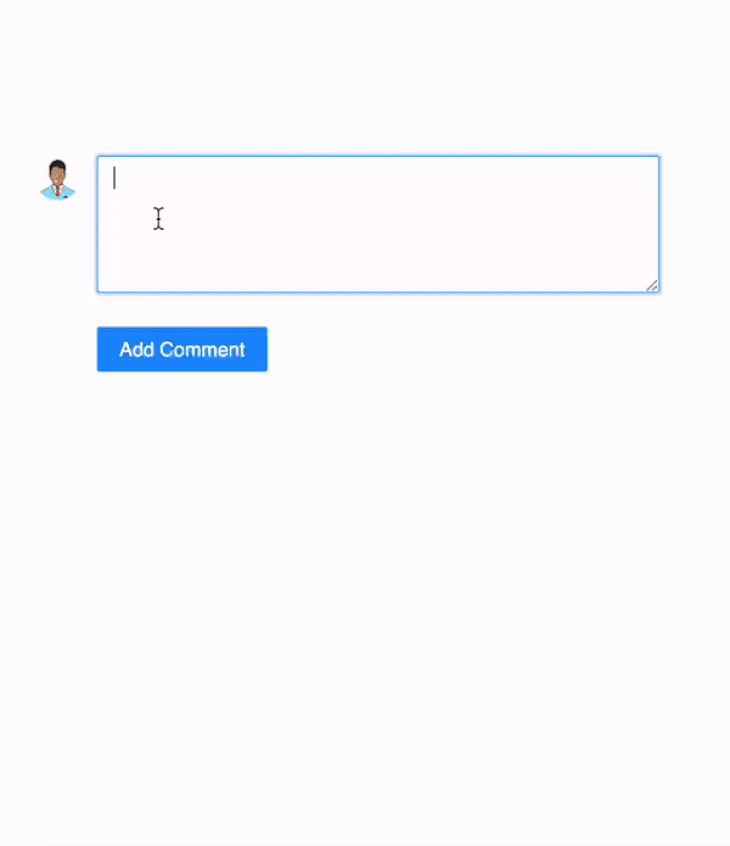
One other use case is to auto-animate the Feedback element of an utility.
Right here, we’re creating a Feedback element, which is used so as to add feedback to a submit. If a brand new remark is added, it’s displayed on the high of an inventory.
//Feedback.jsx
import {Avatar, Button, Remark, Type, Enter,} from 'antd';
import React, {useState} from 'react';
import {useAutoAnimate} from '@formkit/auto-animate/react'
const {TextArea} = Enter;

const Editor = ({onChange, onSubmit, submitting, worth}) => (
    <>
        <Type.Merchandise>
            <TextArea rows={4} onChange={onChange} worth={worth}/>
        </Type.Merchandise>
        <Type.Merchandise>
            <Button
                htmlType="submit"
                loading={submitting}
                onClick={onSubmit}
                sort="major"
                >
            Add Remark
            </Button>
        </Type.Merchandise>
    </>
);

const Feedback = () => {
    const [comments, setComments] = useState([]);
    const [submitting, setSubmitting] = useState(false);
    const [value, setValue] = useState('');
    const [parent] = useAutoAnimate()
    const handleSubmit = () => {
        if (!worth) return;
        setSubmitting(true);
        setTimeout(() => {
            setSubmitting(false);
            setValue('');
            setComments([
                ...comments,
                {
                    author: 'Han Solo',
                    avatar: 'https://joeschmoe.io/api/v1/random',
                    content: <p>{value}</p>,
                },
            ]);
        }, 500);
    };

    const handleChange = (e) => {
        setValue(e.goal.worth);
    };

    return (
        <>
            <ul ref={mum or dad}>
                {feedback.map((remark) => (
                        <Remark
                            key={remark.content material}
                            writer={remark.writer}
                            avatar={
                                    <Avatar
                                      src="https://joeschmoe.io/api/v1/random"
                                      alt="Han Solo"
                                    />
                                    }
                            content material={
                                <p>
                                    {remark.content material}
                                </p>
                            }
                        />
                    )
                )}
            </ul>
            <Remark
                avatar={
                  <Avatar src="https://joeschmoe.io/api/v1/random" alt="Han Solo"/>
                }
                content material={
                    <Editor
                        onChange={handleChange}
                        onSubmit={handleSubmit}
                        submitting={submitting}
                        worth={worth}
                    />
                }
            />
        </>
    );
};

export default Feedback;
Within the above instance, we now have a remark enter. When the person sorts a remark and clicks Add Remark, the entered remark is appended on the high with an animation. To animate the record, we now have added an AutoAnimate hook reference to the <ul> component.
Now, we’ll see the next output after we run the element:
Customise the animation length
We are able to customise the transition time by passing the length props to useAutoAnimate. Let’s see this in motion with a dynamic card for instance.
On this instance, we made the transition 500ms lengthy, so when the person clicks Add Job, a brand new card is inserted and all different playing cards are moved after 500ms.
//DynamicComponents.jsx

import React, {useState} from "react";
import {Avatar, Button, Card, Col, Type, Enter, Row} from 'antd';
import {useAutoAnimate} from "@formkit/auto-animate/react";

const {Meta} = Card;

export default operate DynamicComponents() {

    const [comments, setComments] = useState([]);
    const [parent] = useAutoAnimate({length: 500});

    const handleSubmit = (values) => {
        if (!values) return;
        setComments((prev) => [{content: values.content}, ...prev]);
    };

    return (
        <>
            <Type
                title="primary"
                onFinish={handleSubmit}
                autoComplete="off"
            >
                <Type.Merchandise
                    title="content material"
                >
                   <Enter/>
                </Type.Merchandise>
                <Type.Merchandise>
                    <Button htmlType="submit" sort="major">
                        Add Job
                    </Button>
                </Type.Merchandise>
            </Type>
            <Row gutter={[16, 24]} ref={mum or dad}>
                {feedback.map((remark) => (
                    <Col span={6} key={remark.content material}>
                        <Card
                            type={{
                                width: 100,
                            }}
                            cowl={
                                <img
                                    alt="instance"
                                    src="https://gw.alipayobjects.com/zos/rmsportal/JiqGstEfoWAOHiTxclqi.png"
                                />
                            }
                        >
                            <Meta
                                avatar={
                                <Avatar src="https://joeschmoe.io/api/v1/random"/>
                                  }
                                description={remark.content material}
                            />
                        </Card>
                    </Col>
                ))
                }
            </Row>
        </>
    );
}
Now, we’ll see the next output after we run the element:
Allow and disable animations
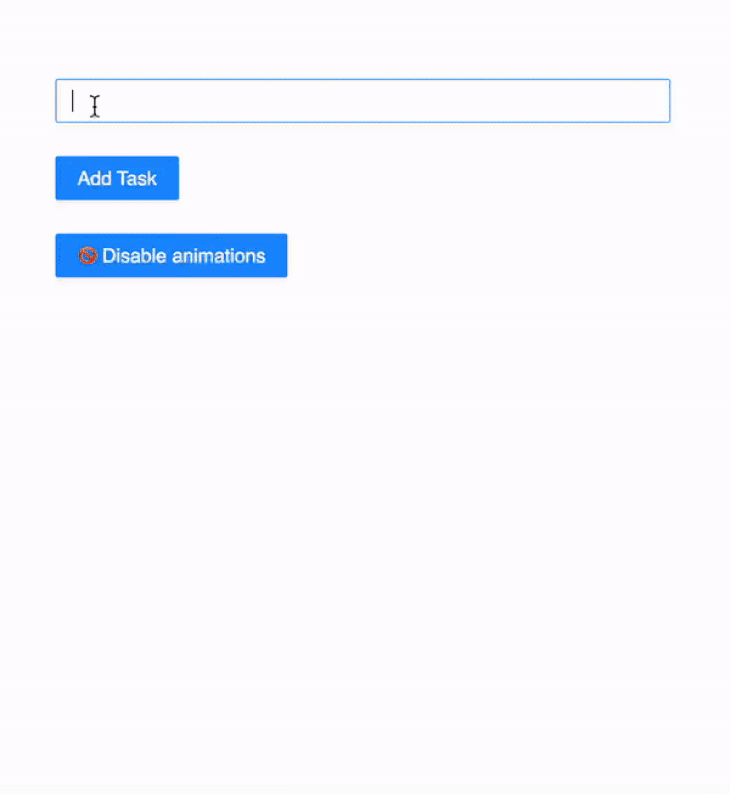
Typically, we’re required to disable an animation and use it later. To deal with these instances, the AutoAnimate hook useAutoAnimate returns the Allow and Disable capabilities, which can be utilized to allow and disable an animation.
We are able to see this within the following code block:
//DynamicCards.jsx

import React, {useState} from "react";
import {Avatar, Button, Card, Col, Type, Enter, Row} from 'antd';
import {useAutoAnimate} from "@formkit/auto-animate/react";

const {Meta} = Card;

export default operate DynamicCards() {
    const [comments, setComments] = useState([]);
    const [parent, enable] = useAutoAnimate({length: 500});
    const [isEnabled, setIsEnabled] = useState(true)

    const handleSubmit = (values) => {
        if (!values) return;
        setComments((prev) => [{content: values.content}, ...prev]);
    };

    operate toggle () {
        allow(!isEnabled)
        setIsEnabled(!isEnabled)
    }

    return (
        <>
            <Type
                title="primary"
                onFinish={handleSubmit}
                autoComplete="off"
            >
                <Type.Merchandise
                    title="content material"
                >
                    <Enter/>
                </Type.Merchandise>
                <Type.Merchandise>
                    <Button htmlType="submit" sort="major">
                        Add Job
                    </Button>
                </Type.Merchandise>
                <Type.Merchandise>
                    <Button onClick={toggle} sort="major">
                        { isEnabled ? " Disable" : " Allow" } animations
                    </Button>
                </Type.Merchandise>
            </Type>
            <Row gutter={[16, 24]} ref={mum or dad}>
                {feedback.map((remark) => (
                    <Col span={6} key={remark.content material}>
                        <Card
                            type={{
                                width: 100,
                            }}
                            cowl={
                                <img
                                    alt="instance"
                                    src="https://gw.alipayobjects.com/zos/rmsportal/JiqGstEfoWAOHiTxclqi.png"
                                />
                            }
                        >
                            <Meta
                                avatar={
                                  <Avatar
                                  src="https://joeschmoe.io/api/v1/random"/>}
                                  description={remark.content material}
                            />
                        </Card>
                    </Col>
                ))
                }
            </Row>
        </>
    );
}
Allow" } animations
</Button>
</Type.Merchandise>
</Type>
<Row gutter={[16, 24]} ref={mum or dad}>
{feedback.map((remark) => (
<Col span={6} key={remark.content material}>
<Card
type={{
width: 100,
}}
cowl={
<img
alt="instance"
src="https://gw.alipayobjects.com/zos/rmsportal/JiqGstEfoWAOHiTxclqi.png"
/>
}
>
<Meta
avatar={
<Avatar
src="https://joeschmoe.io/api/v1/random"/>}
description={remark.content material}
/>
</Card>
</Col>
))
}
</Row>
</>
);
}
Right here, we now have used our earlier instance by including allow and disable choices to it. Animation is managed by the allow boolean prop handed to the useAutoAnimate hook.
Now, we’ll see the next output after we run the element:
AutoAnimate is a zero-config utility that additionally supplies an choice to customise the default animation keyframes and use customized animations. Nonetheless, AutoAnimate’s default animation choices will sometimes be sufficient for many elements in my expertise.
N.B., observe: You will discover the whole code of this tutorial on this CodeSandbox
Conclusion
AutoAnimate makes animation quite simple with its zero-config method, ease of use, and speedy implementation — it helps devs effectively present easy person experiences of their tasks.
Along with the examples we’ve checked out right this moment with React, AutoAnimate additionally helps Vue, Angular, and Svelte. You will discover examples of different JavaScript frameworks within the official docs.
Let me know of your personal experiences utilizing AutoAnimate within the feedback under and thanks for studying!
Full visibility into manufacturing React apps
Debugging React functions might be troublesome, particularly when customers expertise points which are exhausting to breed. If you happen to’re focused on monitoring and monitoring Redux state, routinely surfacing JavaScript errors, and monitoring gradual community requests and element load time, attempt LogRocket. 

LogRocket is sort of a DVR for internet and cell apps, recording actually the whole lot that occurs in your React app. As an alternative of guessing why issues occur, you possibly can combination and report on what state your utility was in when a problem occurred. LogRocket additionally displays your app’s efficiency, reporting with metrics like shopper CPU load, shopper reminiscence utilization, and extra.
The LogRocket Redux middleware package deal provides an additional layer of visibility into your person periods. LogRocket logs all actions and state out of your Redux shops.
Modernize the way you debug your React apps — begin monitoring without cost.
