
Astro lately introduced assist for MDX and Vite 3.0 of their launch of Astro 1.0, two essential integrations that put them on the high of their sport for constructing static websites. Vite is an improve to their inner engine, offering quick builds and a greater improvement expertise, and MDX for extending Markdown capabilities that cater to interactive, text-based content material.
On this article, you’ll discover ways to construct a weblog utilizing Astro and MDX. We’ll cowl:
Stipulations
- Working data of JavaScript and/or JavaScript frameworks
- Data of Markdown syntax
What’s Astro?
Astro is a strong static website generator that permits you to create extremely performant web sites utilizing the JavaScript frameworks and love. Astro is static-first, with progressive enhancement, that means that, by default, it ships zero JavaScript to the browser till required.
What’s Vite?
Vite is a next-gen JavaScript construct device that simplifies how frontend net functions are constructed and developed. Different widespread JavaScript construct instruments, equivalent to Webpack and Rollup, clear up the issue of asset bundling and serving code regionally throughout improvement.
Nonetheless, Vite approaches the issue in a different way by leveraging native browser ES modules to load JavaScript code immediately within the browser. This manner, irrespective of the variety of dependencies or code added to your challenge, you continue to get prompt builds.
What’s MDX?
MDX is a device that permits you to prolong the capabilities of Markdown by leveraging the facility of JSX. You possibly can import and use interactive parts equivalent to charts, alerts, and extra. You possibly can even create reusable MDX parts. MDX opens up new prospects for creating written content material.
Astro app setup
Create a challenge utilizing the Astro CLI by first operating the next command in your terminal:
npm create [email protected]
Observe the step-by-step terminal prompts to complete the setup in accordance with your preferences.
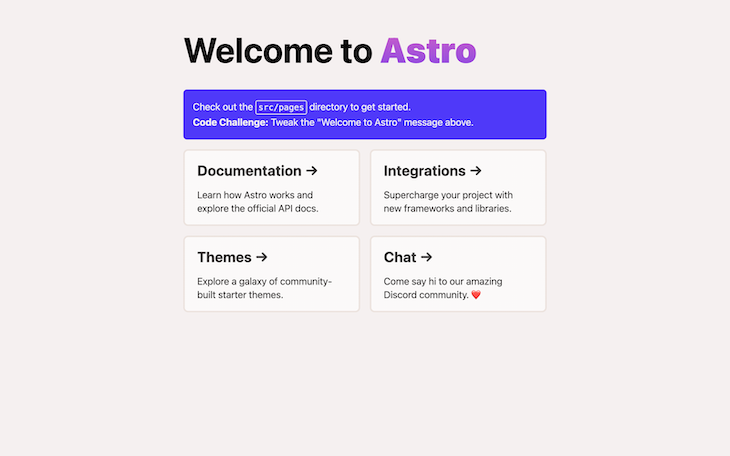
As soon as that’s carried out, cd into the challenge listing and run the command beneath to begin an Astro dev server at http://localhost:3000:
npm run dev
Open your browser and navigate to http://localhost:3000. It is best to see the next in your display screen:
Now, set up MDX utilizing the command beneath, relying in your package deal supervisor:
# Utilizing NPM
npx astro add mdx
# Utilizing Yarn
yarn astro add mdx
# Utilizing PNPM
pnpm astro add mdx
Settle for all of the prompts to finish the combination inside your Astro software and restart your improvement server.
By default, Astro has assist for Markdown information and may construct routes/pages from Markdown information (.md) within the src/pages folder. However by including the MDX integration, you need to use .mdx information within the folder to generate pages in your app.
Writing MDX code into our Astro app
MDX doesn’t have any particular syntax as a result of it’s only a mixture of Markdown and JSX. You possibly can write JSX, Markdown, JavaScript expressions, and import and export statements.
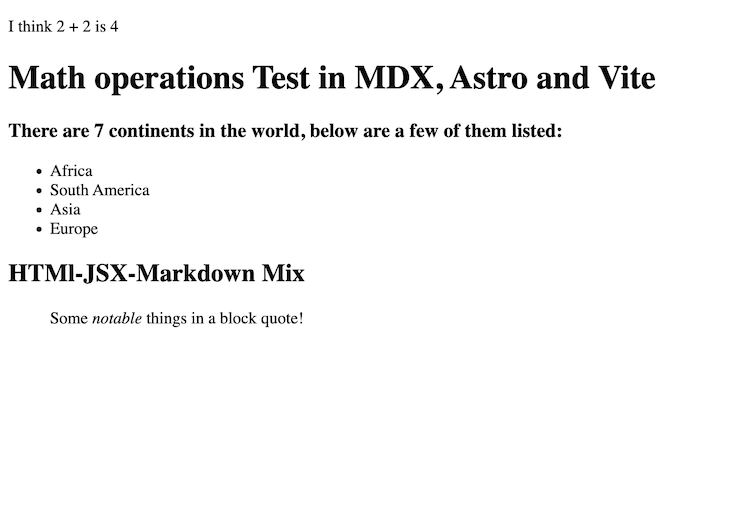
To get a really feel for what writing MDX code is like, create a file in your challenge’s src/pages listing, give it no matter title you need, and finish the file extension with .mdx. Then paste within the following block of code:
export const continents = ['Africa', 'South America', 'Asia', 'Europe']
I believe 2 + 2 is {2+2}

# Math operations Check in MDX, Astro and Vite
### There are 7 continents on the earth, beneath are a number of of them listed:
<ul>
  {continents.map((continent) => (
    <li>{continent}</li>
  ))}
</ul>
## HTMl-JSX-Markdown Combine
<div>
  > Some *notable* issues in a block quote!
</div>
While you navigate to the title of your web page, it is best to see the next output in your browser:
Making a weblog with MDX and Astro
On this tutorial, we’re constructing a weblog utilizing MDX and Astro.
Whereas creating the weblog, you’ll:
- Use MDX to create text-based content material
- Create a format for the
weblogandput uppages - Add interactive parts to MDX
- Use
frontmatterin Astro to go information to Astro layouts - Fetch all Markdown information regionally utilizing the
Astro.glob()methodology for show
Creating the weblog put up format
Navigate to the src/layouts folder and create a brand new format referred to as PostLayout.astro and paste within the following code:
---
import BaseHead from "../parts/BaseHead.astro";
import Header from "../parts/Header.astro";
import Footer from "../parts/Footer.astro";

const {
  frontmatter: { title, description, pubDate, picture, creator },
} = Astro.props;
---
<html lang="en">
  <head>
    <BaseHead title={title} description={description} />
    <fashion>
      .title {
        font-size: 2em;
        margin: 0.25em 0 0;
      }
      hr {
        border-top: 1px stable #ddd;
        margin: 1rem 0;
      }
    </fashion>
  </head>
  <physique>
    <Header />
    <important>
      <article>
        <div class="article-head">
          <h1 class="title">{title}</h1>
          <em>Written by: {creator}</em>
        </div>
        <div class="article-body">
          {picture && <img width={720} top={360} src={picture} alt="" />}
          Revealed on: {pubDate && <time>{pubDate}</time>}
          <hr />
          <slot />
        </div>
      </article>
    </important>
    <div class="footer-container">
      <Footer />
    </div>
    <fashion>
      html {
        min-height: 100vh;
        top: 100%;
      }
      physique {
        top: 100%;
      }
      time {
        show: inline-block;
        margin-top: 10px;
      }
    </fashion>
  </physique>
</html>
Let’s analyze the contents of the code block above.
First, there are a number of element imports on the high of the file that don’t exist but. We’ll get to create them quickly:
- The
BaseHeadelement goes to comprise all of the HTML<head></head>properties for the format - The
Headerelement will comprise the navigation hyperlinks on the high of the web page for going between routes - The
Footerelement will comprise the footer for the format - The
<slot/>element on line 37 is used to inject the remainder of the textual content content material from the Markdown file into the format
Astro supplies Markdown and MDX pages with a frontmatter property that can be utilized to outline “metadata” that may describe the file.
Within the PostLayout.astro file, the frontmatter prop handed by every Markdown/MDX file might be accessed to extract the metadata outlined within the file. On line 8, the frontmatter property supplied by Astro.props is then destructured to reveal the variables for the template.
Now, let’s add the code for the lacking imported parts.
For every of the code blocks beneath, create the corresponding file within the parts folder and paste within the code from the corresponding code block:
For Header.astro :
<header>
  <nav>
    <a href="https://weblog.logrocket.com/">House</a>
    <a href="http://weblog.logrocket.com/weblog">Weblog</a>
  </nav>
</header>
<fashion>
  header {
    margin: 2em 4em 2em;
  }
  h2 {
    margin: 0.5em 0;
  }
</fashion>
For Footer.astro :
---
const at the moment = new Date();
---
<footer>
© {at the moment.getFullYear()} YOUR NAME HERE. All rights reserved.
</footer>
<fashion>
footer {
padding: 25px;
text-align: heart;
}
</fashion>
And eventually, for BaseHead.astro:
---
// Import the worldwide.css file right here in order that it's included on
// all pages by the usage of the <BaseHead /> element.
import "../types/world.css";

const { title, description } = Astro.props;
---
<!-- World Metadata -->
<meta charset="utf-8" />
<meta title="viewport" content material="width=device-width,initial-scale=1" />
<hyperlink rel="icon" sort="picture/svg+xml" href="https://weblog.logrocket.com/favicon.svg" />
<meta title="generator" content material={Astro.generator} />
<!-- Major Meta Tags -->
<title>{title}</title>
<meta title="title" content material={title} />
<meta title="description" content material={description} />
There’s additionally a lacking import: ../types/world.css. Let’s shortly create the file and add types to it.
Within the src folder, create a types folder with a file named world.css and add the next code:
/*
  The CSS on this fashion tag relies off of Bear Weblog's default CSS. https://github.com/HermanMartinus/bearblog/blob/297026a877bc2ab2b3bdfbd6b9f7961c350917dd/templates/types/weblog/default.css
  License MIT: https://github.com/HermanMartinus/bearblog/blob/grasp/LICENSE.md
 */
physique {
  font-family: Verdana, sans-serif;
  margin: auto;
  padding: 20px;
  text-align: left;
  background-color: #fff;
  word-wrap: break-word;
  overflow-wrap: break-word;
  line-height: 1.5;
  shade: #444;
  width: 100%;
}
.article-head {
  margin-left: 4em;
  margin-bottom: 50px;
}
.article-body {
  max-width: 65ch;
  margin: 0 auto;
}
h1,
h2,
h3,
h4,
h5,
h6,
robust,
b {
  shade: #222;
}
a {
  shade: #222;
}
nav a {
  margin-right: 10px;
}
textarea {
  width: 100%;
  font-size: 16px;
}
enter {
  font-size: 16px;
}
content material {
  line-height: 1.6;
}
desk {
  width: 100%;
}
img {
  max-width: 100%;
  top: auto;
}
code {
  padding: 2px 5px;
  background-color: #f2f2f2;
}
pre {
  padding: 1rem;
}
pre > code {
  all: unset;
}
blockquote {
  border: 1px stable #999;
  shade: #222;
  padding: 2px 0px 2px 20px;
  margin: 0px;
  font-style: italic;
}
Making a Markdown weblog put up
To check the format, create a .mdx file and add some content material. To do that, navigate to the pages folder, create a put up folder, add the primary weblog put up named first-post.mdx, after which paste within the code beneath. Be happy to tweak it and alter the property values:
---
format: ../../layouts/PostLayout.astro
title: "Astro, Vite and MDX check"
description: "Lorem ipsum dolor sit amet"
creator: "Iniubong Obonguko"
pubDate: "20 Aug, 2022"
picture: "https://photos.unsplash.com/photo-1664380619395-a25d867b5fb9?crop=entropy&cs=tinysrgb&match=max&fm=jpg&q=80&w=1080"
slug: "first-post"
---
## Story about Outdated days
Within the olden days, Lorem ipsum dolor sit amet, consectetur adipiscing elit, sed do eiusmod tempor incididunt ut labore et dolore magna aliqua. Vitae ultricies leo integer malesuada nunc vel risus commodo viverra. Adipiscing enim eu turpis egestas pretium. Euismod elementum nisi quis eleifend quam adipiscing. In hac habitasse platea dictumst vestibulum. Sagittis purus sit amet volutpat. Netus et malesuada fames ac turpis egestas. Eget magna fermentum iaculis eu non diam phasellus vestibulum lorem. Varius sit amet mattis vulputate enim. Habitasse platea dictumst quisque sagittis. Integer quis auctor elit sed vulputate mi. Dictumst quisque sagittis purus sit amet.

## Conclusion
Morbi tristique senectus et netus. Id semper risus in hendrerit gravida rutrum quisque non tellus. Habitasse platea dictumst quisque sagittis purus sit amet. Tellus molestie nunc non blandit massa. Cursus vitae congue mauris rhoncus. Accumsan tortor posuere ac ut. Fringilla urna porttitor rhoncus dolor. Elit ullamcorper dignissim cras tincidunt lobortis. In cursus turpis massa tincidunt dui ut ornare lectus. Integer feugiat scelerisque varius morbi enim nunc. Bibendum neque egestas congue quisque egestas diam. Cras ornare arcu dui vivamus arcu felis bibendum. Dignissim suspendisse in est ante in nibh mauris. Sed tempus urna et pharetra pharetra massa massa ultricies mi.
The frontmatter is all of the metadata property and values outlined between
the triple dashes (—).
On the high of the .mdx file is the place all of the frontmatter information is outlined:
- The
formatproperty defines the format of alternative, which was created earlier inPostLayout.astro - All different properties within the
frontmattercomprise “metadata” that’ll be utilized by the format to populate the web page - The remainder of the content material beneath the
frontmatteris handled as textual content content material for the weblog and is handed into the<slot/>placeholder within the format
In your browser, go to https://localhost:3000/put up/first-post and it is best to get a web page just like the one beneath:

Including interactive parts to our Astro weblog
Now, we’ll see how we are able to add interactive JavaScript-enabled parts to our weblog put up.
For this, we’ll use an Astro parts library referred to as accessible-astro-components. To proceed, we first want to put in the library. Do that by operating the code beneath in your terminal underneath the tasks folder.
npm i accessible-astro-components
Subsequent, within the first-post.mdx file beneath the frontmatter definitions, import the Accordion and AccordionItem parts:
import { Accordion, AccordionItem } from "accessible-astro-components";
Now, you need to use Accordion anyplace within the file:
{/* first-post.mdx */}
{/* Remainder of content material at high */}
...
<Accordion>
  <AccordionItem header="First Merchandise">
    <p>
      Lorem ipsum dolor sit amet consectetur adipisicing elit. Architecto quasi
      nobis optio? Qui in quo accusantium debitis sapiente obcaecati magnam
      incidunt sit. Molestiae exercitationem quibusdam quod veritatis laboriosam
      est tenetur.
    </p>
    <a href="#">Tab to me!</a>
  </AccordionItem>
  <AccordionItem header="Second Merchandise">
    <p>
      Lorem ipsum dolor sit amet consectetur adipisicing elit. Architecto quasi
      nobis optio? Qui in quo accusantium debitis sapiente obcaecati magnam
      incidunt sit. Molestiae exercitationem quibusdam quod veritatis laboriosam
      est tenetur.
    </p>
  </AccordionItem>
</Accordion>
...
{/* Remainder of content material at backside */}
The result’s:

You may as well use parts which might be particularly made for different JavaScript frameworks, equivalent to VueJS, React, and Svelte. You simply have to arrange the framework in your Astro app first after which import the specified element.
Consult with the official documentation right here for the way it’s carried out.
Create a web page in our Astro weblog
We want a weblog web page that can show all of the weblog posts in a grid.
However earlier than we get to that, let’s first create a format for the weblog web page underneath the /Structure folder and title it BlogLayout.astro. Then paste the next code into it:
---
import Header from "../parts/Header.astro";
import BaseHead from "../parts/BaseHead.astro";
const { title } = Astro.props;
---
<!DOCTYPE html>
<html lang="en">
  <BaseHead
    title="Weblog Web page"
    description="A web page to show all our weblog posts"
  />
  <physique>
    <div class="format">
      <h1>{title}</h1>
      <Header />
      <important>
        <slot />
      </important>
    </div>
    <fashion>
      physique {
        margin: 0;
        background-color: #fff;
        width: 100%;
      }
      .format {
        max-width: 1280px;
        margin: 0 auto;
      }
    </fashion>
  </physique>
</html>
Subsequent, go to the src/pages folder and create a weblog.astro file and paste within the following code:
---
import BlogLayout from "../layouts/BlogLayout.astro";
import { Card } from "accessible-astro-components";
const posts = await Astro.glob("../pages/put up/**/*.mdx");
---
<BlogLayout title="Weblog">
  <part>
    <div class="container">
      <ul>
        {
          posts.map((put up) => (
            <li>
              <Card
                url={"/put up/" + put up.frontmatter.slug}
                img={put up.frontmatter.picture}
                title={put up.frontmatter.title}
                footer={put up.frontmatter.creator}
              >
                {put up.frontmatter.description}
              </Card>
            </li>
          ))
        }
      </ul>
    </div>
  </part>
</BlogLayout>
<fashion lang="scss">
  ul {
    show: grid;
    grid-gap: 2rem;
    grid-template-columns: repeat(3, 1fr);
    list-style-type: none;
  }
</fashion>
Let’s analyze what’s occurring within the code block above:
- First,
BlogLayoutis being imported for use because the format for the web page - The
Cardelement from theaccessible-astro-componentspackage deal is imported - Astro has an
Astroworld context and has the.glob()methodology, which can be utilized to load many native information into the static website setup. On this case, all of the.mdxinformation contained within the/pages/put uplisting are being loaded and assigned to thepostsvariable - A
.mapmethodology then loops by the values within thepostsvariable, renders an inventory, and assigns the required props to theCardelement - The
slugproperty outlined on thefrontmatterproperty of the weblog file is then used to construct the URL for the cardboard element
Add one or two or extra weblog posts within the pages/put up listing to populate the weblog web page.
As soon as carried out, the weblog web page ought to appear like this:
Voila! The weblog is now full.
Conclusion
Creating interactive text-based content material utilizing Markdown syntax has by no means been simpler. By following this tutorial, you’re in your strategy to making a weblog utilizing Astro and MDX. Be happy to replace the code from this tutorial with your individual customized styling and additional options.
You may as well study extra about all of the cool options that Astro supplies with their MDX integration from the official documentation website.
Namaste.
Are you including new JS libraries to enhance efficiency or construct new options? What in the event that they’re doing the other?
There’s little question that frontends are getting extra advanced. As you add new JavaScript libraries and different dependencies to your app, you’ll want extra visibility to make sure your customers don’t run into unknown points.
LogRocket is a frontend software monitoring answer that permits you to replay JavaScript errors as in the event that they occurred in your individual browser so you possibly can react to bugs extra successfully.

LogRocket works completely with any app, no matter framework, and has plugins to log extra context from Redux, Vuex, and @ngrx/retailer. As a substitute of guessing why issues occur, you possibly can combination and report on what state your software was in when a difficulty occurred. LogRocket additionally displays your app’s efficiency, reporting metrics like shopper CPU load, shopper reminiscence utilization, and extra.
Construct confidently — Begin monitoring at no cost.
