These days, velocity and productiveness are the important thing components in beating the competitors relating to app and internet improvement. For this reason full-stack frameworks have gained recognition, offering devs with a strong base to effectively implement tasks that require each frontend and backend improvement.
On this article, we shall be evaluating two full-stack React frameworks: create-t3-app and RedwoodJS.
The previous is a CLI for full-stack Subsequent.js tasks, whereas the latter is a full-stack React framework with an built-in CLI. Each have open-source codebases on GitHub, that means anybody can discover the code and contribute.
We’ll check out the primary applied sciences they’re primarily based on, discover ways to set them up, discover the interior construct construction for each, see how you can work with frontend and backend improvement, and assessment what API options they assist.
Let’s get began.
Leap forward:
Overview
create-t3-app
One of many principal cornerstones of create-t3-stack – apart from simplicity and modularity – is sort security, due to this fact the venture requires customers to make use of TypeScript.
The venture is constructed on high of Subsequent.js, so if you’re aware of its file construction and options, it will likely be simpler to get began with create-t3-app, or T3 Stack.
The really useful styling resolution is Tailwind, which is a utility-first framework primarily based on concise courses that may be effectively composed instantly within the markup.
Prisma is usually recommended as a database shopper, whereas tRPC is obtainable because the core resolution for API calls. The consumer also can use NextAuth to hurry up the authentication for the venture.
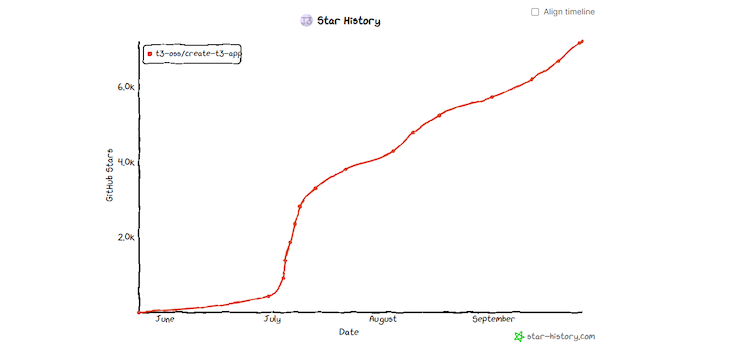
The unique creator of T3 Stack itself is Theo, and the create-t3-app CLI device was made by nexxeln. If you would like a sign of the recognition of this venture, look no additional than its progress in direction of the tip of 2022:

Spectacular, proper?
RedwoodJS
The typed syntax for RedwoodJS is elective. The consumer has an opportunity to bootstrap the venture both with Vanilla JS or TypeScript by including the --ts flag within the set up command.
RedwoodJS follows the patterns of React and isn’t additional primarily based on every other framework – the styling libraries might be optionally added with a single terminal command.
As an alternative of utilizing tRPC, RedwoodJS makes use of GraphQL for its API resolution. Equally, Prisma is used as a database shopper.
On high of that, customers can make the most of Storybook as a UI element catalog, take a look at all the code paths with Jest, and do logging with Pino.
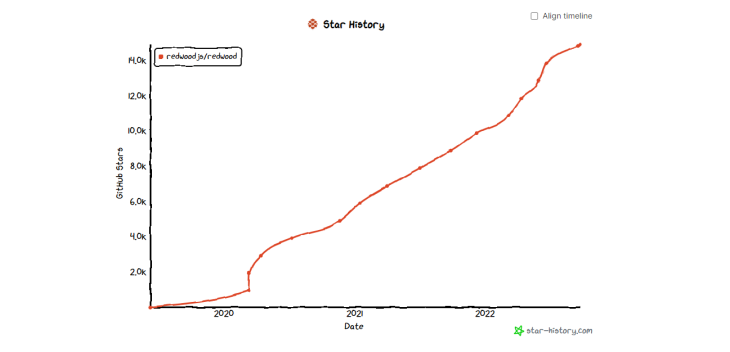
RedwoodJS was based by Tom Preston-Werner, Peter Pistorius, Rob Cameron, and David Value. It has grown steadily since 2020, reaching 14K+ stars in about 3 years:
Setup
create-t3-app
To arrange a create-t3-app venture, customers can use both npx, yarn, or pnpm by working the next instructions within the terminal, respectively:
lang=bash
npx [email protected]
yarn create t3-app
pnpm dlx [email protected]
For the aim of this text, we’ll use npx. Run npx [email protected] t3app in your terminal.
That can take you thru a easy terminal wizard, asking you to configure the venture. We’ll choose all of the out there applied sciences within the wizard, that are; Prisma, tRCP, NextAuth, and Tailwind.
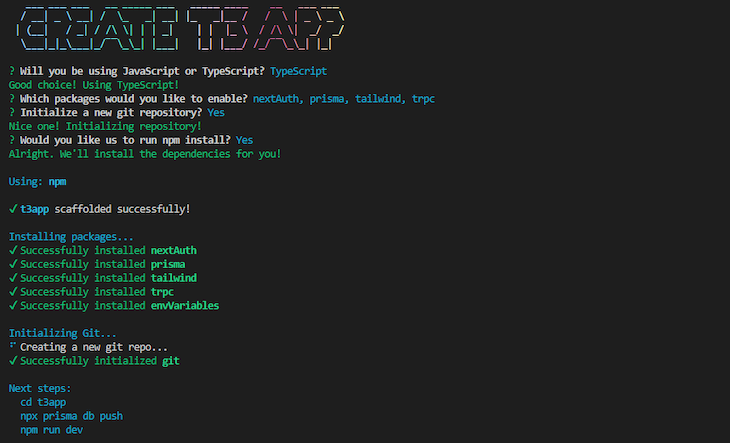
As soon as the setup is full, change the working listing to the newly created venture folder by cd t3app, then push the Prisma database occasion by way of npx prisma db push and run npm run dev to start out the event server.
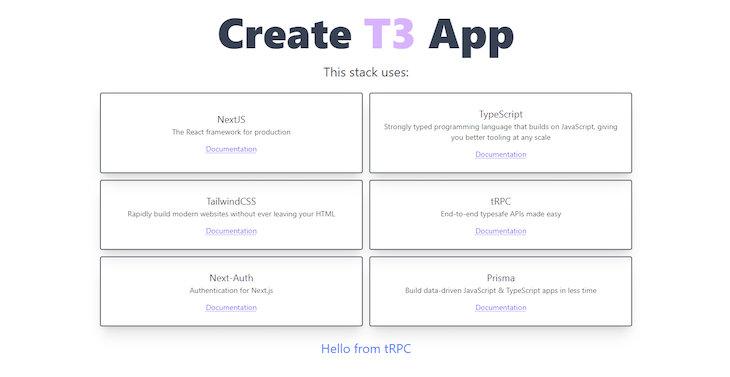
To preview the applying, open your browser, paste http://localhost:3000 within the URL bar, and execute. You have to be offered with this:
RedwoodJS
Establishing RedwoodJS is equally easy, though there are some differing nuances. For RedwoodJS, yarn is a requirement, there isn’t any interactive terminal wizard, and by default the app runs on a distinct port.
Run yarn create redwood-app --ts ./redwoodapp to start out the setup:
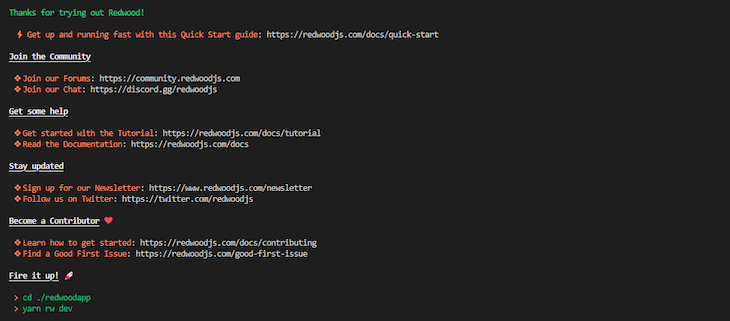
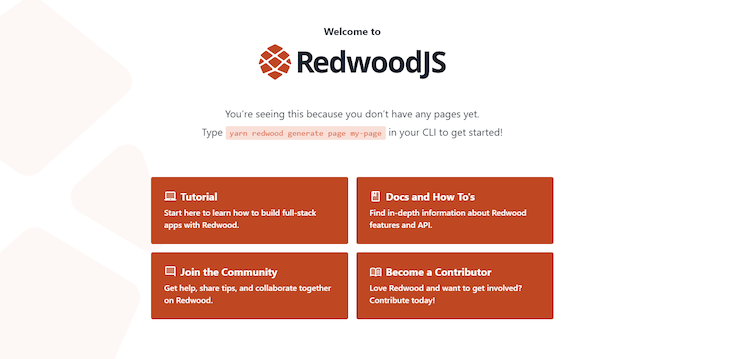
As soon as the set up is full, change the working listing into the newly created folder by way of cd ./redwoodapp and run yarn rw dev to start out the event server.
It ought to carry up your default browser and current you with the RedwoodJS welcome web page. If this doesn’t occur, enter http://localhost:8910 in your browser URL and execute:
File construction
create-t3-app
On the root degree, each the frontend and backend stay within the src folder. The one issues which are separated are the database schema within the prisma folder and the public property like favicon, pictures, audio, and associated recordsdata.
Extra nice articles from LogRocket:
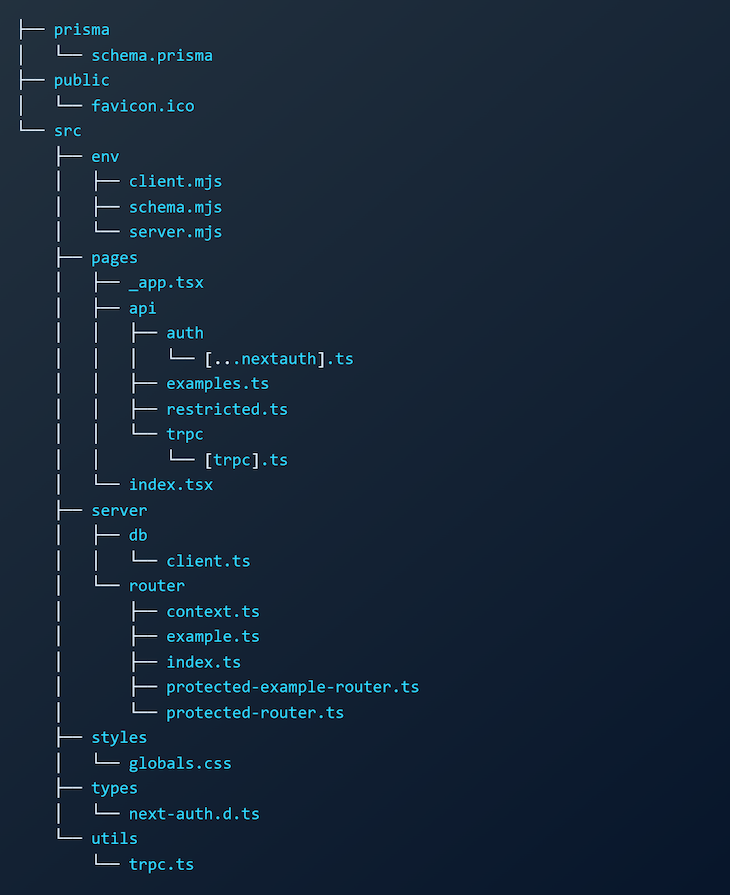
The src folder is additional divided into six subfolders: env, pages, server, types, sorts, and utils.
- The
envfolder comprises the code to make sure the app is constructed with legitimate env vars pagesis used to create new pages and API endpointsserverholds the details about the database shopper and the router configurationtypesis for the exterior stylesheet recordsdatasortsis for NextAuth sort definitionsutilsis for extra tRCP configuration
The general schema of the file system ought to appear to be this:
RedwoodJS
In RedwoodJS, the frontend is totally separated from the backend. All of the frontend code is saved within the internet folder, whereas the backend code is within the api folder.
The frontend is then divided additional into the public folder, which holds all the general public property for the app, and the src folder, which is additional divided into elements, layouts, and pages that enable the consumer to create particular person elements and customary layouts and import them into the pages.
The remainder of the person recordsdata within the src folder are supposed to implement the root-level logic of the applying, type it and supply the routing between pages.
The backend is additional divided into:
- A
dbfolder for database schema - A
distfolder for compiled code - A
sortsfolder for compiled GraphQL sorts - The
srcfolder
The src folder is then additional divided into directives for GraphQL schema directives:
featuresfor lambda features generated by Redwoodgraphqlfor GraphQL schemalibfor configuring auth, database, and loggingprovidersfor enterprise logic associated to your information
The general schema of the file system seems to be as follows:

Frontend
create-t3-app
Since create-t3-app relies on the Subsequent.js file construction; all of the pages are saved as a separate file within the pages folder.
When you give the file a reputation, it mechanically turns into a route. For navigating between pages, you should use the built-in Hyperlink element.
To create a brand new web page take a look at that hyperlinks again to the house, you’ll be able to create take a look at.tsx within the src folder and embrace the next code:
lang=typescript
import sort { NextPage } from "subsequent";
import Hyperlink from "subsequent/hyperlink";

const Take a look at: NextPage = () => {
  return (
    <>
      <ul className="flex">
        <li className="mr-6">
          <Hyperlink href="https://weblog.logrocket.com/">
            <a>Again to residence</a>
          </Hyperlink>
        </li>
        <li className="mr-6">
          <Hyperlink href="http://weblog.logrocket.com/take a look at">
            <a>Take a look at</a>
          </Hyperlink>
        </li>
      </ul>
      <p>This can be a take a look at web page</p>
    </>
  );
};

export default Take a look at;
We selected to put in Tailwind within the setup wizard and already used it within the code snippet above to configure the flex structure for navigation.
With a purpose to preview the end result, open your browser and navigate to http://localhost:3000/take a look at.

RedwoodJS
To create a brand new web page in RedwoodJS, it is strongly recommended to make use of their scaffold command yarn redwood generate web page take a look at, the place take a look at can be your required web page title and route.
It can mechanically create a brand new file internet/src/pages/Testpage/Testpage.tsx with the next code:
lang=typescript
import { Hyperlink, routes } from '@redwoodjs/router'
import { MetaTags } from '@redwoodjs/internet'

const TestPage = () => {
  return (
    <>
      <MetaTags title="Take a look at" description="Take a look at web page" />
      <p>
        Discover me in <code>./internet/src/pages/TestPage/TestPage.tsx</code>
      </p>
      <p>
        This route is known as <code>take a look at</code>, hyperlink to me by way of `
        <Hyperlink to={routes.take a look at()}>Take a look at</Hyperlink>`
      </p>
      <p>
        The hyperlink to residence `<Hyperlink to={routes.residence()}>Again to House</Hyperlink>`
      </p>
    </>
  )
}

export default TestPage
Discover that the routing is imported from @redwoodjs/router after which the trail identify is used as a way on the routes. For the residence route, you’ll first create a brand new web page by way of yarn redwood generate web page residence / after which use the routes.residence() technique.
The scaffold command may also populate the internet/src/pages/TestPage with two further recordsdata: TestPage.take a look at.tsx for testing functions and TestPage.tales.tsx for permitting you to work with Storybook.
If you need to type the web page with Tailwind, you’ll first must run yarn rw setup ui tailwind after which use it as in every other React app.
With a purpose to preview the end result, open your browser and navigate to http://localhost:8910/take a look at.

Database
create-t3-app
The prompt means of dealing with the communication between the app and the database is by way of the Prisma shopper.
To do that, create-t3-app already has a bootstrapped scheme, which is obtainable in prisma/schema.prisma. For the aim of this tutorial, open it and embrace the code:
lang=prisma scheme language (PSL)
generator shopper {
    supplier = "prisma-client-js"
}

datasource db {
    supplier = "sqlite"
    url      = env("DATABASE_URL")
}

mannequin Publish {
    id    Int   @id @default(autoincrement())
    title String?
}
To save lots of any adjustments within the Prisma schema, run a migration utilizing the command npx prisma migrate dev --name init. The --name flag permits you to assign the migration identify proper from the terminal command.
That can create the migrations folder contained in the prisma listing, together with the migrations file with SQL instructions to replace the database.
After the migration is full, generate the Prisma shopper by way of npx prisma generate.
Now, you’ll be able to view the database in Prisma studio. You may entry it by working npx prisma studio, which can begin it on http://localhost:5555.
RedwoodJS
Redwood makes use of Prisma because the ORM as effectively, so it follows an identical construction for the scheme.
The one distinction is that in RedwoodJS it’s situated at api/db/schema.prisma. For the aim of this tutorial, open it and embrace the code:
lang=prisma scheme language (PSL)
datasource db {
  supplier = "sqlite"
  url      = env("DATABASE_URL")
}

generator shopper {
  supplier      = "prisma-client-js"
  binaryTargets = "native"
}

mannequin Publish {
  id    Int   @id @default(autoincrement())
  title  String?
}
Emigrate the adjustments within the schema, you must run yarn rw prisma migrate dev --name init. It can create a brand new path, api/db/migrations, and embrace the SQL file with queries to replace the database in accordance with the schema.
Equally, it is best to be capable of entry the Prisma studio. Run yarn rw prisma studio and it ought to begin it on http://localhost:5555 if the port is obtainable.

Server aspect
create-t3-app
The communication with the backend in create-t3-app is offered by way of tRPC. To provide you an thought of the way it works, we’ll create a easy learn performance for the posts within the database.
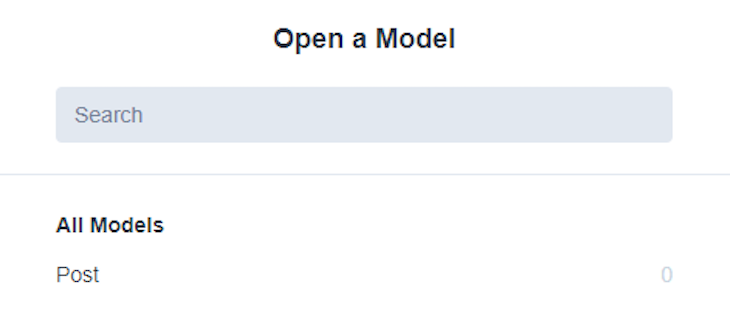
First, open the Prima studio and create just a few data within the Publish desk so we’ve got some pattern information to work with:
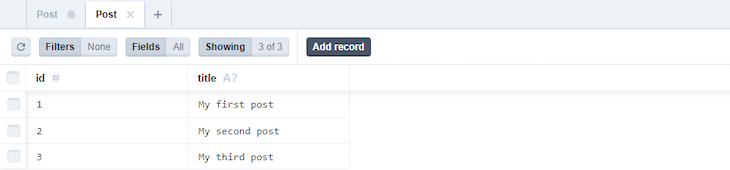
Then, create a brand new file /src/server/router/submit.ts, initialize a brand new postRouter occasion, use the question() technique so as to add an all endpoint to the router, and question all of the posts by way of Prisma’s findMany() technique:
lang=typescript
import { prisma } from "../db/shopper";
import { createRouter } from "./context";

export const postRouter = createRouter().question("all", {
  async resolve() {
    return prisma.submit.findMany();
  },
});
After that, import the postRouter in /src/server/router/index.ts and merge all routers right into a single appRouter by way of merge() technique:
lang=typescript
import { createRouter } from "./context";
import superjson from "superjson";

import { postRouter } from "./submit";

export const appRouter = createRouter()
  .transformer(superjson)
  .merge("submit.", postRouter);

export sort AppRouter = typeof appRouter;
To show the posts, use the useQuery() technique and entry the all endpoint of the posts, after which map via the obtained information. To attain this, change the /src/pages/index.tsx to the next code:
lang=typescript
import sort { NextPage } from "subsequent";
import { trpc } from "../utils/trpc";

const House: NextPage = () => {
  const { information, isLoading } = trpc.useQuery(["post.all"]);

  if (isLoading) {
    return <p>Loading...</p>;
  }

  return (
    <div>
      {information?.map((submit, index: quantity) => {
        return <p key={index}>{submit.title}</p>;
      })}
    </div>
  );
};

export default House;
With a purpose to preview the end result, open your browser and navigate to http://localhost:3000.

We are able to additionally make use of the api folder within the pages listing.
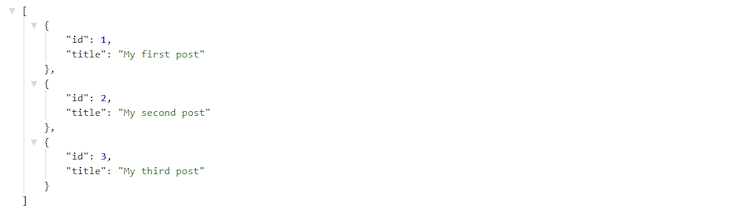
Create a brand new file, /src/pages/api/posts.ts and embrace the next code, which can create an API endpoint on posts and fetch all of the posts:
lang=typescript
import sort { NextApiRequest, NextApiResponse } from "subsequent";
import { prisma } from "../../server/db/shopper";

const posts = async (req: NextApiRequest, res: NextApiResponse) => {
  const posts = await prisma.submit.findMany();
  res.standing(200).json(posts);
};

export default posts;
Now, open your browser and navigate to http://localhost:3000/api/posts, and it is best to be capable of retrieve the information within the JSON format:
RedwoodJS
RedwoodJS provides a scaffold command to create a primary CRUD operation boilerplate with the devoted route.
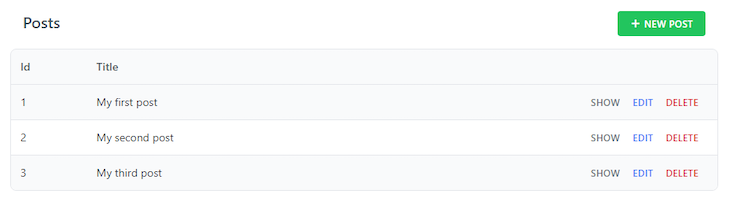
To do that, run yarn rw g scaffold submit. The submit is the identify of the route – be sure you have the corresponding mannequin with the identical identify within the Prisma schema file.
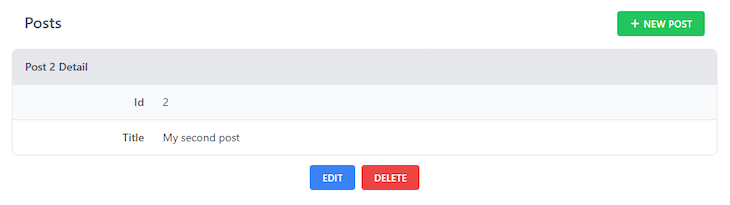
After that, navigate to http://localhost:8910/posts and it is best to see a web page with create, learn, replace, and delete performance.
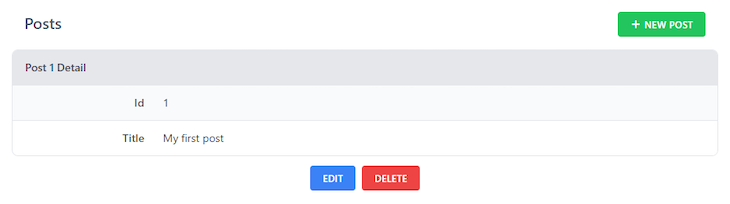
Ensure that so as to add some data after which view the primary entry individually. You have to be taken to http://localhost:8910/posts/1.
To know how the backend works, we’ll take a more in-depth take a look at how the information was fetched from the database.
First, by working the scaffold command at first, a brand new file internet/src/elements/PostCell/PostCell.tsx was created that makes use of GraphQL to fetch the information:
lang=typescript
import sort { FindPostById } from 'sorts/graphql'

import sort { CellSuccessProps, CellFailureProps } from '@redwoodjs/internet'

import Publish from 'src/elements/Publish/Publish'

export const QUERY = gql`
  question FindPostById($id: Int!) {
    submit: submit(id: $id) {
      id
      title
    }
  }
`

export const Loading = () => <div>Loading...</div>

export const Empty = () => <div>Publish not discovered</div>

export const Failure = ({ error }: CellFailureProps) => (
  <div className="rw-cell-error">{error?.message}</div>
)

export const Success = ({ submit }: CellSuccessProps<FindPostById>) => {
  return <Publish submit={submit} />
}
Then the element was imported within the internet/src/pages/submit/PostPage/PostPage.tsx and the precise submit ID from the URL bought handed to the GraphQL as a prop to question the actual submit:
lang=typescript
import PostCell from 'src/elements/Publish/PostCell'

sort PostPageProps = {
  id: quantity
}

const PostPage = ({ id }: PostPageProps) => {
  return <PostCell id={id} />
}

export default PostPage
To try it out, attempt to change between http://localhost:8910/posts/1 to http://localhost:8910/posts/2 and see the adjustments.
Conclusion
Create-t3-app is constructed on high of Subsequent.js, that means the builders get a closely optimized setting to work with. By setting TypeScript as a requirement, create-t3-app additionally makes certain it will likely be simpler to detect errors within the app. In Redwood, the typed syntax is elective, by comparability.
Each are simple to arrange, although create-t3-app provides extra flexibility to configure what applied sciences the consumer desires to incorporate via the setup wizard. As compared, in RedwoodJS, the consumer is required to work with GraphQL, and Storybook is already built-in.
If you’re a fan of scaffolding, RedwoodJS might assist to hurry up the event course of when there are many pages, layouts, elements, and routes to create. It permits customers to create primary CRUD performance rapidly.
Total, I’d suggest crete-t3-app for these which are robust advocates of TypeScript, like to work with Subsequent.js, and need extra flexibility.
For these searching for elective Vanilla JS assist, desire to work with GraphQL, and wish fast scaffolding, RedwoodJS might be a great match to your tasks.
Full visibility into manufacturing React apps
Debugging React functions might be tough, particularly when customers expertise points which are exhausting to breed. If you happen to’re all in favour of monitoring and monitoring Redux state, mechanically surfacing JavaScript errors, and monitoring gradual community requests and element load time, attempt LogRocket. 

LogRocket is sort of a DVR for internet and cell apps, recording actually every little thing that occurs in your React app. As an alternative of guessing why issues occur, you’ll be able to mixture and report on what state your utility was in when a difficulty occurred. LogRocket additionally screens your app’s efficiency, reporting with metrics like shopper CPU load, shopper reminiscence utilization, and extra.
The LogRocket Redux middleware bundle provides an additional layer of visibility into your consumer periods. LogRocket logs all actions and state out of your Redux shops.
Modernize the way you debug your React apps — begin monitoring without cost.
