
On this tutorial, we’ll check out the React Native Ignite boilerplate. Particularly, we’ll be constructing an app with it. By the top of this tutorial, you must be capable of use Ignite in your personal React Native tasks.
We’ll cowl the next matters:
- Creating a brand new React Native mission with Ignite
- Ignite folder construction
- Mills to hurry up improvement
- Design system
- Customized parts
- Navigation with React Navigation
- MobX-state-tree for state administration
- Reactotron for debugging
- Storybook for isolating element improvement
- Jest for testing knowledge retailer
- Detox for end-to-end testing
Desk of contents
Conditions
This tutorial assumes that you have already got expertise in creating React Native apps and that your machine is already arrange with the React Native improvement setting.
Ignite makes use of TypeScript, so data of TypeScript shall be helpful, although you must be capable of observe this tutorial with none TypeScript expertise.
What’s Ignite?
Ignite is a boilerplate for React Native tasks. It was created by the staff at Infinite Purple primarily as a result of they use React Native of their tasks. Because of this Ignite accommodates all the very best practices they apply to their very own tasks.
You’ll be able to be taught extra about Ignite from their documentation.
Creating a brand new React Native mission with Ignite
To start out off, you’ll be able to create a brand new Ignite mission utilizing the next command:
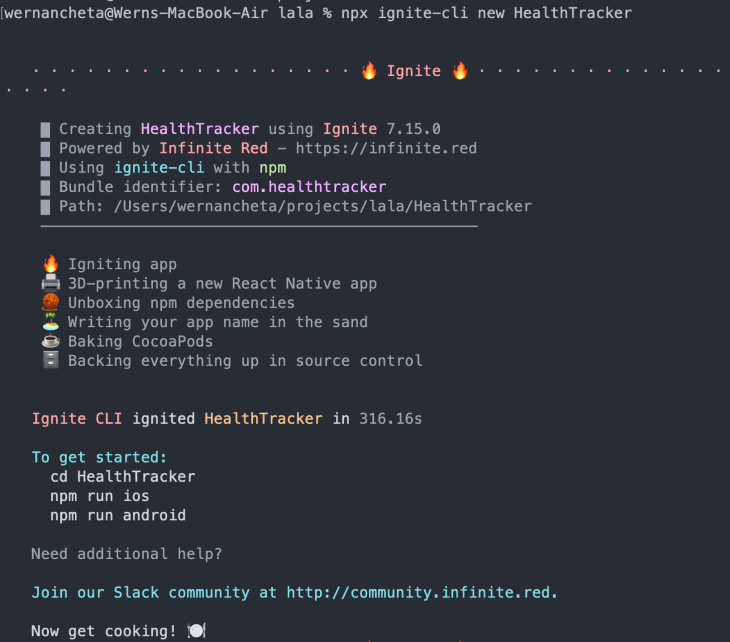
npx ignite-cli new HealthTracker
It will generate a brand new React Native mission with all of the performance I discussed within the intro. Observe that this may generate a naked React Native mission. If you wish to use Expo as a substitute, then specify the --expo possibility like so:
npx ignite-cli new HealthTracker --expo
That is what it appears to be like like if you generate a brand new mission:
If in case you have bother with the set up, remember to try the troubleshooting part on their GitHub repo. Personally, I encountered a difficulty when initializing an Ignite mission as a result of I didn’t have the LTS model of Node put in. On the time of writing, it’s at model 16.6.0.
As soon as put in, now you can run the app similar to you’d in a naked React Native mission:
npx react-native run-android
npx react-native run-ios
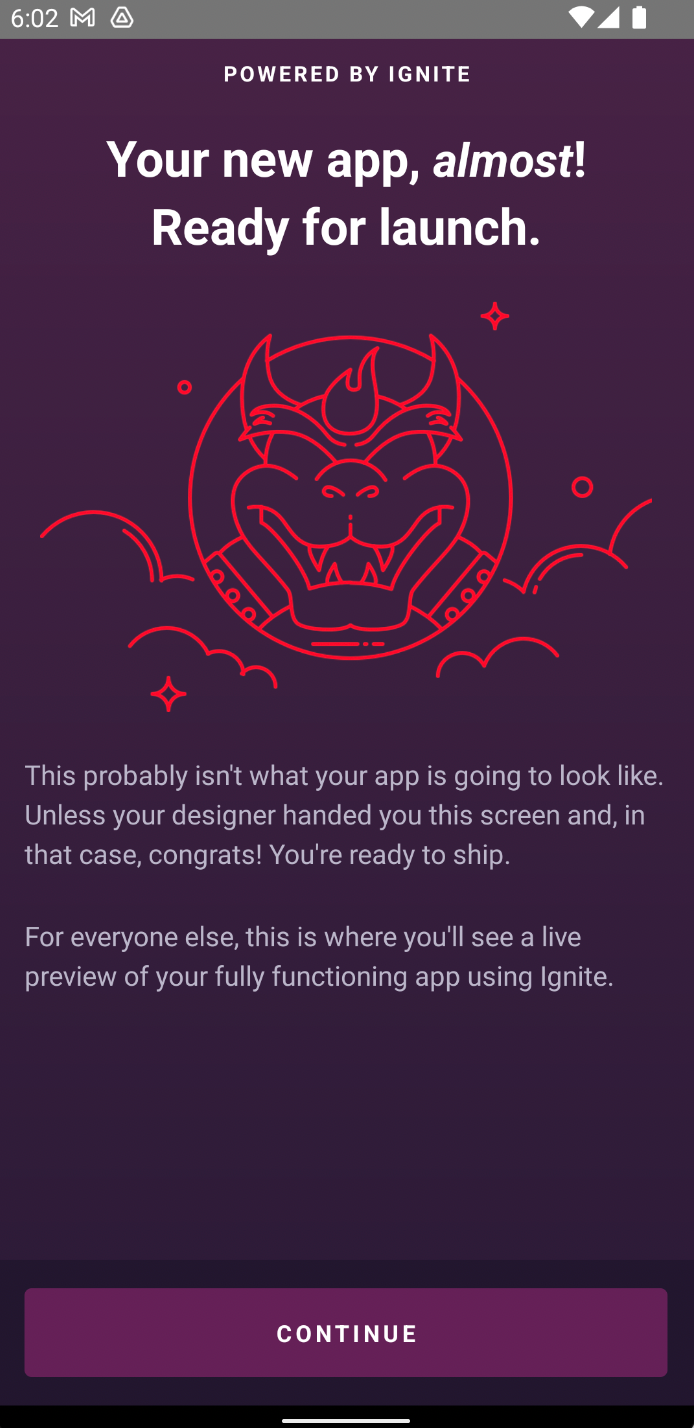
You need to be greeted with this welcome display:
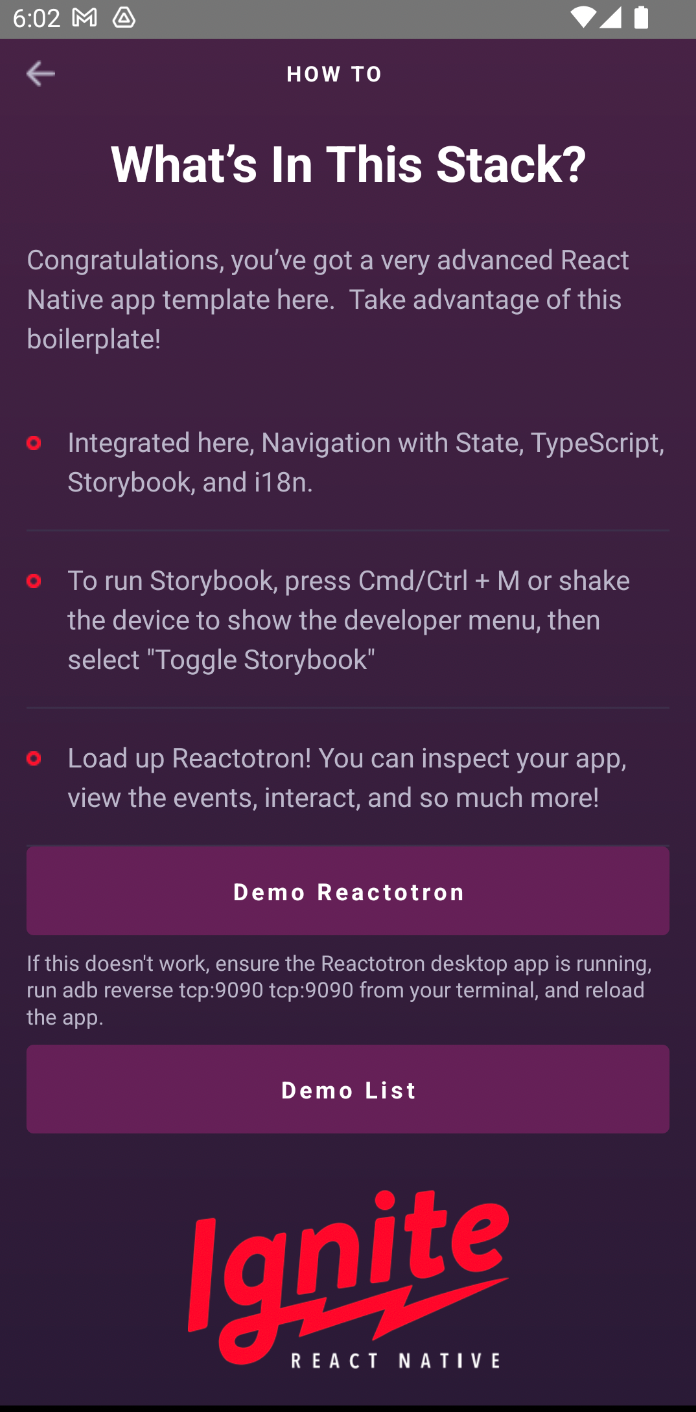
If you press Proceed, it is going to present a fast information on use it:
Further dependencies
Other than the Ignite dependencies, the app itself depends on the next libraries as properly:
Right here’s the command to put in all of these:
npm set up date-fns random-id @react-navigation/bottom-tabs react-native-vector-icons
Don’t overlook to observe further directions on arrange the library. These are often indicated of their GitHub repo, which I’ve linked to above.
Ignite folder construction
The next folders shall be current in your newly generated Ignite mission. It is going to have already got some recordsdata on it. Most of it we don’t want for our mission, nevertheless it’s helpful to go away it there as a reference whereas constructing the app.
app— that is the place your navigators, config, parts, screens, theme, utils, and all the things else that has to do along with your app straight will resideparts— that is the place all of the parts will reside. Every element has its personal folder and accommodates each the element file and its story file. If there’s any asset that’s solely particular to the element, they will reside right here as properlyi18n— accommodates the interpretation recordsdata on your appfashions— all of your app fashions and their take a look at file will reside right here. If in case you have different recordsdata associated to the mannequin corresponding to varieties, they need to reside right here as properlynavigators— that is the place all of the navigators and navigation utilities will residescreens— that is the place all of the display parts will reside. Every display has its personal folder. Any recordsdata which can be required straight by the display must be added throughout the similar foldertheme— that is the place the app theme lives. This consists of the fonts, typography, shade, and spacingutils— the place helpers and utilities used all through all the app are positionedapp.tsx— the entry level to the app
bin— accommodates the setup and publish set up scripts utilized by Ignite if you initialize a brand new appe2e— that is the place you’ll put all of the recordsdata that need to do with Detox end-to-end testingignite— accommodates all of the Ignite generator templatesstorybook— that is the place all of the Storybook config and tales will residetake a look at— accommodates the Jest config and mocks
Challenge overview
Now that every one the fundamentals have been taken care of, let’s now check out what we’ll be constructing on this tutorial. We’ll be constructing a easy health-tracking app that has three screens.
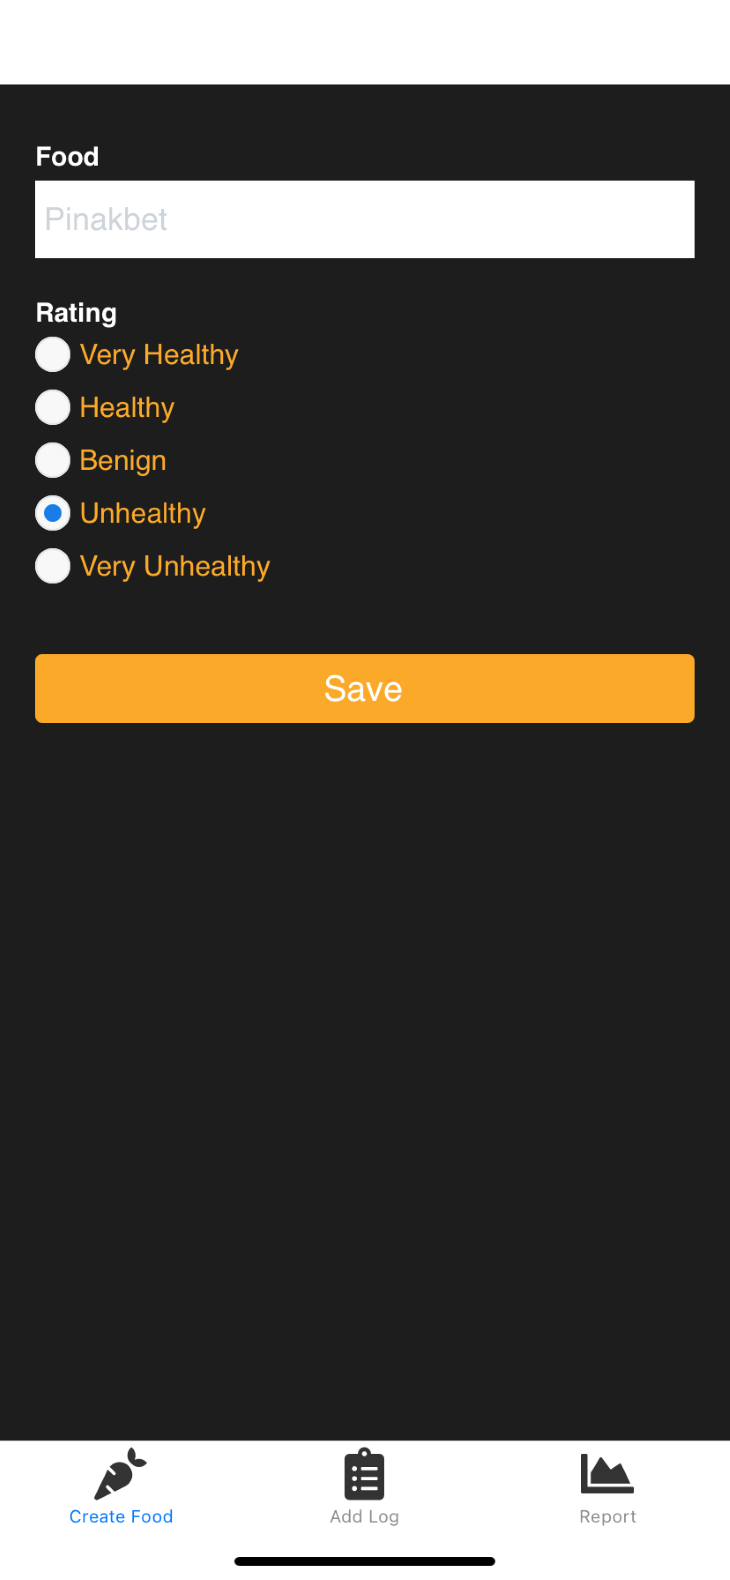
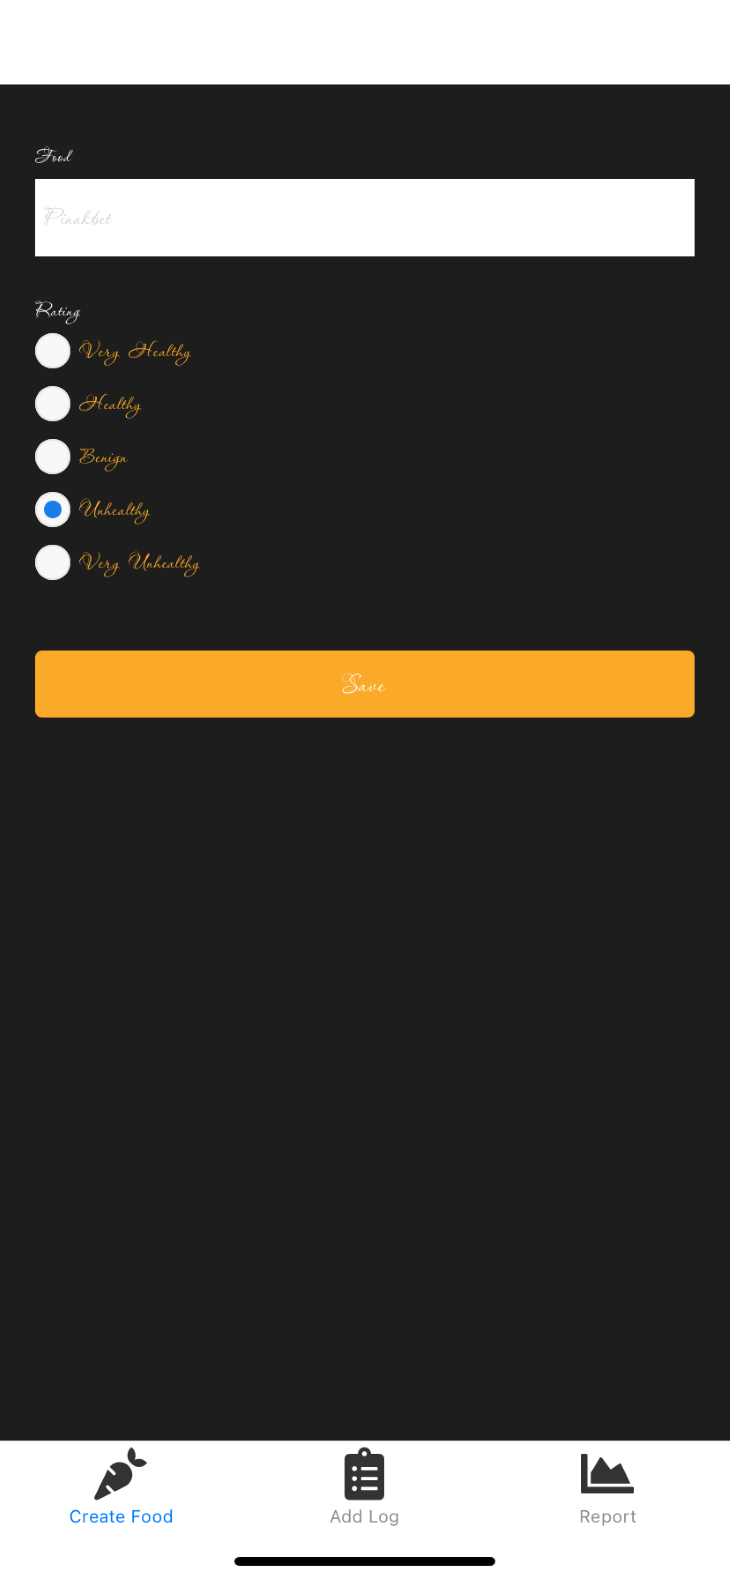
Create meals display
This display is for including meals that the consumer often eats. This features a 1 to five score of how wholesome the meals is with 1 being the unhealthiest and 5 being essentially the most wholesome.
Log meals display
This display is for logging the meals the consumer is consuming.
Report display
Lastly, this display is for displaying an general score of the meals that the consumer ate throughout a selected time period.
You’ll find the complete supply code of the app on this GitHub repo.
Constructing the app
It’s now time to start out constructing the app. First, create the display for including new meals:
npx ignite-cli generate display create-food
This generates the app/screens/create-food/create-food-screen.tsx file. All new screens that you simply generate utilizing Ignite’s generator will create a brand new folder contained in the app/screens listing. It additionally routinely provides it to the app/screens/index.ts file.
Mills
That’s the ability of mills: they make life straightforward for you because you not must manually create the recordsdata for no matter it’s you’re making an attempt to create. In addition they include some default code already; this makes it straightforward to observe a selected normal from the very starting.
However within the case of Ignite, there’s just one normal, and that’s the usual of the parents at Infinite Purple. If you wish to create your personal normal, Ignite additionally gives a method to create your personal mills or at the least customise the mills that Ignite already has. However we gained’t be protecting that one on this tutorial. You’ll be able to try the docs for that.
Navigation
Ignite makes use of React Navigation to implement navigation. It permits us to point out completely different screens based mostly on the place the consumer is at the moment navigated to. If you happen to’ve seen the welcome display earlier, that one makes use of a stack navigator. You’ll find the code for that within the app/navigators/app-navigator.tsx file. Right here’s a snippet from that file:
// app/navigators/app-navigator.tsx

import { createNativeStackNavigator } from "@react-navigation/native-stack"
import { WelcomeScreen, DemoScreen, DemoListScreen } from "../screens"

export kind NavigatorParamList = {
  welcome: undefined
  demo: undefined
  demoList: undefined
  //  Your screens go right here
}

// Documentation: https://reactnavigation.org/docs/stack-navigator/
const Stack = createNativeStackNavigator<NavigatorParamList>()

const AppStack = () => {
  return (
    <Stack.Navigator
      screenOptions={{
        headerShown: false,
      }}
      initialRouteName="welcome"
    >
      <Stack.Display screen title="welcome" element={WelcomeScreen} />
      <Stack.Display screen title="demo" element={DemoScreen} />
      <Stack.Display screen title="demoList" element={DemoListScreen} />
      {/**  Your screens go right here */}
    </Stack.Navigator>
  )
}
Your screens go right here
}
// Documentation: https://reactnavigation.org/docs/stack-navigator/
const Stack = createNativeStackNavigator<NavigatorParamList>()
const AppStack = () => {
return (
<Stack.Navigator
screenOptions={{
headerShown: false,
}}
initialRouteName="welcome"
>
<Stack.Display screen title="welcome" element={WelcomeScreen} />
<Stack.Display screen title="demo" element={DemoScreen} />
<Stack.Display screen title="demoList" element={DemoListScreen} />
{/** Your screens go right here */}
</Stack.Navigator>
)
}
It must be easy sufficient to grasp when you’ve labored with React Navigation beforehand. If not, then you’ll be able to try among the tutorials beforehand written on the subject:
So to get our newly created display to point out up, we have to import it first:
import { CreateFoodScreen } from "../screens"
Then add it on the NavigatorParamList:
export kind NavigatorParamList = {
  CreateFoodScreen: undefined
}
Lastly, we add it below the stack navigator and set it because the preliminary display:
const AppStack = () => {
  return (
    <Stack.Navigator
      screenOptions={{
        headerShown: false,
      }}
      initialRouteName="createfood"
    >
      <Stack.Display screen title="createfood" element={CreateFoodScreen} />
    </Stack.Navigator>
  )
}
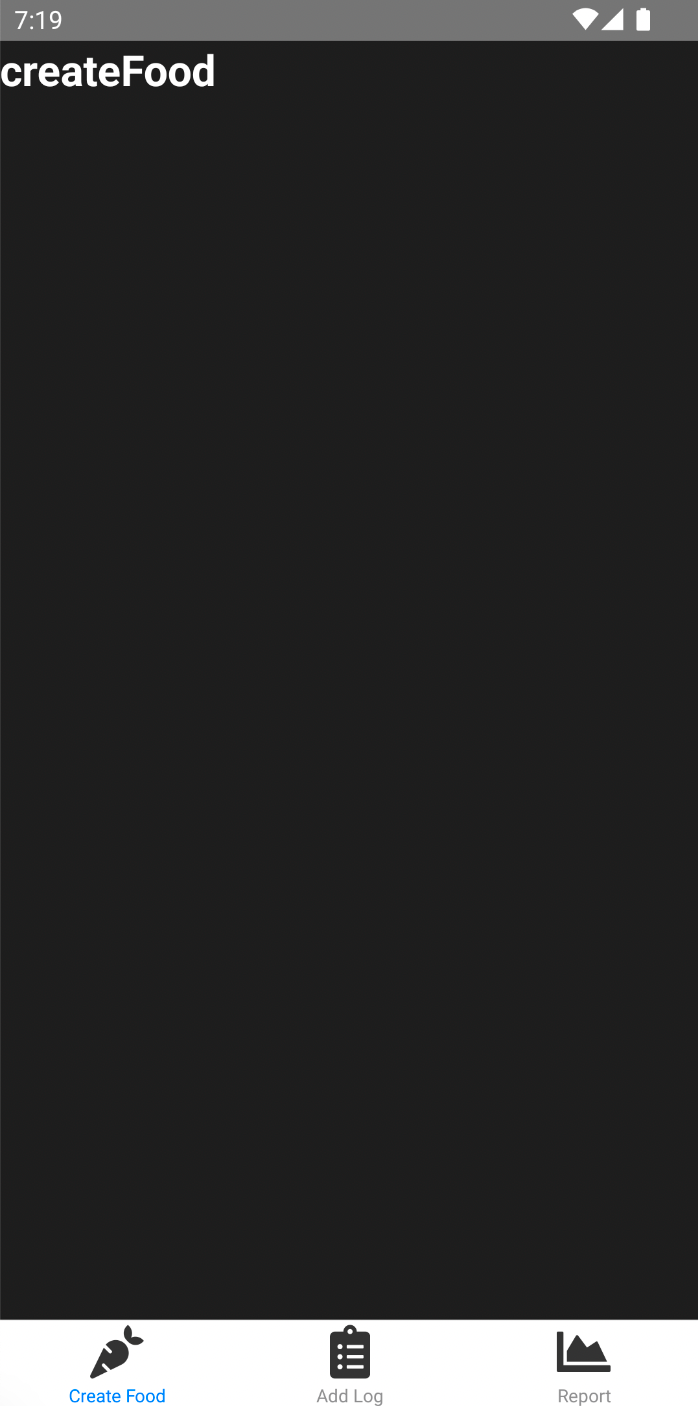
That may now present the create meals display. Go forward and create the remainder of the screens:
npx ignite-cli generate display food-logger
npx ignite-cli generate display report
Backside tab navigator
We gained’t truly be utilizing the stack navigator. We’ll use the backside tab navigator as a substitute.
Replace the app/navigators/app-navigator.tsx file to incorporate and use the entire screens:
// app/navigators/app-navigator.tsx
import Icon from "react-native-vector-icons/FontAwesome5"

import { CreateFoodScreen, FoodLoggerScreen, ReportScreen } from "../screens"

export kind NavigatorParamList = {
  createFood: undefined
  foodLogger: undefined
  report: undefined
}

const Tab = createBottomTabNavigator<NavigatorParamList>()

const AppStack = () => {
  return (
    <Tab.Navigator
      screenOptions={{
        headerShown: false,
      }}
      initialRouteName="createFood"
    >
      <Tab.Display screen
        title="createFood"
        element={CreateFoodScreen}
        choices={{
          tabBarIcon: () => <Icon title="carrot" measurement={30} shade="#333" />,
          title: "Create Meals",
        }}
      />

      <Tab.Display screen
        title="foodLogger"
        element={FoodLoggerScreen}
        choices={{
          tabBarIcon: () => <Icon title="clipboard-list" measurement={30} shade="#333" />,
          title: "Add Log",
        }}
      />

      <Tab.Display screen
        title="report"
        element={ReportScreen}
        choices={{
          tabBarIcon: () => <Icon title="chart-area" measurement={30} shade="#333" />,
          title: "Report",
        }}
      />
    </Tab.Navigator>
  )
}
As soon as that’s performed, you must now see all of the screens that may be navigated utilizing backside tab navigation:
Parts
Earlier than we add the performance for the screens, let’s first check out how we are able to create new parts with Ignite. Ignite already comes with some parts that can be utilized to construct the UI of the app. They’re designed with flexibility and customizability in thoughts so you must be capable of simply apply your personal {custom} design system with it.
You’ll be able to create new parts utilizing the generator:
npx ignite-cli generate element Radio
This creates a brand new folder below the app/parts listing. Contained in the folder are two recordsdata: one for the element itself and one other for Storybook testing. Let’s first add the code for the precise element:
// app/parts/radio/radio.tsx
import * as React from "react"
import { TextStyle, View, ViewStyle, TouchableOpacity } from "react-native"
import { observer } from "mobx-react-lite"
import { shade, typography } from "../../theme"
import { Textual content } from "../textual content/textual content"
import { RadioProps } from "./radio.props"

const CONTAINER: ViewStyle = {
  flexDirection: "row",
  alignItems: "middle",
  marginRight: 45,
  marginBottom: 10,
}

const ICON: ViewStyle = {
  top: 10,
  width: 10,
  borderRadius: 7,
  backgroundColor: "#187DE6",
}

const TEXT: TextStyle = {
  fontFamily: typography.main,
  fontSize: 16,
  shade: shade.main,
  marginLeft: 5,
}

const BODY: ViewStyle = {
  top: 20,
  width: 20,
  backgroundColor: "#F8F8F8",
  borderRadius: 10,
  borderWidth: 1,
  borderColor: "#E6E6E6",
  alignItems: "middle",
  justifyContent: "middle",
}

/**
 * Describe your element right here
 */
export const Radio = observer(operate Radio(props: RadioProps) {
  const { type, merchandise, chosen, setSelected } = props
  const types = Object.assign({}, CONTAINER, type)

  return (
    <View type={types}>
      <TouchableOpacity
        onPress={() => {
          setSelected(merchandise.worth)
        }}
        type={BODY}
      >
        {chosen ? <View type={ICON} /> : null}
      </TouchableOpacity>
      <TouchableOpacity
        onPress={() => {
          setSelected(merchandise.worth)
        }}
      >
        <Textual content type={TEXT}>{merchandise.title}</Textual content>
      </TouchableOpacity>
    </View>
  )
})
The prop varieties are separated from the remainder of the code. This serves as documentation on what values (and their kind) you’ll be able to cross in as props. This is likely one of the the explanation why Ignite makes use of TypeScript by default. Since varieties are closely used, it gained’t appear to be a second-class citizen within the codebase:
// app/parts/radio/radio.props.ts
import React from "react"
import { StyleProp, ViewStyle } from "react-native"

export interface RadioProps {
  /**
   * An elective type override helpful for padding & margin.
   */
  type?: StyleProp<ViewStyle>

  merchandise?: Object

  chosen?: boolean

  setSelected: Perform
}
Design system
Ignite makes it very easy to customise the appear and feel of the app. Every thing that has to do with altering the theme of the app within the app/theme folder. Right here’s a fast overview of the recordsdata:
palette.ts— you’ll be able to add the colour palette of your app right hereshade.ts— for giving extra descriptive roles to the colours (e.g., main, error, warning)spacing.ts— for specifying whitespace sizestiming.ts— for animation timingstypography.ts— for altering the font type
You can too use {custom} fonts. Copy the {custom} font into the theme/fonts folder.
Subsequent, you’ll want to copy it to the Xcode mission. You need to use the identical Fonts folder because the one utilized by React Native vector icons:
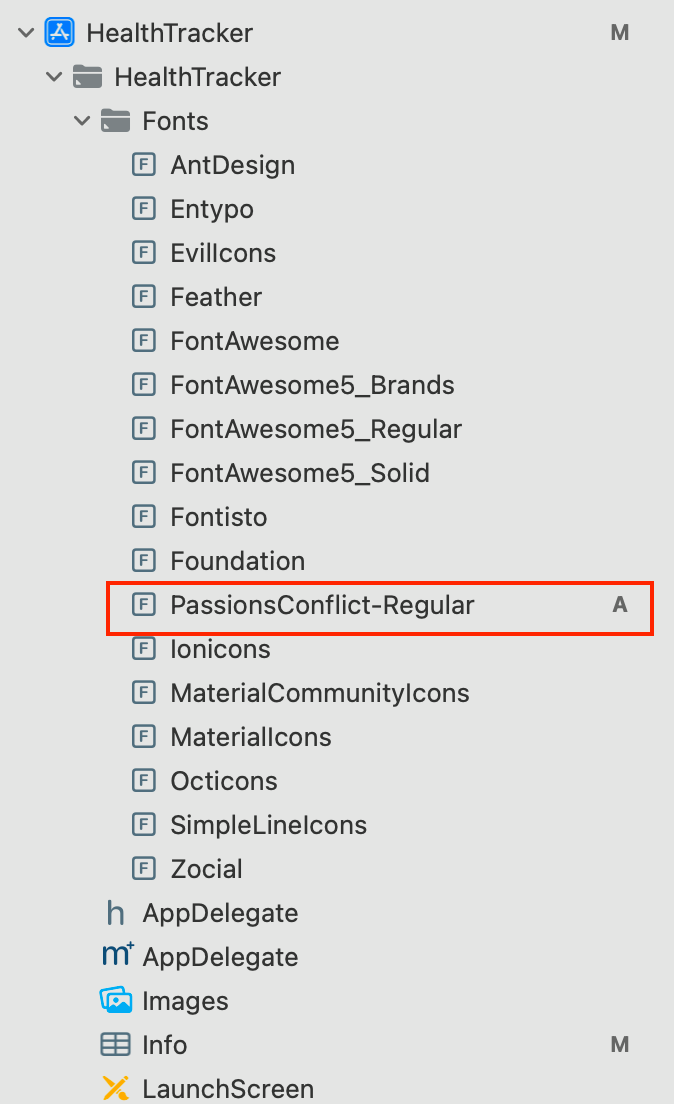
Subsequent, add it to the ios/HealthTracker/Data.plist file below the UIAppFonts discipline:
<key>UIAppFonts</key>
<array>

  <string>Zocial.ttf</string>
  <string>PassionsConflict-Common.ttf</string>
</array>
Lastly, replace the app/theme/typography.ts file with the title of the font. That is case-sensitive, so remember to use the font’s filename as it’s:
// app/theme/typography.ts
export const typography = {
  /**
   * The first font.  Utilized in most locations.
   */
  main: Platform.choose({
    ios: "PassionsConflict-Common",
    android: "PassionsConflict-Common",
  }),
As soon as that’s performed, the {custom} font is accessible. Observe that this gained’t change all of the fonts used within the app. As you’ll be able to see, the underside tab textual content remains to be utilizing the default font. I’ll go away that so that you can work out:
For Android, please seek the advice of the belongings/fonts/custom-fonts.md file in your mission to learn to use a {custom} font in Android.
Storybook
One of many primary benefits of utilizing Ignite is that it makes it really easy to adapt greatest practices in your mission.
A type of greatest practices is isolating element improvement and testing. The perfect software for that job is Storybook. By merely utilizing the element generator, you’re already getting this totally free. So all you need to do is replace the code so as to add each potential use case for the element:
// app/parts/radio/radio.story.tsx

import * as React from "react"
import { storiesOf } from "@storybook/react-native"
import { StoryScreen, Story, UseCase } from "../../../storybook/views"

import { Radio } from "./radio"

declare let module

storiesOf("Radio", module)
  .addDecorator((fn) => <StoryScreen>{fn()}</StoryScreen>)
  .add("States", () => (
    <Story>
      <UseCase textual content="Unselected" utilization="When not but chosen.">
        <Radio
          merchandise={{ title: "title", worth: "worth" }}
          setSelected={false}
          setSelected={() => {
            console.log("chosen radio")
          }}
        />
      </UseCase>

      <UseCase textual content="Chosen" utilization="When chosen.">
        <Radio
          merchandise={{ title: "title", worth: "worth" }}
          chosen
          setSelected={() => {
            console.log("chosen radio")
          }}
        />
      </UseCase>
    </Story>
  ))
If you happen to’re new to Storybook, remember to undergo the Storybook for React Native tutorial.
To view Storybook, execute the next command on the basis listing of the mission:
npm run storybook
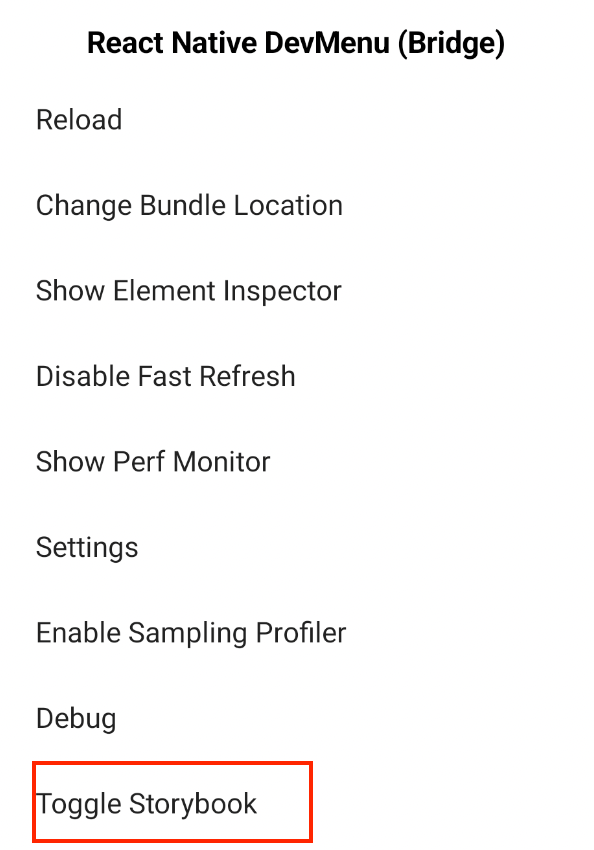
This opens a brand new browser window, however we don’t really want that, so you’ll be able to shut it. To view the element throughout the app, press Ctrl + M (or Command + M) whereas on the simulator. This reveals the React Native dev menu. Click on Toggle Storybook:
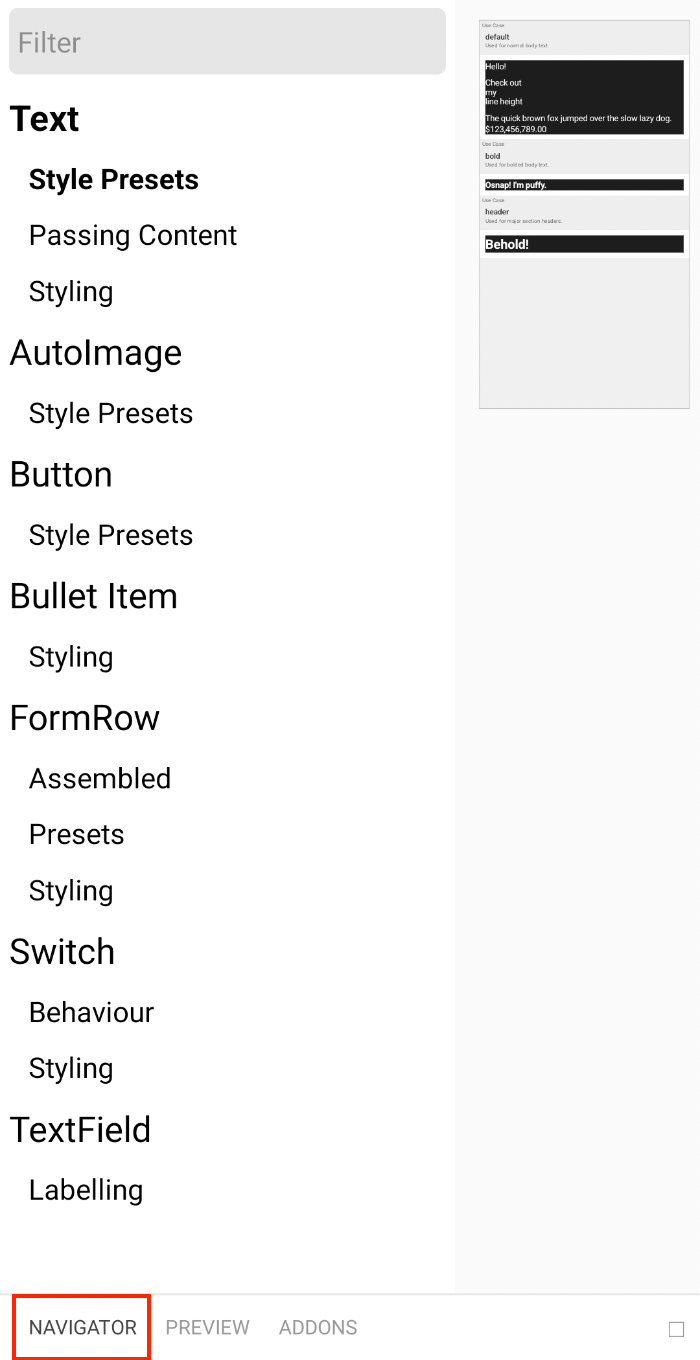
Clicking that may present the default textual content element. Click on on Navigator on the underside left nook and that may present you all of the parts which were added to Storybook. By default, all of Ignite’s inbuilt parts are already listed right here. You can too use the filter to seek for a selected element:
The radio element we’ve simply created gained’t be listed right here. It’s essential to add it to the storybook/storybook-registry.ts file first because it doesn’t routinely get added right here if you generate a brand new element:
// storybook/storybook-registry.ts
require("../app/parts/header/header.story")

// add this
require("../app/parts/radio/radio.story")
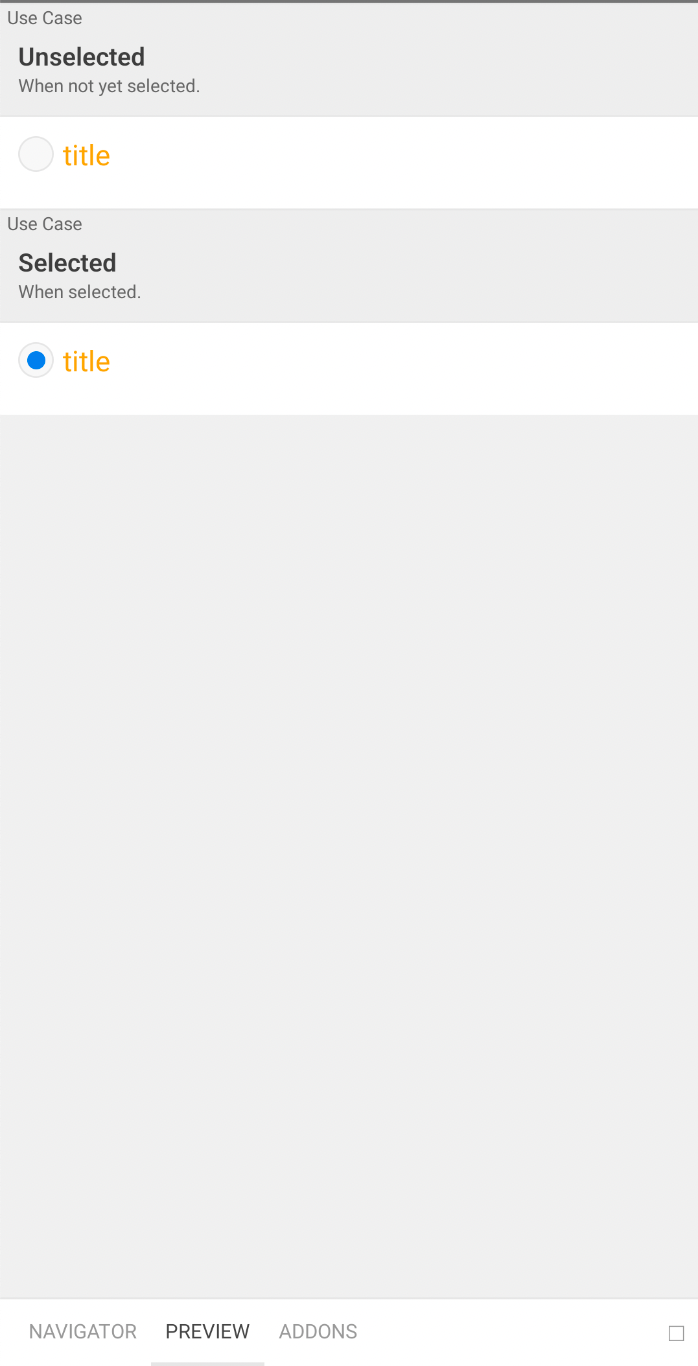
As soon as that’s performed, you must now see the radio element:
Create the meals display
Let’s now return to the create meals display:
// app/screens/create-food/create-food-screen.tsx

import React, { FC, useState, useEffect } from "react"
import { observer } from "mobx-react-lite"
import { ViewStyle } from "react-native"
import { StackScreenProps } from "@react-navigation/stack"

var randomId = require("random-id")

import { NavigatorParamList } from "../../navigators"
import { Display screen, Textual content, TextField, Button, Radio, Spacer } from "../../parts"

import { shade } from "../../theme"

import { FoodStoreModel } from "../../fashions/food-store/food-store"

import { food_ratings } from "../../config/app"

import { useStores } from "../../fashions"

const ROOT_STYLE: ViewStyle = {
  backgroundColor: shade.palette.black,
  flex: 1,
  padding: 20,
}

export const CreateFoodScreen: FC<StackScreenProps<NavigatorParamList, "createFood">> = observer(
  ({ navigation }) => {
    const [food, setFood] = useState("")
    const [rating, setRating] = useState(2)

    const [saveButtonText, setSaveButtonText] = useState("Save")

    const { foodStore } = useStores()

    const resetForm = () => {
      setFood("")
      setRating(2)
    }

    const saveFood = () => {
      foodStore.saveFood({
        id: randomId(10),
        title: meals,
        score,
      })

      resetForm()

      setSaveButtonText("Saved!")

      setTimeout(() => {
        setSaveButtonText("Save")
      }, 1800)
    }

    return (
      <Display screen type={ROOT_STYLE} preset="scroll">
        <TextField
          onChangeText={(worth) => setFood(worth)}
          inputStyle={{ shade: shade.palette.black }}
          worth={meals}
          label="Meals"
          placeholder="Pinakbet"
          testID="meals"
        />

        <Spacer measurement={10} />

        <Textual content preset="daring" textual content="Score" />
        {food_ratings.map((merchandise, index) => {
          const chosen = merchandise.score === score
          return (
            <Radio
              merchandise={{ title: merchandise.title, worth: merchandise.score }}
              key={index}
              chosen={chosen}
              setSelected={setRating}
            />
          )
        })}

        <Spacer measurement={30} />

        <Button textual content={saveButtonText} preset="giant" onPress={saveFood} />
      </Display screen>
    )
    // },
  },
)
From the code above, you’ll be able to see that it follows the standard sample for display code in React Native: imports on the prime, adopted by the types, then lastly the physique of the display. Something goes so long as you apply the identical sample in all your display code.
Please use the GitHub repo as a reference for all of the code that‘s utilized by the code above as we gained’t be going by all of the code on this tutorial.
The MobX-state-tree library
Within the code for the create meals display, we made use of the FoodStoreModel as an information retailer. The underlying library that makes this work is MobX-state-tree.
If you happen to’ve already used MobX, the principle distinction between the 2 is that MobX-state-tree gives construction to the in any other case unopinionated vanilla MobX. MobX-state-tree lets you simply implement a centralized retailer on your app knowledge, take a snapshot of it, and restore the app state from a snapshot.
Nonetheless on the app/screens/create-food/create-food-screen.tsx file, right here’s how we made use of MobX-state-tree. First, you’ll want to import the shop mannequin:
import { FoodStoreModel } from "../../fashions/food-store/food-store"
Subsequent, import the useStores context. This lets you entry all of the shops added to the basis retailer:
import { useStores } from "../../fashions"
You’ll be able to then use it to realize entry to the foodStore:
const { foodStore } = useStores()
This then lets you name any of the strategies within the retailer. This consists of the tactic for saving a meals:
foodStore.saveFood({
  id: randomId(10),
  title: meals,
  score,
})
You’ll be able to generate fashions in Ignite by executing the next command:
npx ignite-cli generate mannequin <title of mannequin>
On this case, we wish to generate the meals retailer mannequin:
npx ignite-cli generate mannequin food-store
This creates a brand new folder named food-store below the app/fashions listing. Contained in the folder are two recordsdata: food-store.ts which is the file for the mannequin itself, and food-store.take a look at.ts which is the Jest take a look at for the mannequin. We’ll check out use Jest for testing fashions in a later a part of this tutorial.
The mannequin is the place you’d declare the next:
- props — the fields for this mannequin. On this case, we solely have an array of
meals. We will specify the info varieties for the person fields through the use of one other mannequin (FoodModel) - views — lets you return, filter, or type the saved knowledge. All views could be accessed like a property within the mannequin
- actions — these are the strategies for manipulating knowledge inside the shop. On this case, we solely wish to push new knowledge to it
Right here’s the code for the meals retailer mannequin:
// app/fashions/food-store/food-store.ts
import { Occasion, SnapshotIn, SnapshotOut, varieties } from "mobx-state-tree"

import { FoodModel, FoodSnapshotIn } from "../meals/meals"
/**
 * Mannequin description right here for TypeScript hints.
 */

export const FoodStoreModel = varieties
  .mannequin("FoodStore")
  .props({
    meals: varieties.elective(varieties.array(FoodModel), []),
  })
  .views((self) => ({
    get allFoods() {
      return self.meals
    },
  })) // eslint-disable-line @typescript-eslint/no-unused-vars
  .actions((self) => ({
    saveFood: (foodSnapshot: FoodSnapshotIn) => {
      self.meals.push(foodSnapshot)
    },
  })) // eslint-disable-line @typescript-eslint/no-unused-vars

export interface FoodStore extends Occasion<typeof FoodStoreModel> {}
export interface FoodStoreSnapshotOut extends SnapshotOut<typeof FoodStoreModel> {}
export interface FoodStoreSnapshotIn extends SnapshotIn<typeof FoodStoreModel> {}
export const createFoodStoreDefaultModel = () => varieties.elective(FoodStoreModel, {})
Subsequent, generate the meals mannequin:
npx ignite-cli generate mannequin meals
Right here’s the code for the meals mannequin. This lets you specify the form of every object that must be handed to the meals retailer mannequin:
// app/fashions/meals/meals.ts
import { Occasion, SnapshotIn, SnapshotOut, varieties } from "mobx-state-tree"

/**
 * Mannequin description right here for TypeScript hints.
 */

export const FoodModel = varieties
  .mannequin("Meals")
  .props({
    id: varieties.identifier,
    title: varieties.string,
    score: varieties.integer,
  })
  .views((self) => ({})) // eslint-disable-line @typescript-eslint/no-unused-vars
  .actions((self) => ({})) // eslint-disable-line @typescript-eslint/no-unused-vars

export interface Meals extends Occasion<typeof FoodModel> {}
export interface FoodSnapshotOut extends SnapshotOut<typeof FoodModel> {}
export interface FoodSnapshotIn extends SnapshotIn<typeof FoodModel> {}
export const createFoodDefaultModel = () => varieties.elective(FoodModel, {})
The ultimate step is to incorporate the meals retailer within the root retailer. You’ll want to do that for each retailer that you simply create if you wish to entry them globally:
// app/fashions/root-store/root-store.ts

// ...
import { FoodStoreModel } from "../../fashions/food-store/food-store" // add this

export const RootStoreModel = varieties.mannequin("RootStore").props({
  // ...
  // add this
  foodStore: varieties.elective(FoodStoreModel, {} as any),

})
Testing fashions with Jest
Jest is a JavaScript testing framework. By default, Ignite already generates a take a look at each time you generate a brand new mannequin. We already created the meals retailer mannequin earlier, so it ought to have generated a corresponding take a look at file at app/fashions/food-store/food-store.take a look at.ts. Add the next code to confirm if the API for saving a brand new meals works. We will implement the take a look at in three steps:
- Create a brand new occasion of the meals retailer mannequin
- Name the
saveFood()technique - Use Jest to match the worth returned by the
allFoodsviews with the hardcoded worth we’re anticipating
Right here’s the code:
// app/fashions/food-store/food-store.take a look at.ts

import { FoodStoreModel } from "./food-store"

take a look at("could be created", () => {
  const occasion = FoodStoreModel.create()

  occasion.saveFood({
    id: "somerandomid123",
    title: "fried rooster",
    score: 2,
  })

  count on(occasion.allFoods).toStrictEqual([
    {
      id: "somerandomid123",
      name: "fried chicken",
      rating: 2,
    },
  ])
})
To run all of the checks:
npm run take a look at
This could return the next:

If you wish to run a selected take a look at (for instance, solely the checks within the meals retailer), you should utilize the title of the file to take action:
npm run take a look at -t 'food-store'
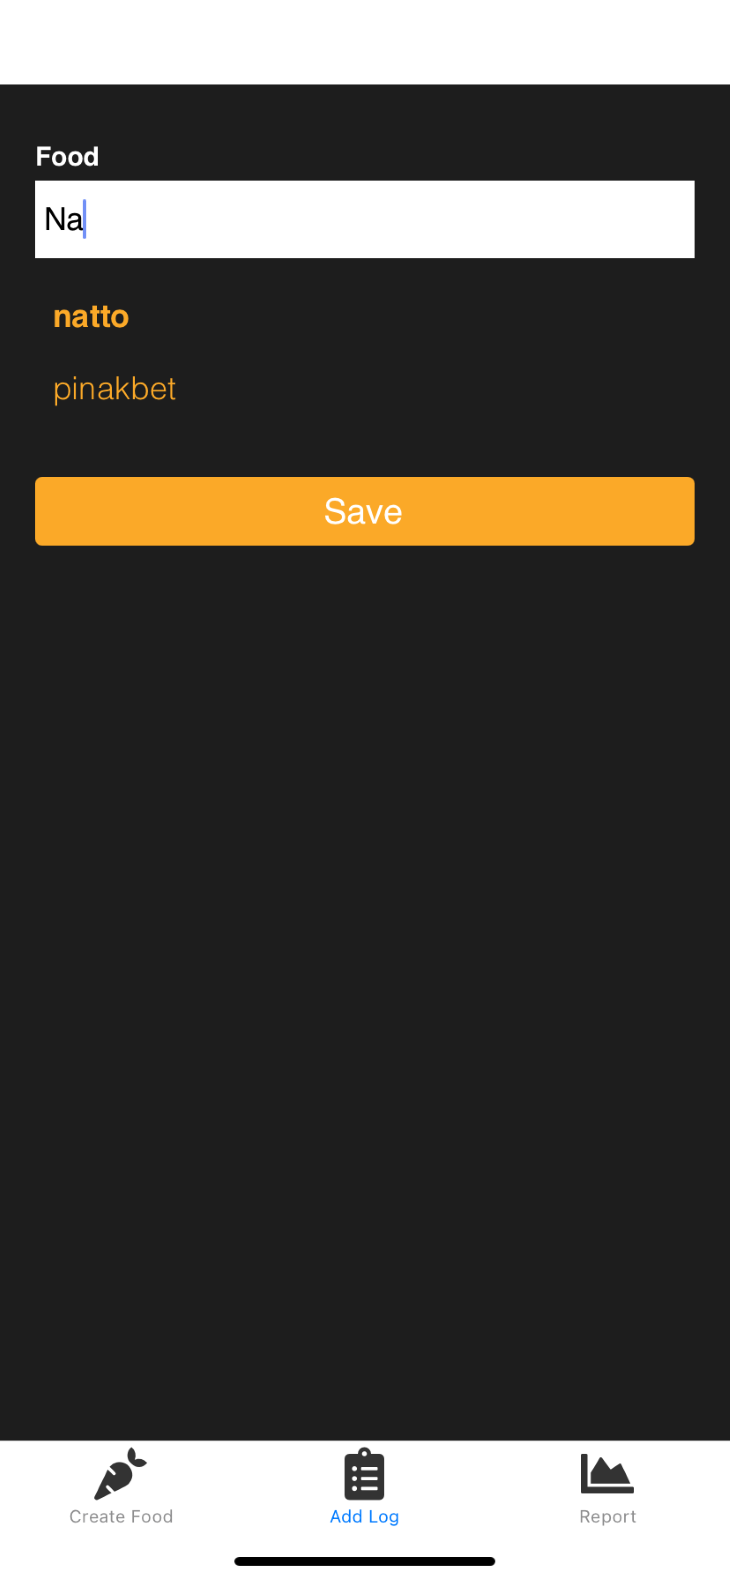
The meals logger display
Going again to the screens, the following one we have to implement is the meals logger display:
npx ignite-cli generate display food-logger
This display permits the consumer to look and choose the meals added by way of the create meals display. When saved, it units the small print of the meals in addition to the date. The date is a vital half because it’s what’s used to type the info within the report display afterward. Right here’s the code for the meals logger display:
// app/screens/food-logger/food-logger-screen.tsx

import React, { FC, useState } from "react"
import { observer } from "mobx-react-lite"
import { ViewStyle } from "react-native"
import { StackScreenProps } from "@react-navigation/stack"

var randomId = require("random-id")

import { NavigatorParamList } from "../../navigators"
import { Display screen, Textual content, TextField, SelectableText, Button, Spacer } from "../../parts"

import { shade } from "../../theme"

import { useStores } from "../../fashions"

const ROOT_STYLE: ViewStyle = {
  backgroundColor: shade.palette.black,
  flex: 1,
  padding: 20,
}

export const FoodLoggerScreen: FC<StackScreenProps<NavigatorParamList, "foodLogger">> = observer(
  operate FoodLoggerScreen() {
    const { foodStore, foodLogStore } = useStores()

    const [food, setFood] = useState("")
    const [selectedFood, setSelectedFood] = useState(null)

    const filteredFoods = meals
      ? foodStore.allFoods.filter((merchandise) => {
          return merchandise.title.toLowerCase().consists of(meals.toLowerCase())
        })
      : []

    const hasNoFoods = foodStore.allFoods.size === 0
    const hasFoodsButNotFiltered = foodStore.allFoods.size > 0 && filteredFoods.size === 0

    const resetForm = () => {
      setFood("")
      setSelectedFood(null)
    }

    const saveLog = () => {
      const selected_food_data = foodStore.allFoods.discover((merchandise) => merchandise.id === selectedFood)

      foodLogStore.saveLog({
        id: randomId(10),
        food_id: selectedFood,
        score: selected_food_data.score,
        date: new Date(),
      })

      resetForm()
    }

    return (
      <Display screen type={ROOT_STYLE} preset="scroll">
        <TextField
          onChangeText={(worth) => setFood(worth)}
          inputStyle={{ shade: shade.palette.black }}
          worth={meals}
          label="Meals"
          placeholder="Pinakbet"
        />

        {hasNoFoods && <Textual content textual content="Create some meals first.." />}

        {hasFoodsButNotFiltered && <Textual content textual content="Kind one thing.." />}

        {filteredFoods.map((merchandise) => {
          const isSelected = merchandise.id === selectedFood
          return (
            <SelectableText
              textual content={merchandise.title}
              key={merchandise.id}
              id={merchandise.id}
              setSelected={setSelectedFood}
              isSelected={isSelected}
            />
          )
        })}

        <Spacer measurement={30} />

        <Button textual content="Save" preset="giant" onPress={saveLog} />
      </Display screen>
    )
  },
)
You’ll be able to view the code for the SelectableText element, meals log retailer, and meals log mannequin within the repo.
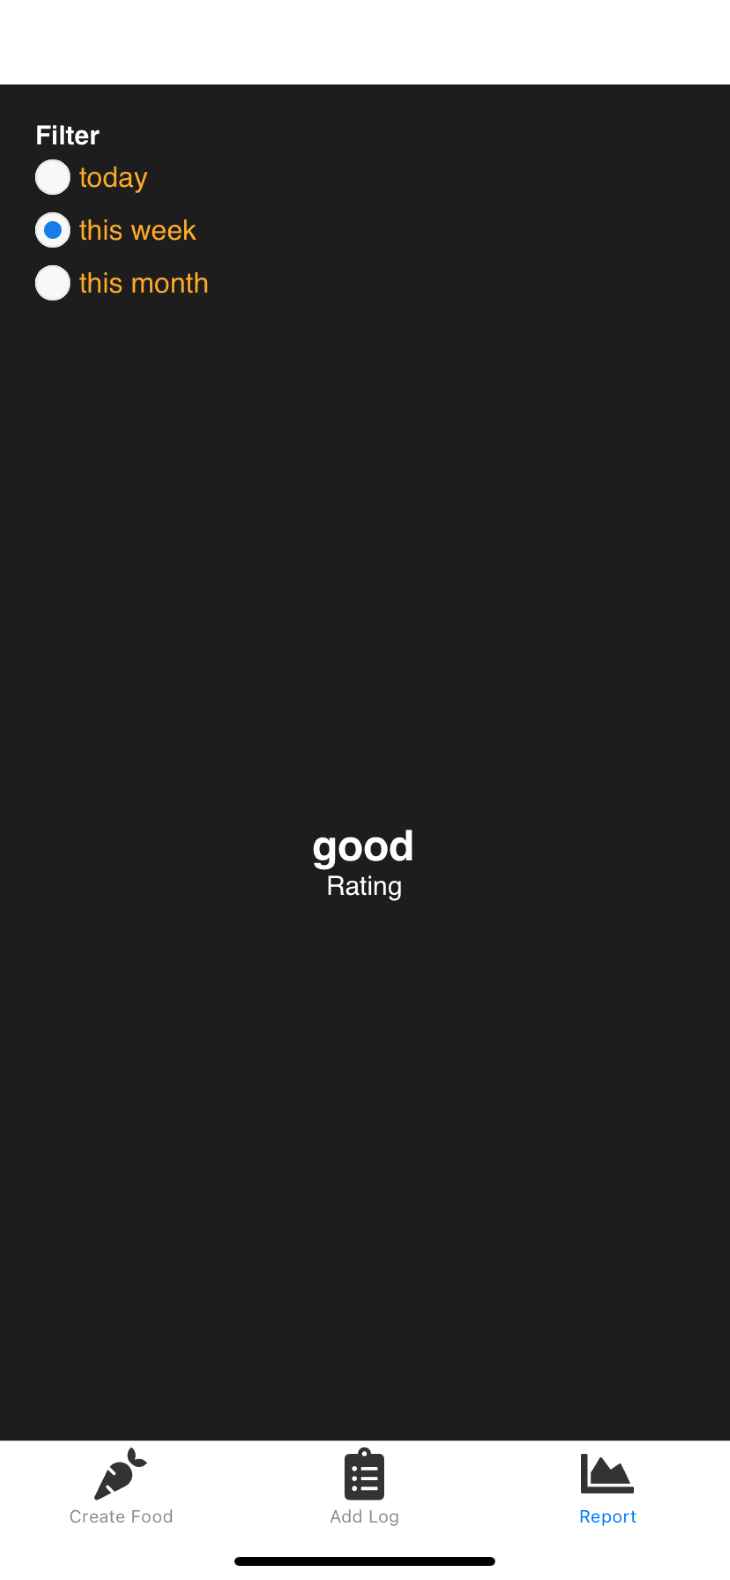
The report display
Lastly, we’ve the report display:
npx ignite-cli generate display report
This permits the consumer to pick from a set checklist of time ranges by which to base the filtering on. With the assistance of the date-fns library, the implementation is less complicated. From there, all we’re doing is utilizing cut back and averaging to search out which score the outcome falls into:
import React, { FC, useState, useEffect } from "react"
import { observer } from "mobx-react-lite"
import { ViewStyle, View } from "react-native"
import { StackScreenProps } from "@react-navigation/stack"

import { isToday, isThisWeek, isThisMonth } from "date-fns"

import { NavigatorParamList } from "../../navigators"
import { Display screen, Textual content, Radio } from "../../parts"

import { isWhatPercentOf } from "../../utils/numbers"

import { shade, spacing } from "../../theme"

import { time_ranges, health_ratings } from "../../config/app"

import { useStores } from "../../fashions"

const ROOT_STYLE: ViewStyle = {
  backgroundColor: shade.palette.black,
  flex: 1,
  padding: spacing.giant,
}

const RATING_CONTAINER_STYLE: ViewStyle = {
  flex: 1,
  justifyContent: "middle",
  alignItems: "middle",
}

export const ReportScreen: FC<StackScreenProps<NavigatorParamList, "report">> = observer(
  operate ReportScreen({ navigation }) {
    const { foodLogStore } = useStores()

    const [timeRange, setTimeRange] = useState("immediately")
    const [rating, setRating] = useState("---")

    const getRating = (timeRange) => {
      const filteredLog = foodLogStore.allLogs.filter((merchandise) => {
        const currentDateTime = merchandise.date

        if (timeRange === "immediately") {
          return isToday(currentDateTime)
        } else if (timeRange === "this week") {
          return isThisWeek(currentDateTime)
        } else if (timeRange === "this month") {
          return isThisMonth(currentDateTime)
        }
        return false
      })

      const scores = filteredLog.map((merchandise) => {
        return merchandise.score
      })

      const diminished = scores.cut back((a, b) => a + b, 0)

      const avg = diminished / scores.size
      const max_avg = (5 * scores.size) / scores.size

      const p.c = isWhatPercentOf(avg, max_avg)

      const discovered = health_ratings.discover((merchandise) => {
        return p.c >= merchandise.vary[0] && p.c <= merchandise.vary[1]
      })

      if (discovered) {
        setRating(discovered.title)
      }
    }

    useEffect(() => {
      const unsubscribe = navigation.addListener("focus", () => {
        getRating(timeRange)
      })

      // Return the operate to unsubscribe from the occasion so it will get eliminated on unmount
      return unsubscribe
    }, [navigation, timeRange])

    useEffect(() => {
      getRating(timeRange)
    }, [timeRange])

    return (
      <Display screen type={ROOT_STYLE} preset="scroll">
        <View>
          <Textual content preset="daring" textual content="Filter" />
          {time_ranges.map((merchandise, index) => {
            const chosen = merchandise == timeRange
            return (
              <Radio
                merchandise={{ title: merchandise, worth: merchandise }}
                key={index}
                chosen={chosen}
                setSelected={setTimeRange}
              />
            )
          })}
        </View>

        <View type={RATING_CONTAINER_STYLE}>
          <Textual content preset="header" textual content={score} />
          <Textual content textual content="Score" />
        </View>
      </Display screen>
    )
  },
)
You realize the drill: try the repo for all of the lacking code.
Debugging with Reactotron
There’s nothing unsuitable with utilizing console.log() for debugging all of the issues, however for a quicker suggestions loop, I like to recommend Reactotron for debugging your React Native apps. Go forward and set up it when you haven’t already.
To ensure that Reactotron to detect the app, Reactotron must be the one to launch first earlier than the app. So if in case you have a working app occasion already, cease it, launch Reactotron, then begin the app once more.
Right here’s what Reactotron appears to be like like:

More often than not, you’ll solely attain for the Timeline and the State. From the screenshot above, you’ll be able to see that it already logs async storage, navigation, and MobX-state-tree retailer by default.
If you’d like one thing just like console.log(), you’ll be able to nonetheless do it:
import Reactotron from "reactotron-react-native"

Reactotron.log('one thing')
You can too monitor the shop. Right here I’ve added foodStore.meals for monitoring so each time I save a brand new meals, it’s appended to this array:
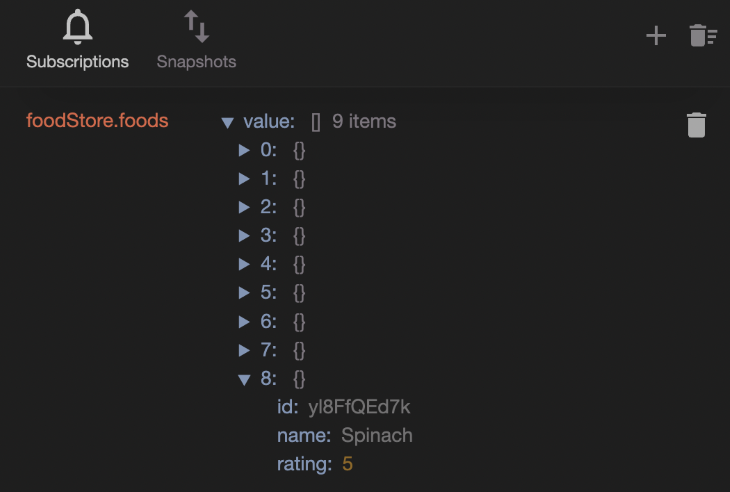
That’s it for a fast tutorial on use Reactotron. Be sure you examine the Reactotron documentation if you wish to be taught extra about it.
Finish-to-end testing with Detox
Detox is an end-to-end testing automation framework for React Native apps.
Ignite is just liable for organising Detox throughout the mission itself. You continue to need to arrange Detox dependencies in your machine to get it to work. We gained’t be protecting Detox intimately on this tutorial, so remember to try the next guides with the intention to get arrange with it.
Skip the directions for organising Detox inside your mission itself as a result of Ignite has already been taken care of if you generated a brand new mission with Ignite:
When you’ve arrange your machine, open the bundle.json file on the root of the mission listing and replace the detox.configurations.ios.sim.debug.construct property:
"xcodebuild -workspace ios/HealthTracker.xcworkspace -scheme HealthTracker -sdk iphonesimulator -derivedDataPath ios/construct"
You additionally must replace the system title and os to one thing that’s put in in your machine. You’ll be able to checklist all of the obtainable simulators by executing the next command:
xcrun simctl checklist units obtainable
That may return one thing like the next:

So if you wish to use iPhone 11 for testing, your detox config ought to look one thing like this:
"detox": {
    "test-runner": "jest",
    "configurations": {
      "ios.sim.debug": {
        "binaryPath": "ios/construct/Construct/Merchandise/Debug-iphonesimulator/HealthTracker.app",
        "construct": "xcodebuild -workspace ios/HealthTracker.xcworkspace -scheme HealthTracker -sdk iphonesimulator -derivedDataPath ios/construct",
        "kind": "ios.simulator",
        "system": {
          "title": "iPhone 11",
          "os": "iOS 14.4"
        }
      },
    }
  },
Subsequent, you’ll be able to add the take a look at. We’ll solely add the take a look at for the create meals display:
// e2e/firstTest.spec.js

const { reloadApp } = require("./reload")

describe("Instance", () => {
  beforeEach(async () => {
    await reloadApp()
  })

  it("ought to save the meals", async () => {
    // examine if the meals enter discipline is displayed on the display
    await count on(factor(by.textual content("Meals"))).toBeVisible()

    // kind "Fries" within the textual content discipline for getting into the title of the meals
    await factor(by.id("meals")).typeText("Fries")

    // confirm if "Fries" has certainly been typed in to the textual content discipline
    await count on(factor(by.textual content("Fries"))).toExist()

    // faucet on the score for "Very Wholesome"
    await factor(by.textual content("Very Wholesome")).faucet()

    // faucet the save button
    await factor(by.textual content("Save")).faucet()

    // examine if the textual content of the save button has modified to "Saved!"
    // indicating that the code for saving has certainly been referred to as
    await count on(factor(by.textual content("Saved!"))).toBeVisible()

    // examine if the shape has been reset
    await count on(factor(by.textual content("Fries"))).toNotExist()
  })
})
Subsequent, you’ll want to construct the app:
npm run construct:e2e
If you happen to examine the bundle.json file, this merely calls the detox construct -c ios.sim.debug command.
Extra nice articles from LogRocket:
As soon as it’s performed constructing the app, now you can run the checks:
npm run take a look at:e2e
Right here’s what it appears to be like like:
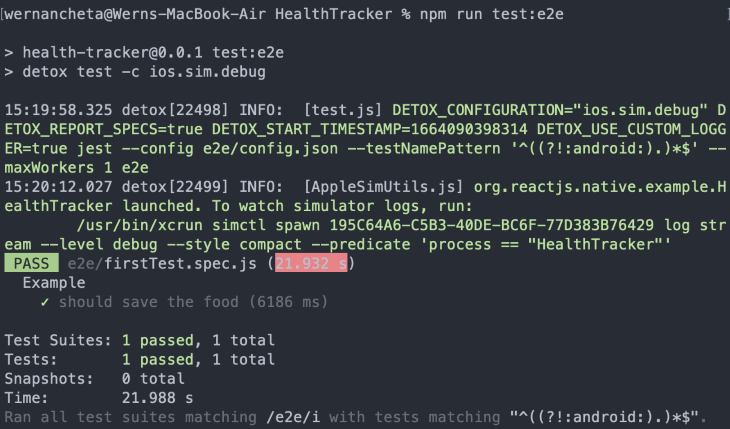
We’ve solely gone by arrange and run Detox on the iOS simulator. Be sure you try the official information for working Detox on Android if you wish to run your checks on Android.
Conclusion
At this level, you need to be assured in utilizing Ignite on your personal React Native tasks. As you’ve got seen, Ignite makes it very easy to observe greatest practices in creating React Native apps. It saves a whole lot of time particularly when creating new tasks because you not need to arrange all the things from scratch.
Ignite comes with an opinion on how issues must be performed, nevertheless it provides you all of the instruments you’ll want to absolutely customise the app feel and appear in addition to how you’d write your code.
LogRocket: Immediately recreate points in your React Native apps.

LogRocket is a React Native monitoring answer that helps you reproduce points immediately, prioritize bugs, and perceive efficiency in your React Native apps.
LogRocket additionally helps you improve conversion charges and product utilization by displaying you precisely how customers are interacting along with your app. LogRocket’s product analytics options floor the the explanation why customers do not full a selected circulate or do not undertake a brand new characteristic.
Begin proactively monitoring your React Native apps — attempt LogRocket totally free.
