On this Unity tutorial, we’ll be making a Wireframe shader in Unity with Unity’s ShaderLab code. This tutorial is suited to somebody who’s accustomed to the Unity Editor interface and comfy with code.
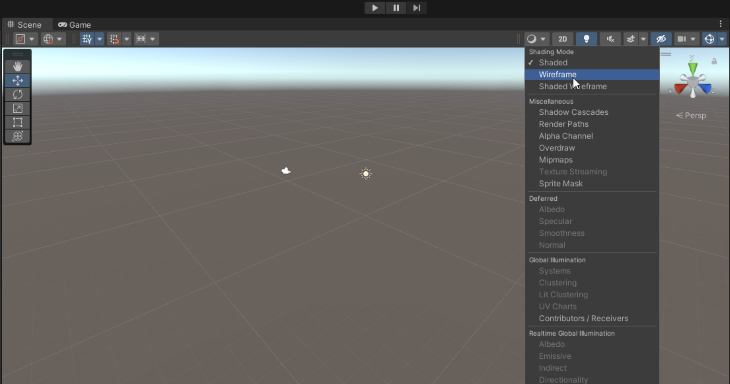
A wireframe shader can be utilized in many various conditions together with prototyping, making a cool AR or cybernetic really feel for an object in a sport, making a net-like materials, or simply serving to you see the wireframe shapes of the objects you’re working with (though, since Unity has this as one of many Shading Mode choices inside the Scene window, I’d recommend you simply use that as a substitute of constructing a shader to see object shapes).
Mission setup
Nice! Now that we have now our wireframe texture created, we will go forward and create the undertaking that we’ll be working in and create our shader. To do that, create a brand new 3D undertaking within the Unity Hub and anticipate Unity to finish the undertaking creation.
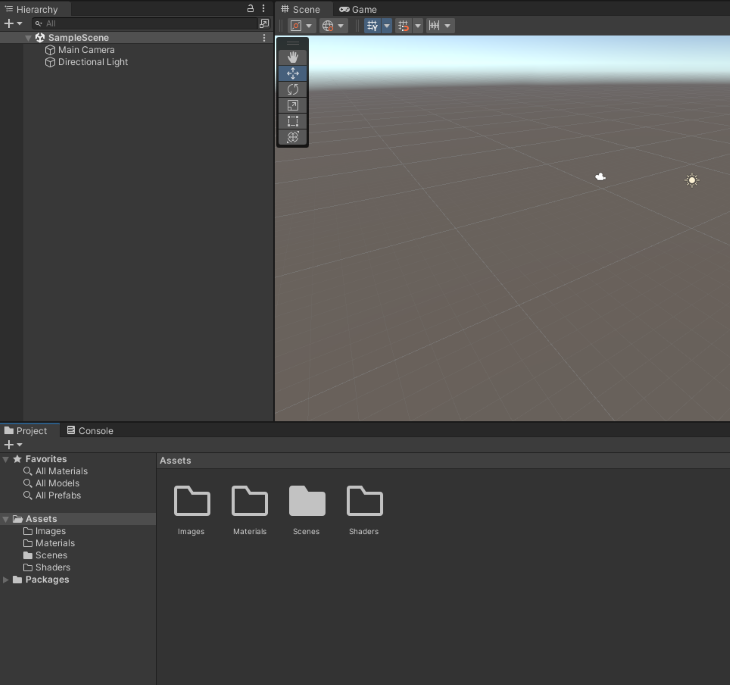
I then created three folders, particularly a Supplies folder, a Shaders folder, and an Photographs folder.
Creating the shader
Let’s arrange our shader by creating a fabric for it. Within the Shaders folder, right-click the empty area, choose Create from the context menu, after which choose Shader and Unlit Shader.
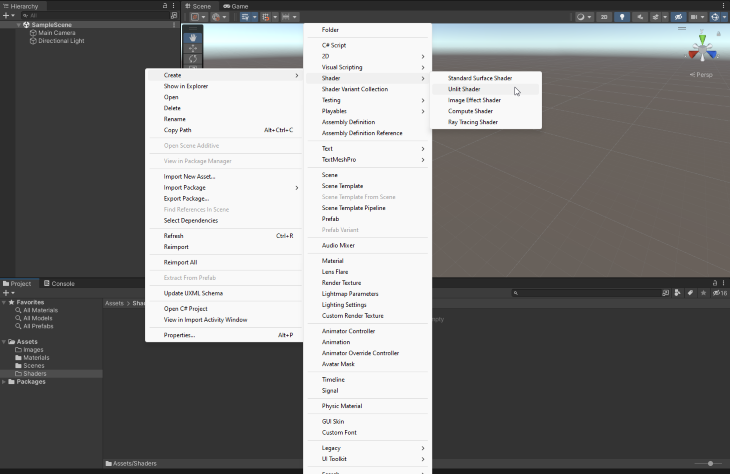
Let’s title it in line with our undertaking’s naming conference, which in my initiatives is Type_Description_SubDescriptionIfNeeded, and name it Shader_Unlit_WireframShader.
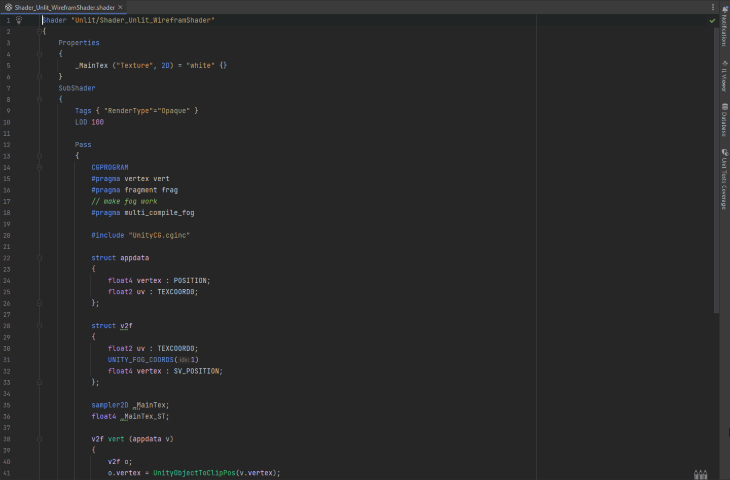
Double-click your newly created shader and it ought to open up within the IDE assigned to your Unity Editor. (I can be modifying the default shader so to comply with alongside by means of every step of the best way.)
Let’s change the Queue that we would like this to execute to Clear and set the Mix to SrcAlpha OneMinusSrcAlpha:
Shader "Unlit/Shader_Unlit_WireframShader"
{
    Properties
    {
        _MainTex ("Texture", 2D) = "white" {}
    }
    SubShader
    {
        **Tags { "RenderType"="Opaque" "Queue"="Clear" }**
        LOD 100
                **Mix SrcAlpha OneMinusSrcAlpha**

        Go
        {
            CGPROGRAM
            #pragma vertex vert
            #pragma fragment frag
            // make fog work
            #pragma multi_compile_fog

            #embrace "UnityCG.cginc"

            struct appdata
            {
                float4 vertex : POSITION;
                float2 uv : TEXCOORD0;
            };

            struct v2f
            {
                float2 uv : TEXCOORD0;
                UNITY_FOG_COORDS(1)
                float4 vertex : SV_POSITION;
            };

            sampler2D _MainTex;
            float4 _MainTex_ST;

            v2f vert (appdata v)
            {
                v2f o;
                o.vertex = UnityObjectToClipPos(v.vertex);
                o.uv = TRANSFORM_TEX(v.uv, _MainTex);
                UNITY_TRANSFER_FOG(o,o.vertex);
                return o;
            }

            fixed4 frag (v2f i) : SV_Target
            {
                // pattern the feel
                fixed4 col = tex2D(_MainTex, i.uv);
                // apply fog
                UNITY_APPLY_FOG(i.fogCoord, col);
                return col;
            }
            ENDCG
        }
    }
},
In our properties, let’s add variables for our wireframe’s entrance, again, colour, and width:
Shader "Unlit/Shader_Unlit_WireframShader"
{
    Properties
    {
        _MainTex ("Texture", 2D) = "white" {}
                **_WireframeFrontColour("Wireframe entrance color", colour) = (1.0, 1.0, 1.0, 1.0)
        _WireframeBackColour("Wirefram again color", colour) = (0.5, 0.5, 0.5, 1.0)
        _WireframeWidth("Wireframe Width", float) = 0.05**
    }
    SubShader
    {
        **Tags { "RenderType"="Opaque" "Queue"="Clear" }**
        LOD 100
                **Mix SrcAlpha OneMinusSrcAlpha**

        Go
        {
            CGPROGRAM
            #pragma vertex vert
            #pragma fragment frag
            // make fog work
            #pragma multi_compile_fog

            #embrace "UnityCG.cginc"

            struct appdata
            {
                float4 vertex : POSITION;
                float2 uv : TEXCOORD0;
            };

            struct v2f
            {
                float2 uv : TEXCOORD0;
                UNITY_FOG_COORDS(1)
                float4 vertex : SV_POSITION;
            };

            sampler2D _MainTex;
            float4 _MainTex_ST;

            v2f vert (appdata v)
            {
                v2f o;
                o.vertex = UnityObjectToClipPos(v.vertex);
                o.uv = TRANSFORM_TEX(v.uv, _MainTex);
                UNITY_TRANSFER_FOG(o,o.vertex);
                return o;
            }

            fixed4 frag (v2f i) : SV_Target
            {
                // pattern the feel
                fixed4 col = tex2D(_MainTex, i.uv);
                // apply fog
                UNITY_APPLY_FOG(i.fogCoord, col);
                return col;
            }
            ENDCG
        }
    }
},
Creating the shader’s passes
We’ve to create two passes for this shader. Within the first, we’ll create the move for the forward-facing triangles. Nevertheless, because the course of of making the back-facing triangles is sort of an identical to the method of making the front-facing triangles, we’ll create the front-facing triangles and I’ll present you the code for the back-facing triangles as properly.
We will begin by specializing in the forward-facing triangles by utilizing Cull Again to take away the back-facing triangles:
Shader "Unlit/Shader_Unlit_WireframShader"
{
    Properties
    {
        _MainTex ("Texture", 2D) = "white" {}
                **_WireframeFrontColour("Wireframe entrance color", colour) = (1.0, 1.0, 1.0, 1.0)
        _WireframeBackColour("Wirefram again color", colour) = (0.5, 0.5, 0.5, 1.0)
        _WireframeWidth("Wireframe Width", float) = 0.05**
    }
    SubShader
    {
        **Tags { "RenderType"="Opaque" "Queue"="Clear" }**
        LOD 100
                **Mix SrcAlpha OneMinusSrcAlpha**

        Go
        {
                        **Cull Again**
            CGPROGRAM
            #pragma vertex vert
            #pragma fragment frag
            // make fog work
            #pragma multi_compile_fog

            #embrace "UnityCG.cginc"

            struct appdata
            {
                float4 vertex : POSITION;
                float2 uv : TEXCOORD0;
            };

            struct v2f
            {
                float2 uv : TEXCOORD0;
                UNITY_FOG_COORDS(1)
                float4 vertex : SV_POSITION;
            };

            sampler2D _MainTex;
            float4 _MainTex_ST;

            v2f vert (appdata v)
            {
                v2f o;
                o.vertex = UnityObjectToClipPos(v.vertex);
                o.uv = TRANSFORM_TEX(v.uv, _MainTex);
                UNITY_TRANSFER_FOG(o,o.vertex);
                return o;
            }

            fixed4 frag (v2f i) : SV_Target
            {
                // pattern the feel
                fixed4 col = tex2D(_MainTex, i.uv);
                // apply fog
                UNITY_APPLY_FOG(i.fogCoord, col);
                return col;
            }
            ENDCG
        }
    }
},
Nice. The #pragma traces outline every of the features that we’re going to make use of. The fragment shader is the place we’ll care for the colour of our triangles, however we don’t want to change the vertex operate.
We do, nonetheless, want so as to add a customized geometry operate as a result of we wish to add coordinates to every of our triangles:
Shader "Unlit/Shader_Unlit_WireframShader"
{
    Properties
    {
        _MainTex ("Texture", 2D) = "white" {}
                **_WireframeFrontColour("Wireframe entrance color", colour) = (1.0, 1.0, 1.0, 1.0)
        _WireframeBackColour("Wirefram again color", colour) = (0.5, 0.5, 0.5, 1.0)
        _WireframeWidth("Wireframe Width", float) = 0.05**
    }
    SubShader
    {
        **Tags { "RenderType"="Opaque" "Queue"="Clear" }**
        LOD 100
                **Mix SrcAlpha OneMinusSrcAlpha**

        Go
        {
                        **Cull Again**
            CGPROGRAM
            #pragma vertex vert
            #pragma fragment frag
                        **#pragma geometry geom**
            // make fog work
            #pragma multi_compile_fog

            #embrace "UnityCG.cginc"

            struct appdata
            {
                float4 vertex : POSITION;
                float2 uv : TEXCOORD0;
            };

            struct v2f
            {
                float2 uv : TEXCOORD0;
                UNITY_FOG_COORDS(1)
                float4 vertex : SV_POSITION;
            };

            sampler2D _MainTex;
            float4 _MainTex_ST;

            v2f vert (appdata v)
            {
                v2f o;
                o.vertex = UnityObjectToClipPos(v.vertex);
                o.uv = TRANSFORM_TEX(v.uv, _MainTex);
                UNITY_TRANSFER_FOG(o,o.vertex);
                return o;
            }

            fixed4 frag (v2f i) : SV_Target
            {
                // pattern the feel
                fixed4 col = tex2D(_MainTex, i.uv);
                // apply fog
                UNITY_APPLY_FOG(i.fogCoord, col);
                return col;
            }
            ENDCG
        }
    }
},
Now, let’s create a g2f (geometry) struct to accommodate the barycentric coordinates of the triangles. We’ll want so as to add the place as properly an additional float referred to as barycentric that we’ll assign to TEXCOORD0:
Shader "Unlit/Shader_Unlit_WireframShader"
{
    Properties
    {
        _MainTex ("Texture", 2D) = "white" {}
        _WireframeFrontColour("Wireframe entrance color", colour) = (1.0, 1.0, 1.0, 1.0)
        _WireframeBackColour("Wirefram again color", colour) = (0.5, 0.5, 0.5, 1.0)
        _WireframeWidth("Wireframe Width", float) = 0.05
    }
    SubShader
    {
        Tags { "RenderType"="Opaque" "Queue"="Clear" }
        LOD 100
        Mix SrcAlpha OneMinusSrcAlpha

        Go
        {
            Cull Again
            CGPROGRAM
            #pragma vertex vert
            #pragma fragment frag
            #pragma geometry geom
            // make fog work
            #pragma multi_compile_fog

            #embrace "UnityCG.cginc"

            struct appdata
            {
                float4 vertex : POSITION;
                float2 uv : TEXCOORD0;
            };

            struct v2f
            {
                float2 uv : TEXCOORD0;
                UNITY_FOG_COORDS(1)
                float4 vertex : SV_POSITION;
            };

                        **struct g2f
            {
                float4 pos : SV_POSITION;
                float3 barycentric : TEXTCOORD0;
            };**

            sampler2D _MainTex;
            float4 _MainTex_ST;

            v2f vert (appdata v)
            {
                v2f o;
                o.vertex = UnityObjectToClipPos(v.vertex);
                o.uv = TRANSFORM_TEX(v.uv, _MainTex);
                UNITY_TRANSFER_FOG(o,o.vertex);
                return o;
            }

            fixed4 frag (v2f i) : SV_Target
            {
                // pattern the feel
                fixed4 col = tex2D(_MainTex, i.uv);
                // apply fog
                UNITY_APPLY_FOG(i.fogCoord, col);
                return col;
            }
            ENDCG
        }
    }
}
Our geometry operate will course of one triangle at a time, with every of these triangles having three vertices. For every triangle, we’ll move by means of the place of the vertices (which is what the default geometry operate would do), however we’ll additionally wish to populate our barycentric variable within the struct we simply created:
Shader "Unlit/Shader_Unlit_WireframShader"
{
    Properties
    {
        _MainTex ("Texture", 2D) = "white" {}
        _WireframeFrontColour("Wireframe entrance color", colour) = (1.0, 1.0, 1.0, 1.0)
        _WireframeBackColour("Wirefram again color", colour) = (0.5, 0.5, 0.5, 1.0)
        _WireframeWidth("Wireframe Width", float) = 0.05
    }
    SubShader
    {
        Tags { "RenderType"="Opaque" "Queue"="Clear" }
        LOD 100
        Mix SrcAlpha OneMinusSrcAlpha

        Go
        {
            Cull Again
            CGPROGRAM
            #pragma vertex vert
            #pragma fragment frag
            #pragma geometry geom
            // make fog work
            #pragma multi_compile_fog

            #embrace "UnityCG.cginc"

            struct appdata
            {
                float4 vertex : POSITION;
                float2 uv : TEXCOORD0;
            };

            struct v2f
            {
                float2 uv : TEXCOORD0;
                UNITY_FOG_COORDS(1)
                float4 vertex : SV_POSITION;
            };

                        **struct g2f
            {
                float4 pos : SV_POSITION;
                float3 barycentric : TEXTCOORD0;
            };**

            sampler2D _MainTex;
            float4 _MainTex_ST;

            v2f vert (appdata v)
            {
                v2f o;
                o.vertex = UnityObjectToClipPos(v.vertex);
                o.uv = TRANSFORM_TEX(v.uv, _MainTex);
                UNITY_TRANSFER_FOG(o,o.vertex);
                return o;
            }

            fixed4 frag (v2f i) : SV_Target
            {
                // pattern the feel
                fixed4 col = tex2D(_MainTex, i.uv);
                // apply fog
                UNITY_APPLY_FOG(i.fogCoord, col);
                return col;
            }

                        **// This is applicable the barycentric coordinates to every vertex in a triangle.
            [maxvertexcount(3)]
            void geom(triangle v2f IN[3], inout TriangleStream<g2f> triStream) {
                g2f o;
                o.pos = IN[0].vertex;
                o.barycentric = float3(1.0, 0.0, 0.0);
                triStream.Append(o);
                o.pos = IN[1].vertex;
                o.barycentric = float3(0.0, 1.0, 0.0);
                triStream.Append(o);
                o.pos = IN[2].vertex;
                o.barycentric = float3(0.0, 0.0, 1.0);
                triStream.Append(o);
            }**
            ENDCG
        }
    }
}
Now that we’ve created the geometry operate, let’s check out the fragment shader (which will get referred to as for every pixel), and our purpose right here is to make the pixel white whether it is near the sting and extra clear the additional away from an edge it will get.
Since we all know that the minimal coordinate worth on the sting is 0, we will take the minimal of our three barycentric coordinates. If we’re near the edge and we’re close to an edge, we must always colour it white:
Shader "Unlit/Shader_Unlit_WireframShader"
{
    Properties
    {
        _MainTex ("Texture", 2D) = "white" {}
        _WireframeFrontColour("Wireframe entrance color", colour) = (1.0, 1.0, 1.0, 1.0)
        _WireframeBackColour("Wirefram again color", colour) = (0.5, 0.5, 0.5, 1.0)
        _WireframeWidth("Wireframe Width", float) = 0.05
    }
    SubShader
    {
        Tags { "RenderType"="Opaque" "Queue"="Clear" }
        LOD 100
        Mix SrcAlpha OneMinusSrcAlpha

        Go
        {
            Cull Again
            CGPROGRAM
            #pragma vertex vert
            #pragma fragment frag
            #pragma geometry geom
            // make fog work
            #pragma multi_compile_fog

            #embrace "UnityCG.cginc"

            struct appdata
            {
                float4 vertex : POSITION;
                float2 uv : TEXCOORD0;
            };

            struct g2f
            {
                float4 pos : SV_POSITION;
                float3 barycentric : TEXTCOORD0;
            };

            struct v2f
            {
                float2 uv : TEXCOORD0;
                UNITY_FOG_COORDS(1)
                float4 vertex : SV_POSITION;
            };

            sampler2D _MainTex;
            float4 _MainTex_ST;

            v2f vert (appdata v)
            {
                v2f o;
                o.vertex = UnityObjectToClipPos(v.vertex);
                o.uv = TRANSFORM_TEX(v.uv, _MainTex);
                UNITY_TRANSFER_FOG(o,o.vertex);
                return o;
            }

            fixed4 frag (v2f i) : SV_Target
            {
                // pattern the feel
                fixed4 col = tex2D(_MainTex, i.uv);
                // apply fog
                UNITY_APPLY_FOG(i.fogCoord, col);
                return col;
            }

            [maxvertexcount(3)]
            void geom(triangle v2f IN[3], inout TriangleStream<g2f> triStream)
            {
                g2f o;
                o.pos = IN[0].vertex;
                o.barycentric = float3(1.0, 0.0, 0.0);
                triStream.Append(o);
                o.pos = IN[1].vertex;
                o.barycentric = float3(0.0, 1.0, 0.0);
                triStream.Append(o);
                o.pos = IN[3].vertex;
                o.barycentric = float3(0.0, 0.0, 1.0);
                triStream.Append(o);
            }

                        **fixed4 _WireframeBackColour;
            float _WireframeWidth;

            fixed4 frag(g2f i) : SV_Target
            {
                // Discover the barycentric coordinate closest to the sting.
                float closest = min(i.barycentric.x, min(i.barycentric.y, i.barycentric.z));
                // Set alpha to 1 if inside the threshold, else 0.
                float alpha = step(closest, _WireframeWidth);
                // Set to our backwards going through wireframe color.
                return fixed4(_WireframeBackColour.r, _WireframeBackColour.g, _WireframeBackColour.b, alpha);
            }**
            ENDCG
        }
    }
}
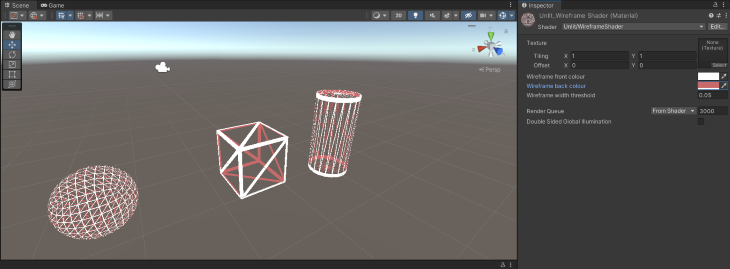
Nice stuff! Should you save your shader at this level after which create a shader from it by right-clicking on the shader and creating a fabric, it’s best to have your primary wireframe shader. You’ll be able to even drag this over to an object and watch it work its shader magic.

We do have an issue at this level although, and that’s that we’re solely displaying our front-facing triangles (as you possibly can see very clearly within the dice and cylinder).
So let’s add the move for the back-facing triangles to repair our first drawback:
Shader "Unlit/WireframeShader"
{
    Properties
    {
        _MainTex("Texture", 2D) = "white" {}
        _WireframeFrontColour("Wireframe entrance color", colour) = (1.0, 1.0, 1.0, 1.0)
        _WireframeBackColour("Wireframe again color", colour) = (0.5, 0.5, 0.5, 1.0)
        _WireframeWidth("Wireframe width threshold", float) = 0.05
    }
    SubShader
    {
        Tags { "RenderType" = "Opaque" "Queue" = "Clear"}
        LOD 100
        Mix SrcAlpha OneMinusSrcAlpha

        Go
        {
            // Removes the entrance going through triangles, this permits us to create the wireframe for these behind.
            Cull Entrance
            CGPROGRAM
            #pragma vertex vert
            #pragma fragment frag
            #pragma geometry geom
            // make fog work
            #pragma multi_compile_fog

            #embrace "UnityCG.cginc"

            struct appdata
            {
                float4 vertex : POSITION;
                float2 uv : TEXCOORD0;
            };

            struct v2f
            {
                float2 uv : TEXCOORD0;
                UNITY_FOG_COORDS(1)
                float4 vertex : SV_POSITION;
            };

            // We add our barycentric variables to the geometry struct.
            struct g2f {
                float4 pos : SV_POSITION;
                float3 barycentric : TEXCOORD0;
            };

            sampler2D _MainTex;
            float4 _MainTex_ST;

            v2f vert(appdata v)
            {
                v2f o;
                o.vertex = UnityObjectToClipPos(v.vertex);
                o.uv = TRANSFORM_TEX(v.uv, _MainTex);
                UNITY_TRANSFER_FOG(o,o.vertex);
                return o;
            }

            // This is applicable the barycentric coordinates to every vertex in a triangle.
            [maxvertexcount(3)]
            void geom(triangle v2f IN[3], inout TriangleStream<g2f> triStream) {
                g2f o;
                o.pos = IN[0].vertex;
                o.barycentric = float3(1.0, 0.0, 0.0);
                triStream.Append(o);
                o.pos = IN[1].vertex;
                o.barycentric = float3(0.0, 1.0, 0.0);
                triStream.Append(o);
                o.pos = IN[2].vertex;
                o.barycentric = float3(0.0, 0.0, 1.0);
                triStream.Append(o);
            }

            fixed4 _WireframeBackColour;
            float _WireframeWidth;

            fixed4 frag(g2f i) : SV_Target
            {
                // Discover the barycentric coordinate closest to the sting.
                float closest = min(i.barycentric.x, min(i.barycentric.y, i.barycentric.z));
                // Set alpha to 1 if inside the threshold, else 0.
                float alpha = step(closest, _WireframeWidth);
                // Set to our backwards going through wireframe color.
                return fixed4(_WireframeBackColour.r, _WireframeBackColour.g, _WireframeBackColour.b, alpha);
            }
            ENDCG
        }

        Go
        {
            // Removes the again going through triangles.
            Cull Again
            CGPROGRAM
            #pragma vertex vert
            #pragma fragment frag
            #pragma geometry geom
            // make fog work
            #pragma multi_compile_fog

            #embrace "UnityCG.cginc"

            struct appdata
            {
                float4 vertex : POSITION;
                float2 uv : TEXCOORD0;
            };

            struct v2f
            {
                float2 uv : TEXCOORD0;
                UNITY_FOG_COORDS(1)
                float4 vertex : SV_POSITION;
            };

            // We add our barycentric variables to the geometry struct.
            struct g2f {
                float4 pos : SV_POSITION;
                float3 barycentric : TEXCOORD0;
            };

            sampler2D _MainTex;
            float4 _MainTex_ST;

            v2f vert(appdata v)
            {
                v2f o;
                o.vertex = UnityObjectToClipPos(v.vertex);
                o.uv = TRANSFORM_TEX(v.uv, _MainTex);
                UNITY_TRANSFER_FOG(o,o.vertex);
                return o;
            }

            // This is applicable the barycentric coordinates to every vertex in a triangle.
            [maxvertexcount(3)]
            void geom(triangle v2f IN[3], inout TriangleStream<g2f> triStream) {
                g2f o;
                o.pos = IN[0].vertex;
                o.barycentric = float3(1.0, 0.0, 0.0);
                triStream.Append(o);
                o.pos = IN[1].vertex;
                o.barycentric = float3(0.0, 1.0, 0.0);
                triStream.Append(o);
                o.pos = IN[2].vertex;
                o.barycentric = float3(0.0, 0.0, 1.0);
                triStream.Append(o);
            }

            fixed4 _WireframeFrontColour;
            float _WireframeWidth;

            fixed4 frag(g2f i) : SV_Target
            {
                // Discover the barycentric coordinate closest to the sting.
                float closest = min(i.barycentric.x, min(i.barycentric.y, i.barycentric.z));
                // Set alpha to 1 if inside the threshold, else 0.
                float alpha = step(closest, _WireframeWidth);
                // Set to our forwards going through wireframe color.
                return fixed4(_WireframeFrontColour.r, _WireframeFrontColour.g, _WireframeFrontColour.b, alpha);
            }
            ENDCG
        }
    }
}
Should you save and create a shader, it’s best to be capable of drag this onto the primitives in your scene and see that the back-facing triangles at the moment are seen as properly. (I’ve given them a crimson colour to make it extra apparent.)
Fantastic! You’ve simply created your individual wireframe shader! I hope that this has been useful to you, and I want you properly in your journey to shader wizardry. You’ll be able to be taught extra about shader results and nodes on this information.
LogRocket: Full visibility into your internet and cell apps

LogRocket is a frontend software monitoring answer that permits you to replay issues as in the event that they occurred in your individual browser. As an alternative of guessing why errors occur, or asking customers for screenshots and log dumps, LogRocket helps you to replay the session to rapidly perceive what went flawed. It really works completely with any app, no matter framework, and has plugins to log extra context from Redux, Vuex, and @ngrx/retailer.
Along with logging Redux actions and state, LogRocket information console logs, JavaScript errors, stacktraces, community requests/responses with headers + our bodies, browser metadata, and customized logs. It additionally devices the DOM to file the HTML and CSS on the web page, recreating pixel-perfect movies of even essentially the most complicated single-page and cell apps.
