
WordPress is a superb platform, but it surely will also be a bit unorganized at occasions – at the very least from a code perspective. It is because the code has gone by means of many iterations, and as updates roll out, generally issues are as effectively coded as they might be.
Simply because the code is usually a bit everywhere at occasions doesn’t imply your growth course of should observe swimsuit. Although messy code is commonly excused as a consequence of quick manufacturing schedules, you stand to truly make extra as an online developer by implementing a correct workflow.
On this article, we are going to cowl some ideas that can assist you develop WordPress websites in the proper means with the proper instruments available. We can even present a step-by-step walk-through that can assist you observe the following pointers.
By following this information, you’ll be able to keep away from a few of the widespread issues that happen when growing WordPress websites. And additionally, you will be capable of create a web site that’s simple to take care of and replace.
So, let’s get began!
Attributes of Excessive-High quality Code
Earlier than we delve into our full information on making a WordPress growth workflow, let’s pause a second to debate why high-quality code really issues. Rather a lot.
When fascinated by the code to your web site, there are a number of key attributes that you must take into accout. These attributes will assist to make sure that your code is clear, well-organized, and simple to grasp.
Listed below are some attributes of high-quality code:
- Streamlined
- Simple to observe
- Modular
- Effectively-commented
- Will be reused and maintained simply
These attributes could seem to be lots to bear in mind, however don’t fear. We’ll totally cowl the best way to attain every in our information. However first, we have to discuss why your growth workflow merely should abide by these requirements.
Why WordPress Improvement Wants High-Tier Coding Practices
To ensure that a WordPress web site to perform correctly, the code that makes up the positioning must be prime quality. That is particularly vital for WordPress web sites as a result of they’re typically advanced, with many various shifting elements.
There are a lot of explanation why coding practices are vital for WordPress growth:
- WordPress web sites are advanced.
- A single line of code can have a huge impact.
- Code must be well-written and well-tested.
- Excessive-quality code is simpler to take care of.
- High quality code can assist enhance efficiency.
Protecting these factors in thoughts as you progress by means of your growth planning course of can assist you retain your eye on the prize, so to talk.
WordPress Workflow Enchancment Suggestions
Now that we’ve talked about why it’s vital to have well-written code let’s go over some ideas that can assist you enhance your WordPress workflow for each single undertaking. Every of the next ideas will assist to make sure your WordPress code is clear and optimized, which is what your precedence needs to be in 2022 and past.
Make the most of Staging
A staging web site is a duplicate of your dwell web site that you should utilize to check adjustments earlier than making them in your dwell web site. It is a worthwhile device as a result of it means that you can experiment with adjustments with out affecting your dwell web site.
There are a lot of advantages of utilizing a staging web site:
- You’ll be able to check adjustments earlier than making them in your dwell web site.
- You’ll be able to keep away from potential issues by testing on a staging web site.
- You’ll be able to ensure that your adjustments are working as meant.
- You’ll be able to keep away from potential downtime in your dwell web site.
- You’ll be able to cut back the danger of breaking your dwell web site.
And while you use the Premium Staging Surroundings add-on for Kinsta, you’ll be able to robotically create a staging surroundings with every of your WordPress websites with out having to carry out any guide operations. It’s an actual time-saver.
Implement Model Management
Model management is a system that tracks adjustments to recordsdata over time. That is worthwhile for WordPress growth as a result of it means that you can monitor adjustments and revert again to earlier variations if crucial.
For many, this implies utilizing Git, which is a well-liked model management system. When you’re unfamiliar, Git is a free and open-source distributed model management system designed to deal with the whole lot from small to very massive tasks with pace and effectivity.

It’s particularly helpful when working with a big distributed workforce. The very last thing you wish to run into is a number of variations of your capabilities.php file, all named one thing barely completely different, in your WordPress set up as a result of a number of individuals had been making adjustments without delay.
Git vs. GitHub
Git is a model management system, a device to handle your supply code historical past. GitHub is an organization that gives internet hosting for software program growth tasks that use Git.
They’re two various things, however most individuals use the time period “Git” to consult with each Git and GitHub.
Schedule Automated Backups
Probably the most vital points of WordPress growth is backups. Backups are important as a result of they let you restore your web site if one thing goes fallacious.
There are a lot of methods to automate backups, however one of many best methods is to make use of a WordPress backup plugin. There are a lot of nice backup plugins accessible, however we suggest utilizing the Kinsta Automated Exterior Backups add-on.
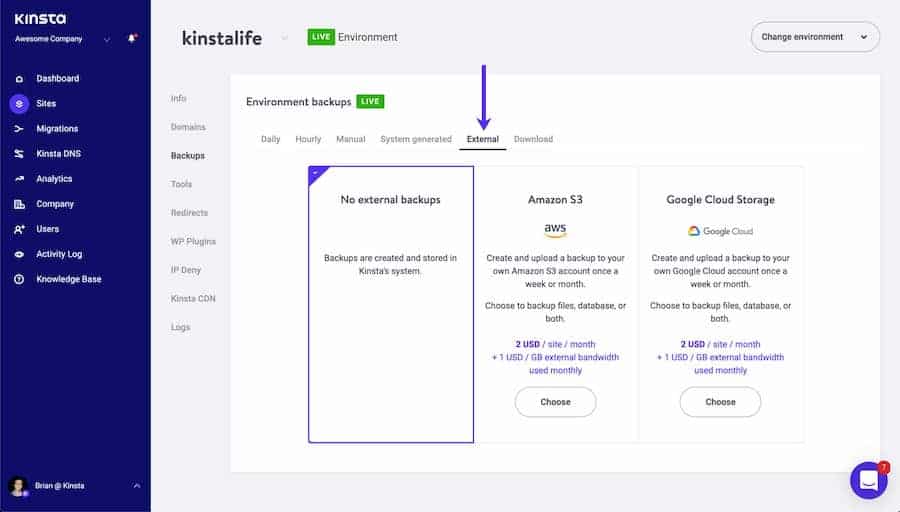
This add-on will robotically create backups of your WordPress web site each day and retailer them on an exterior server.
Take Benefit of Linting
Linting is the method of checking code for errors. That is worthwhile for WordPress growth as a result of it may enable you discover and repair errors in your code.
Many code editors do that robotically, however if you wish to be sure yours affords this function, think about using one of many following code and textual content editors:
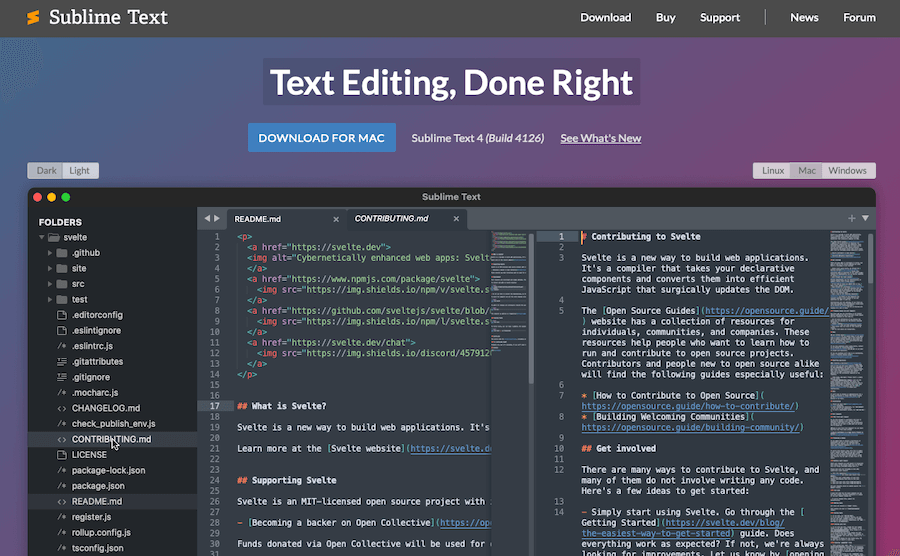
- Chic Textual content: This code editor has many options, together with linting.
- Atom: This code editor additionally has linting built-in.
- Vim: This textual content editor additionally affords linting in addition to many different options.
- Visible Studio Code: This code editor has linting accessible by default.
- PHPStorm: It is a paid growing surroundings that has linting accessible.
Use a Code Generator
A code generator is a device that may robotically generate code for you. That is worthwhile for WordPress growth as a result of it may prevent time and enable you keep away from errors.
There are a lot of code turbines accessible, however a few of the hottest embody:
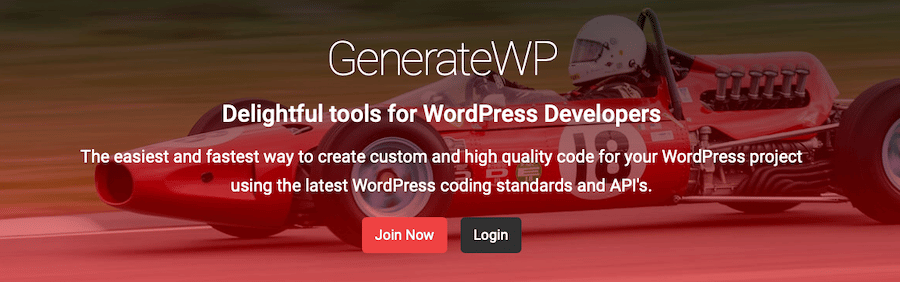
- GenerateWP: This code generator can generate code for customized put up sorts, taxonomies, metaboxes, and extra.
- Hasty: This code generator can generate code for customized put up sorts, taxonomies, and fields.
- Nimbus Themes Code Generator: This code generator can generate code for customized put up sorts, taxonomies, and fields.
Use WP-CLI
WP-CLI is a command line interface for WordPress. That is worthwhile for WordPress growth as a result of it means that you can handle your WordPress web site from the command line.
That is particularly helpful when that you must do duties which might be repetitive or require a number of steps. For instance, WP-CLI can be utilized to set up WordPress, create posts and pages, set up plugins and themes, and way more. It’s additionally useful when that you must make adjustments to a number of websites without delay.
Use a WordPress Improvement Framework
A WordPress growth framework is a device that may enable you streamline your workflow. That is worthwhile for WordPress growth as a result of it may prevent time and enable you keep away from errors.
There are a lot of WordPress growth frameworks accessible, however a few of the hottest embody:
- Genesis: This framework from StudioPress is designed that can assist you construct WordPress websites quicker.
- Underscores: This framework from Automattic is designed that can assist you begin growing WordPress themes rapidly.
- Basis: This framework from Zurb is designed that can assist you create responsive WordPress websites.
- Bootstrap: This framework from Twitter is an excellent useful method to create responsive designs for WordPress web sites.
Use Activity Runners
A activity runner is a device that may automate duties. That is worthwhile for WordPress growth as a result of it may prevent time and enable you keep away from errors. It additionally means that you can run a number of duties concurrently.
There are a lot of activity runners accessible, however a few of the hottest embody:
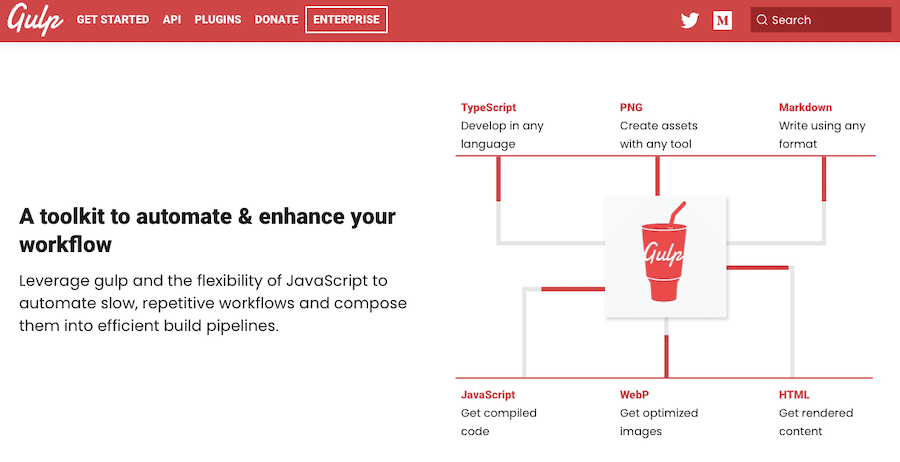
- Gulp: This activity runner can be utilized to automate duties like CSS preprocessing, JavaScript linting, and extra.
- Grunt: Grunt is a Javascript activity runner that helps to automate a lot of your extra repetitive duties.
- Webpack: This activity runner can be utilized to automate duties like bundling JavaScript recordsdata and extra.
Get Accustomed to Vue.js or React Now
Though you might not be utilizing Vue.js or React immediately, it’s vital to get aware of these frameworks now. That is worthwhile for WordPress growth as a result of they’re gaining popularity and are getting used increasingly as time goes by.
Vue.js is a JavaScript framework that means that you can create reactive person interfaces. React is a JavaScript library for constructing person interfaces.
Each Vue.js and React are widespread decisions for WordPress growth as a result of they’re quick, light-weight, and simple to make use of and are important for turning WordPress right into a headless CMS.
Why Spending Time on WordPress Workflow Planning is Very important
WordPress web sites are advanced, and it’s vital to have a well-planned workflow earlier than beginning any undertaking. By taking the time to plan your workflow, it can save you time and keep away from potential issues down the street.
There are a lot of advantages to planning your WordPress workflow:
- It can save you time by figuring out what must be performed.
- You’ll be able to keep away from potential issues by planning forward.
- You may make certain all the required duties are accomplished.
- You’ll be able to be sure that your workflow is environment friendly and efficient.
- You’ll be able to stop points when handing off tasks to collaborators or purchasers
Spending time on WordPress workflow planning is significant as a result of it may prevent time and enable you keep away from potential issues. By taking the time to plan your workflow, you’ll be able to ensure that all the required duties are accomplished and that your workflow is environment friendly and efficient.
The Ideally suited WordPress Workflow for Improvement
There are a lot of methods to method WordPress workflow, however there are some important steps that needs to be included in your growth course of.
Step 1: Setup a Native Improvement Surroundings
Step one in any WordPress workflow needs to be establishing an area growth surroundings. That is vital as a result of it means that you can work in your WordPress web site offline, which might save time and forestall errors.
There are a lot of methods to arrange an area growth surroundings, it simply depends upon what setup you favor to make use of. We suggest DevKinsta for this.
We suggest utilizing Kinsta Staging and the Premium Staging Environments add-on. This provides you a whole WordPress growth surroundings with a one-click push to dwell.
You may also work on a number of tasks on the similar time and merge adjustments earlier than going dwell. It additionally comes with built-in A/B testing, plugin compatibility testing, and resource-intensive testing to assist additional guarantee your builds are structured appropriately.
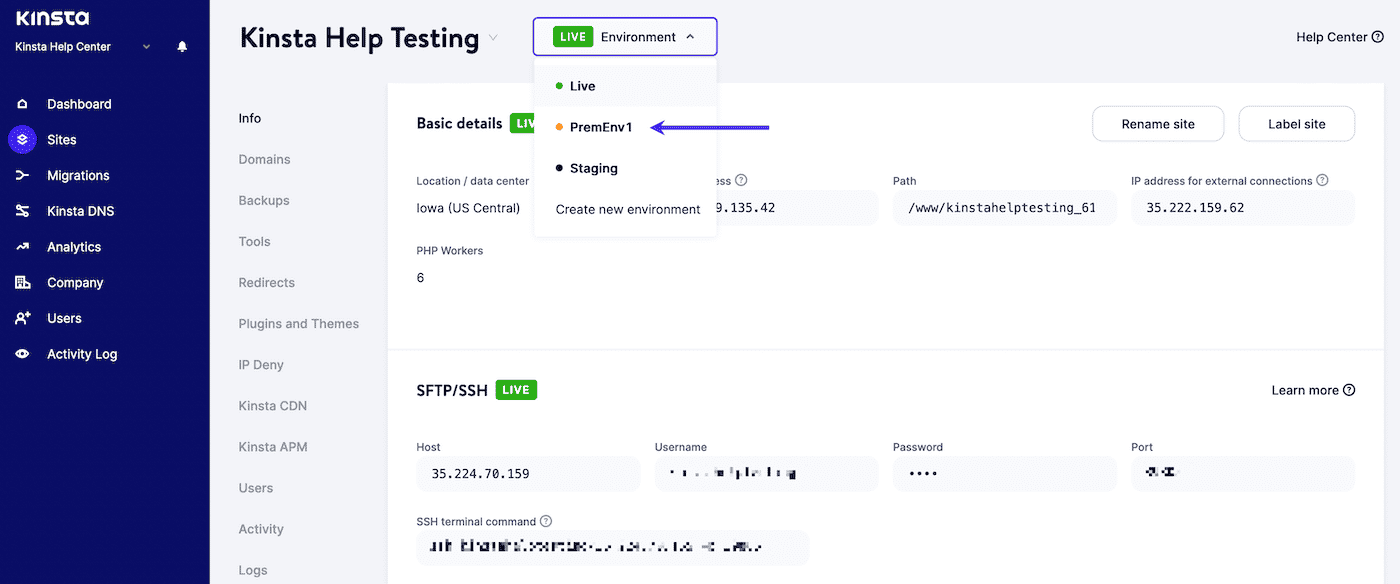
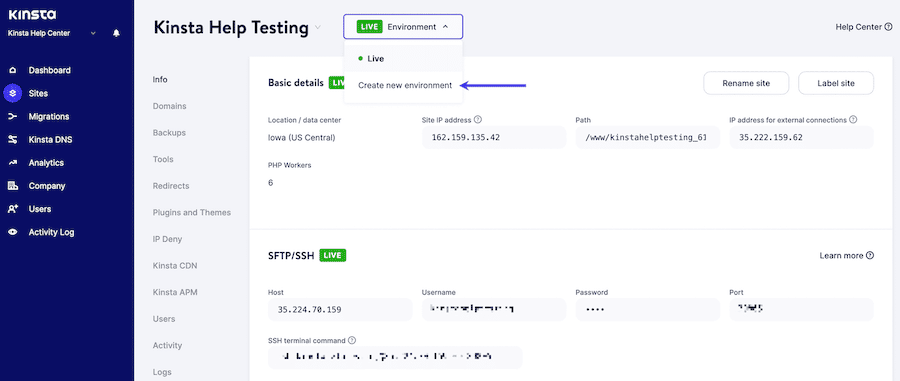
To get began with the Premium Staging Environments add-on, you merely have to buy it by means of your Kinsta account. To activate the staging surroundings, go to MyKinsta, then click on Surroundings > Create new surroundings on the prime of the display screen.
Step 2: Set Up Model Management
The second step in any WordPress workflow needs to be establishing model management. That is vital as a result of it means that you can monitor adjustments to your code and revert again to earlier variations if crucial.
To do that, you should utilize a device like Git. That course of appears like the next
1. Create a Repository on GitHub
To create a repository on GitHub, you should utilize the next steps:
- Log in to your GitHub account and click on on the + signal within the prime proper nook.
- Choose New repository from the dropdown menu.
- Enter a reputation to your repository and an outline, then click on Create repository.

2. Clone the Repository to Your Native Improvement Surroundings
In our case, we’ll be utilizing DevKinsta for our instance.
- On the GitHub web page to your repository, click on the Clone or obtain button.
- Within the Clone with HTTPs part, copy the URL to your repository.
- In your growth surroundings, open up a terminal and alter to the listing the place you wish to clone your repository.
- Sort the next command, substituting within the URL you copied from Github:
git clone https://github.com/YOUR_USERNAME/YOUR_REPOSITORY.gitThis can clone your repository to your native growth surroundings.
3. Add Recordsdata and Commit Modifications
- Add the recordsdata you wish to monitor with Git to the repository listing in your pc.
- Sort git add adopted by the title of the file, or use git add . so as to add the entire recordsdata within the listing.
- Sort git commit -m adopted by a message describing the adjustments you’ve made.
- To push your adjustments to Github, kind git push.
Now you can proceed making adjustments to the recordsdata in your pc and pushing them to GitHub. Whenever you wish to retrieve the most recent model of the recordsdata from Github, you should utilize the git pull command.
When you’re not utilizing GitHub, you can too use Bitbucket in a similar way.
Step 3: Develop Domestically
After you might have arrange your native growth surroundings and model management, it’s time to begin growing your WordPress web site domestically offline.
When growing domestically, you’ll be able to check adjustments in your staging web site earlier than pushing them dwell. That is vital as a result of it means that you can catch any errors or bugs earlier than they have an effect on your dwell web site.
To push adjustments out of your native growth surroundings to your staging web site, you should utilize a device like DevKinsta. This device makes it simple to push adjustments out of your native growth surroundings to your staging web site with just some clicks.
Step 4: Make Use of WP-CLI
WP-CLI is a command line interface for WordPress that means that you can handle your WordPress web site from the terminal. This may be helpful for duties like creating and managing customers, putting in and updating plugins, and way more.
To put in WP-CLI, observe these steps:
- Obtain the WP-CLI phar file.
- Transfer the file to a listing in your PATH (for instance, /usr/native/bin).
- Rename the file to wp.
- Make the file executable (for instance, chmod +x /usr/native/bin/wp).
- Take a look at that WP-CLI is put in by working wp –model.
From there, you should utilize WP-CLI to handle your WordPress web site from the command line. For a full record of instructions, you’ll be able to take a look at our in-depth information to WP-CLI v2.
Step 5: Automate Your Workflow With Gulp
Gulp is a activity runner that means that you can automate duties like minifying CSS and JavaScript recordsdata, compiling Sass recordsdata, and way more.
To make use of Gulp, you first want to put in it globally in your system. To do that, you’ll want Node.js, npm, and – in fact – Gulp. Run the following command in Node.js:
npm set up gulp-cli -gAs soon as Gulp is put in, you’ll be able to create a gulpfile.js file within the root of your undertaking. This file incorporates the code to your Gulp duties.
For instance, the next gulpfile.js file incorporates a activity for minifying CSS recordsdata:
var gulp = require('gulp');
var cleanCSS = require('gulp-clean-css');
gulp.activity('minify-css', perform() {
 return gulp.src('src/*.css')
 .pipe(cleanCSS({compatibility: 'ie8'}))
 .pipe(gulp.dest('dist'));
});
To run this activity, you should utilize the next command:
gulp minify-cssStep 6: Use Linting
Linting instruments are static code evaluation instruments that enable you discover errors in your code. For our functions right here, we’re utilizing Atom.io with the next linting packages:
- atom-beautify
- atom-ternjs
- linter
- linter-eslint
- linter-php
- linter-sass-lint
In your terminal, navigate to the listing you wish to lint and run the next command:
discover . -name "*.js" -o -name "*.scss" | xargs eslint --fixThis can lint the entire JavaScript and Sass recordsdata in your undertaking.
If you wish to lint a selected file, you’ll be able to run the next command:
eslint --fix file-name.jsSubstitute file-name.js with the title of the file you wish to lint.
Step 7: Use a CSS Preprocessor
A CSS preprocessor is a device that means that you can write CSS in a distinct language after which compile it into CSS. The 2 hottest CSS preprocessors are Sass and Much less.
On this tutorial, we’ll be utilizing Sass. To make use of Sass, you first have to set up the Sass command line device. To do that, run the next command:
gem set up sassAs soon as Sass is put in, you should utilize the next command to compile a Sass file into CSS:
sass enter.scss output.cssSubstitute enter.scss with the title of your Sass file and output.css with the title of the CSS file you wish to create.
If you wish to watch your Sass recordsdata for adjustments and robotically compile them into CSS, you should utilize the next command:
sass --watch enter.scss:output.cssSubstitute enter.scss with the title of your Sass file and output.css with the title of the CSS file you wish to create.
Step 8: Use a Deployment Plugin
A deployment plugin is a device that means that you can simply deploy your WordPress web site from an area growth surroundings to a dwell server.
There are a selection of various instruments you should utilize for this goal, however we suggest utilizing WP Pusher. WP Pusher is a free deployment plugin that you should utilize together with your WordPress web site.

To put in WP Pusher, first, obtain the ZIP file from the WP Pusher web site. Then, log into your WordPress web site and go to Plugins > Add New. Click on on the Add Plugin button and choose the ZIP file you simply downloaded. As soon as the plugin is put in and activated, you’ll be able to go to Settings > WP Pusher to configure it.
As soon as WP Pusher is configured, you’ll be able to deploy WordPress plugins and themes to your dwell server with out having to work together with the FTP interface in any respect or messing together with your WordPress database.
Step 9: Make Use of WordPress Relaxation API
The WordPress REST API is a strong device that means that you can work together together with your WordPress web site from outdoors of the WordPress admin interface.
The WordPress REST API can be utilized to construct customized options to your WordPress web site. For instance, you can use the WordPress REST API to construct a cell app to your WordPress web site or to create a customized dashboard.
To get began with the WordPress REST API, you have to to interface with it through the WordPress Command Line Interface. We printed a tutorial on the best way to arrange the WordPress REST API lately that may stroll you thru every step.
Step 10: Create and Observe a Fashion Information
A mode information is a set of pointers for coding and designing your WordPress web site. A mode information helps to make sure that your code is constant and simple to learn.
There are a selection of various type guides you should utilize to your WordPress undertaking. We suggest utilizing the WordPress Coding Requirements as a place to begin. Nonetheless, you’ll possible make quite a few modifications and additions as time goes on.
Any type information you create is prone to be altering on a regular basis. However the vital level is that it offers an outlined assortment of steps to take and pointers to observe for all builders in your workforce.
Basically, your type information needs to be your WordPress workflow in written type.
Step 11: Push Your Web site Stay
When you’ve accomplished the entire steps above, your WordPress web site is able to be pushed dwell. When you’re utilizing a deployment plugin like WP Pusher, this course of is so simple as pushing your code to your distant Git repository.
You are able to do this straight inside Kinsta, too, by going to MyKinsta > Websites, deciding on your web site, then clicking Surroundings actions. From there, click on Push to Stay.
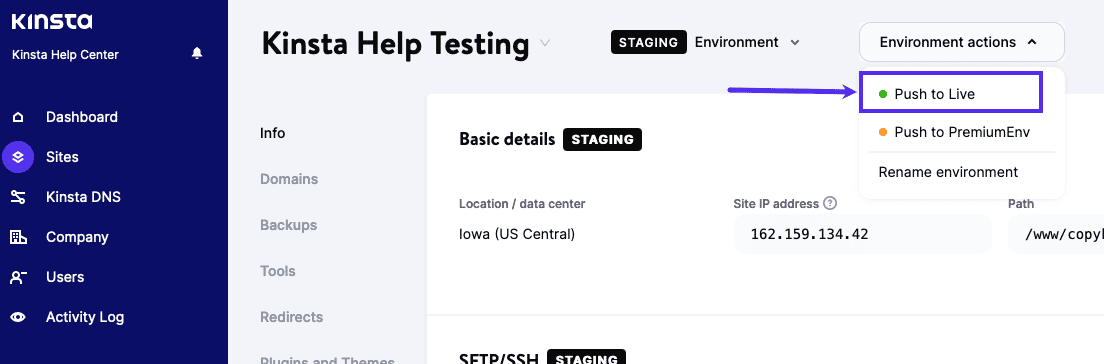
Subsequent, test the field subsequent to Recordsdata or Database (to test each), kind within the web site title, then click on Push to Stay.
When you’re not utilizing a deployment plugin or Git, you’ll be able to merely export your WordPress database out of your native growth surroundings and import it into your dwell server. You are able to do this by going to Instruments > Export in your WordPress admin dashboard.
Then, choose All content material from the export choices and click on on the Obtain Export File button. After you have your database file, you’ll be able to import it into your dwell server by going to Instruments > Import in your WordPress admin dashboard. Choose the database file you simply exported and click on on the Add file and import button.
You may also manually switch your WordPress recordsdata out of your native growth surroundings to your dwell server utilizing an FTP shopper like FileZilla. Merely hook up with your dwell server utilizing FTP, then drag and drop your WordPress recordsdata into the public_html listing.
When you’ve pushed your WordPress web site dwell, you’ll be able to take your time to check the whole lot out and ensure that the whole lot is working because it ought to.
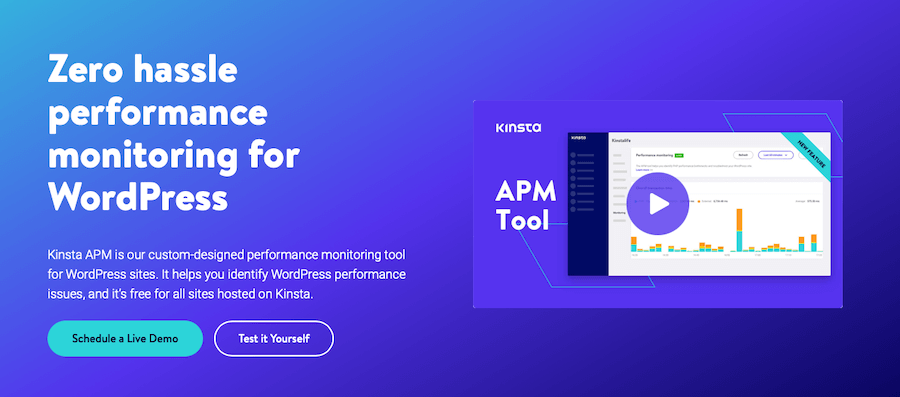
This may even be a great time to verify Kinsta AMP is up and working correctly. This efficiency monitoring device will keep watch over your server efficiency and ensure that your web site is working as quick as attainable.
Abstract
As you’ll be able to see, there’s lots that goes into correctly making a WordPress growth workflow. However following these steps will assist to make sure that your WordPress web site is well-organized, simple to handle, and working easily.
And you may’t go fallacious by leaning on Kinsta merchandise like DevKinsta, Premium Staging Environments add-on, and Kinsta AMP. These instruments will make your WordPress growth workflow even simpler and extra environment friendly.
Do you might have any questions on making a WordPress growth workflow? Tell us within the feedback under!
Save time, prices and maximize web site efficiency with:
- Prompt assist from WordPress internet hosting specialists, 24/7.
- Cloudflare Enterprise integration.
- World viewers attain with 35 information facilities worldwide.
- Optimization with our built-in Software Efficiency Monitoring.
All of that and way more, in a single plan with no long-term contracts, assisted migrations, and a 30-day-money-back-guarantee. Try our plans or discuss to gross sales to search out the plan that’s best for you.
