
Flutter has been extensively adopted due to its flexibility to construct purposes to run in your Android, iOS, macOS and Home windows machines with one codebase. Typically, these gadgets come in numerous sizes, and regardless of Flutter’s cross-platform capabilities, you can’t assure that the interface of your utility would, by default, render as anticipated throughout these gadgets. This can be a characteristic you must account for throughout your improvement course of.
This text will reveal how one can create an adaptive app with Flutter. You’ll discover ways to construct a primary ecommerce utility that adapts to a given gadget’s measurement with out having to rebuild the app because the display screen measurement modifications. We’ll cowl:
What’s an adaptive utility?
An utility is taken into account adaptive when it’s designed to vary the values of its properties at runtime primarily based on particular parameters in response to totally different inputs or situations. For instance, an adaptive utility renders totally different interfaces on cell and desktop views utilizing the identical codebase.
You will need to observe that adaptive design shouldn’t be confused with responsive design. A responsive utility dynamically modifications the format of its interface primarily based on the obtainable display screen measurement, however maintains the laid-out design. The contents of the app are merely rearranged to suit the display screen measurement.
However, an adaptive design requires that you simply create platform-specific designs, content material, and templates. That’s, the design of your utility on a cell gadget could be totally different on a bigger display screen similar to a desktop gadget.
What to think about when constructing an adaptive app
To enhance the person expertise, you must design your utility to accommodate totally different gadgets (telephones, foldables, tablets, smartwatches, and PCs) with various designs, sizes, shapes, and working programs. Your customers ought to be capable to discover your utility on these various gadgets and nonetheless benefit from the experiences native to the gadgets and OS.
An essential determination you’ll must make in your design or improvement section is figuring out the brink at which your utility ought to change its layouts. In a bit of the Android documentation are a set of really helpful values that will help you determine the format of your utility throughout totally different display screen sizes.
Typically, the obtainable width of the display screen may very well be extra essential than its obtainable top due to the affect of vertical scrolling. You’ll additionally have to account for the mouse, keyboard, contact inputs, and different traits explicit to every platform. You need to customise the expertise and interface of your utility to go well with the host gadget.
Utilizing the Flutter LayoutBuilder to create an adaptive app
Flutter supplies many widgets you should utilize when constructing your adaptive utility. There are additionally some exterior packages such because the Flutter Adaptive UI and adaptive format which you can combine into your utility. On this article, we’ll deal with utilizing the Flutter-provided LayoutBuilder widget to construct an adaptive utility.
The LayoutBuilder class is helpful for constructing responsive and adaptive purposes as a result of it has a builder perform that it invokes at format time. This perform returns a widget, receives the appliance context and constraints, and performs particular operations primarily based on the values of the constraints. For example, you may select to render a distinct design when the gadget width meets a situation specified by way of the constraints.maxWidth property:
LayoutBuilder(
        builder: (ctx, constraints) {
          if (constraints.maxWidth < 600) {
              return widget;
          }else{
            return anotherWidget;
          }
        }
    );
Venture overview
The demo utility for this tutorial is an ecommerce app that shows its merchandise in a scrollable view. On cell gadgets, every product takes up the obtainable width and the person can vertically scroll by way of the display screen to view every obtainable product. The cell view may also include an app drawer with navigation buttons.
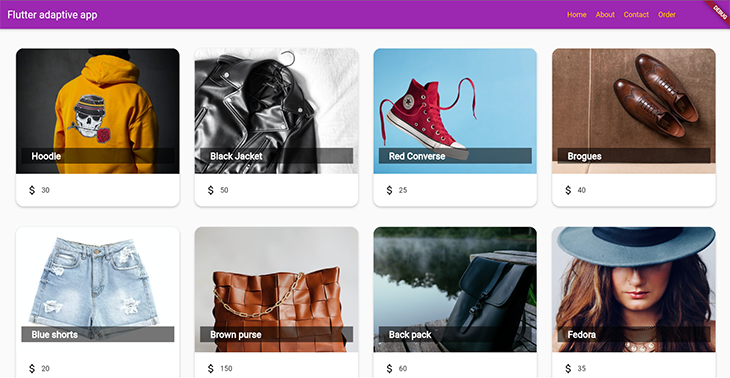
On a bigger display screen, similar to on a desktop gadget, the merchandise are distributed throughout the width and top of the display screen. The desktop view may also include a navigation bar on the high of the display screen to exchange the app drawer from the cell view.
As beforehand talked about, the appliance will use the Flutter LayoutBuilder class to make sure that it renders the required interface, based on the obtainable display screen measurement, at runtime, with out having to rebuild the appliance.
Right here is the anticipated output of the appliance throughout various display screen sizes:
Conditions
- Basic data of Flutter
- The Flutter SDK put in in your machine
- Any appropriate IDE of your alternative; I’ll be utilizing Android Studio for this demonstration
Tutorial: Creating an adaptive ecommerce app with Flutter
Establishing
Open your terminal and run the next command to create the bootstrapped Flutter mission, then open the mission in your most well-liked IDE.
flutter create shop_app
Within the lib folder, create two packages — widgets and screens — that may include the Dart recordsdata to your utility’s widgets and screens, respectively.
Extra nice articles from LogRocket:
Create a dummy_data.dart file within the lib folder, then copy the content material from the GitHub repo for this tutorial into the file. You’ll use this file to generate the Product widgets within the subsequent sections.
Constructing the Product widget
The Product widget represents the template for every product merchandise on the app. Within the widgets package deal, create a product.dart file and add the next code:
import 'package deal:flutter/materials.dart';

class Product extends StatelessWidget {
  closing String id;
  closing String identify;
  closing Shade colour;
  closing String imageUrl;
  closing double value;

  const Product({
    required this.id,
    required this.identify,
    this.colour = Colours.amberAccent,
    required this.imageUrl,
    required this.value
  });
}
Right here is the construct technique for the widget:
 @override
  Widget construct(BuildContext context) {
    return InkWell(
      onTap: () => (){},
      baby: Card(
        form: RoundedRectangleBorder(
            borderRadius: BorderRadius.round(15)
        ),
        elevation: 4,
        margin: EdgeInsets.fromLTRB(15, 20, 15, 20),
        baby: Column(
          youngsters: [
            Expanded(
              child: Stack(
                children: [
                  ClipRRect(
                    borderRadius: const BorderRadius.only(
                        topLeft: Radius.circular(15),
                        topRight: Radius.circular(15)),
                    child: Image.network(
                      imageUrl,
                      height: 250,
                      width: double.infinity,
                      fit: BoxFit.cover,
                    ),
                  ),
                  Positioned(
                    bottom: 20,
                    right: 10,
                    child: Container(
                      color:  Colors.black54,
                      width: 300,
                      padding: const EdgeInsets.symmetric(vertical: 5, horizontal: 20),
                      child: Text(name,
                        style: const TextStyle(
                          fontSize: 18,
                          color: Colors.white,
                          fontWeight: FontWeight.bold
                        ),
                        softWrap: true,
                        overflow: TextOverflow.fade,
                      ),
                    ),
                  )
                ],
              ),
            ),
            Padding(
              padding: const EdgeInsets.all(20.0),
              baby:
                  Row(
                    youngsters: [
                      const Icon(Icons.attach_money),
                      const SizedBox(width: 6),
                      Text('$price')
                    ],
                  ),
              ),
          ],
        ),
      ),
    );
  }
The widget above makes use of a mix of Flutter lessons and widgets, together with:
- The InkWell class to reinforce the person expertise of the appliance
- The Stack to position widgets on high of each other
- The Positioned widget to position the product identify in a selected place
Right here is the output of the Product widget:
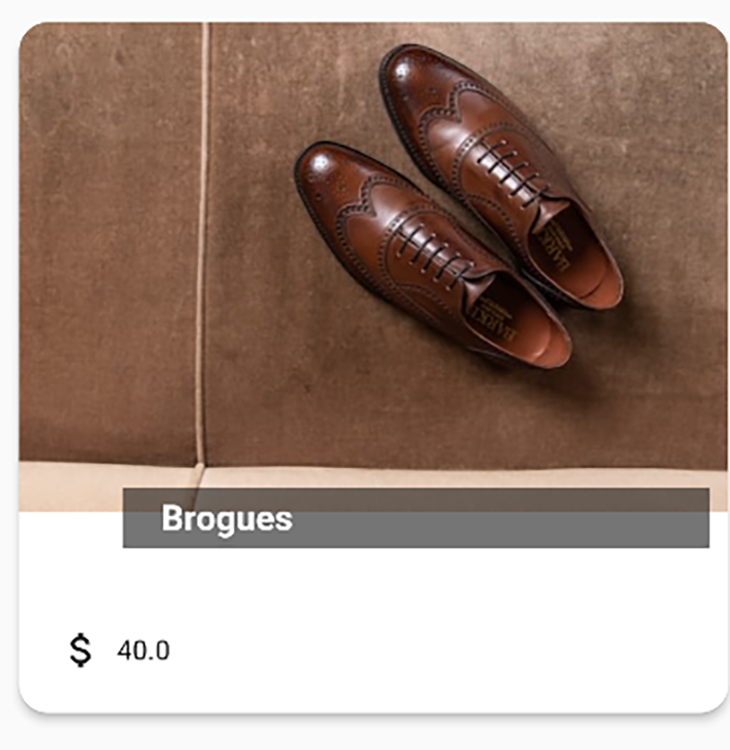
Constructing the navigation drawer
The navigation drawer will particularly be used inside the cell view of the appliance; that’s, the appliance will render the drawer when opened on a cell gadget. Throughout the widgets package deal, create a Dart file named navigation_drawer and embrace the next code within the file:
import 'package deal:flutter/materials.dart';

class NavigationDrawer extends StatelessWidget {
  const NavigationDrawer({Key? key}) : tremendous(key: key);

  Widget buildListTile(String title, IconData icon){
    return ListTile(
      main: Icon(icon,
        measurement: 26,),
      title: Textual content(
        title,
        fashion: const TextStyle(
            fontSize: 14,
            fontWeight: FontWeight.daring
        ),
      ),
      onTap: () {},
    );
  }

  @override
  Widget construct(BuildContext context) {
    return Drawer(
      baby: Column(
        youngsters: [
          Container(
            height: 100,
              padding: EdgeInsets.all(20),
          alignment: Alignment.bottomCenter,
            color: Theme.of(context).accentColor,
            child: Text('App Menu',
                style: TextStyle(
                  fontWeight: FontWeight.w900,
                  fontSize: 20,
                  color: Theme.of(context).primaryColor,
                ),
            ),
          ),
          const SizedBox(height: 20),
          buildListTile('Home', Icons.home),
          buildListTile('About', Icons.info_outline),
          buildListTile('Contact', Icons.contact_phone_outlined),
          buildListTile('Order', Icons.shopping_cart),
        ],
      ),
    );
  }
}
From the above code, the buildListTile technique builds a ListTile widget for particular gadgets within the drawer, on this case, Dwelling, About, Contact, and Order.
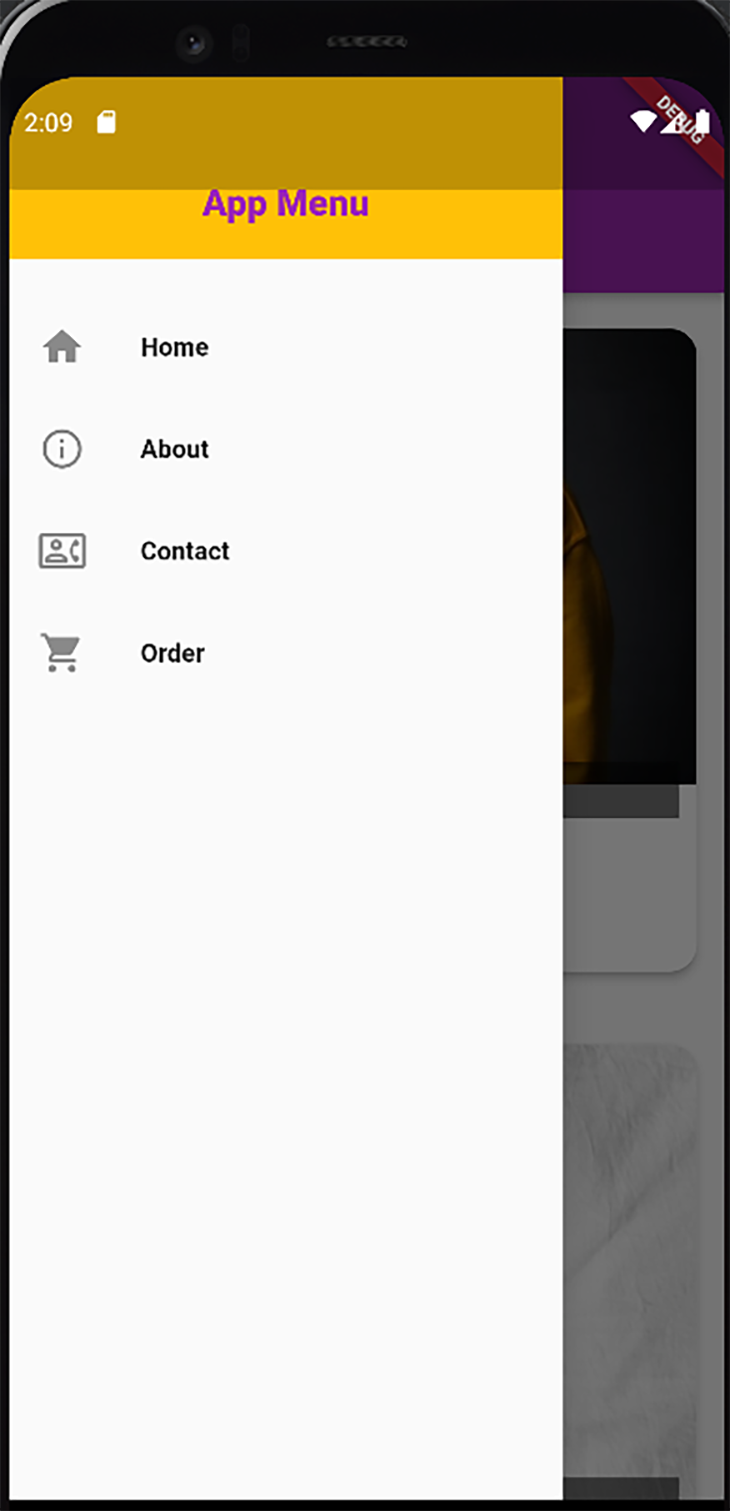
Rendering the cell display screen
Subsequent, create the display screen to render the cell view of the appliance. Within the screens package deal, create a Dart file with the identify mobile_product_view and embrace the next code snippet within the file:
import 'package deal:flutter/materials.dart';
import 'package deal:shop_app/widgets/product.dart';

import '../dummy_data.dart';
import '../widgets/navigation_drawer.dart';

class MobileProductView extends StatelessWidget {
  closing String title;

  const MobileProductView({Key? key, required this.title}) : tremendous(key: key);

  @override
  Widget construct(BuildContext context) {
   return Scaffold(
        appBar: AppBar(
          title: Textual content(title),
        ),
        drawer: NavigationDrawer(),
     physique:  GridView.rely(
       crossAxisCount: 1,
    youngsters: DUMMY_DATA.map((product) =>
    Product(id: product.id, identify: product.identify, imageUrl: product.imageUrl, colour: product.colour, value: product.value)).toList(),
    )
    );
  }
}
The code above reveals the appliance utilizing the info from the dummy_data.dart file to construct a listing of Product widgets which might be rendered as GridView.

Rendering the desktop display screen
This part will include the implementation for the desktop view of the appliance. Create a Dart file with the identify desktop_product_view within the screens package deal. Add the next code to the file:
import 'package deal:flutter/materials.dart';
import 'package deal:shop_app/widgets/product.dart';

import '../dummy_data.dart';

class DesktopProductView extends StatelessWidget {
  closing String title;
  closing int crossAxisCount;

  const DesktopProductView({Key? key, required this.title, required this.crossAxisCount}) : tremendous(key: key);

  @override
  Widget construct(BuildContext context) {

    Widget getAction(String actionName){
      return TextButton(
        onPressed: () {},
        baby: Textual content(
          actionName,
          fashion: TextStyle(
              colour: Theme.of(context).accentColor,
            fontWeight: FontWeight.w500
          ),
        ),
      );
    }

    return Scaffold(
      appBar: AppBar(
        title: Textual content(title),
        actions: [
          Padding(
            padding: const EdgeInsets.only(right: 100.0),
            child: Row(
              mainAxisAlignment: MainAxisAlignment.spaceBetween,
              children: [
                getAction('Home'),
                getAction('About'),
                getAction('Contact'),
                getAction('Order'),
              ],
            ),
          )
        ],
      ),
      physique: Padding(
        padding: const EdgeInsets.all(18.0),
        baby: GridView.rely(
         crossAxisCount: crossAxisCount,
          youngsters: DUMMY_DATA.map((product) =>
              Product(
                  id: product.id,
                  identify: product.identify,
                  imageUrl: product.imageUrl,
                  colour: product.colour,
                  value: product.value)
          ).toList(),
        ),
      ),
    );
  }
}
From the above code, the widget receives the crossAxisCount worth by way of its constructor. With this worth, it specifies the amount of Product widgets to render within the GridView at runtime.
The actions within the AppBar widget will change the drawer you created for the cell view. Utilizing the getAction technique, you create particular motion widgets for the AppBar.
Implementing the LayoutBuilder class
The implementation of the LayoutBuilder class can be carried out within the primary.dart file. It is because we’re designing the whole display screen of the appliance to be adaptive. Therefore, the LayoutBuilder ought to construct the interface from the outermost layer of the widgets, which on this case is positioned within the primary.dart file.
Right here is the code you must add to the primary.dart file:
import 'package deal:flutter/materials.dart';
import 'package deal:shop_app/screens/mobile_product_view.dart';

import 'screens/desktop_product_view.dart';

void primary() {
  runApp(const MyApp());
}

class MyApp extends StatelessWidget {
  const MyApp({tremendous.key});

  @override
  Widget construct(BuildContext context) {
    return MaterialApp(
      title: 'Flutter Demo',
      theme: ThemeData(
        primarySwatch: Colours.purple,
        accentColor: Colours.amber
      ),
      dwelling: const MyHomePage(title: 'Flutter adaptive app'),
    );
  }
}

class MyHomePage extends StatefulWidget {
  const MyHomePage({tremendous.key, required this.title});
  closing String title;

  @override
  State<MyHomePage> createState() => _MyHomePageState();
}

class _MyHomePageState extends State<MyHomePage> {

  @override
  Widget construct(BuildContext context) {
    return LayoutBuilder(
      builder: (ctx, constraints){
        if(constraints.maxWidth < 600){
          return MobileProductView(title: widget.title);
        }
        int crossAxisCount = 0;
        if(constraints.maxWidth > 1400) {
          crossAxisCount = 4;
        } else if(constraints.maxWidth > 900) {
          crossAxisCount = 3;
        } else if (constraints.maxWidth >= 600) {
          crossAxisCount = 2;
        }
        return DesktopProductView(title: widget.title, crossAxisCount: crossAxisCount);
      }
    );
  }
}
The construct technique of the MyHomePage widget builds the screens utilizing the LayoutBuilder primarily based on the next constraints:
- If the width of the gadget display screen is lower than 600 pixels, it builds the
MobileProductView, which represents the interface you will have created within the earlier part for cell gadgets - If the width of the gadget display screen is bigger than 600 pixels, it builds the
DesktopProductViewhowever with the requiredcrossAxisCount, relying on the gadget width, as illustrated within the code
If you happen to intend to make only a particular a part of your utility adaptive and never the whole display screen as demonstrated above, you would need to implement the LayoutBuilder on the specified portion of the widget.
Conclusion
Making your utility adaptive throughout totally different working programs and gadget display screen sizes is an effective method of bettering its person expertise. This tutorial demonstrated how one can make your utility adaptive utilizing the Flutter LayoutBuilder class. As talked about originally of the article, there are different choices such because the adaptive format package deal you may undertake when constructing an adaptive app.
The mission constructed on this tutorial is out there on GitHub. I additionally suggest that you simply discover the Flutter docs to get a broader glimpse of constructing adaptive layouts throughout totally different parts of your utility.
