
On this tutorial, we’ll construct an inside software for studying, downloading and importing objects to the buckets in MinIO.
What’s MinIO?
Minio is an open-source distributed object storage server designed for Non-public Cloud infrastructure offering S3 storage performance. Minio is can be utilized for storing unstructured information equivalent to pictures, movies, log information, backups, and containers.
What you may must construct the GCS file explorer?
- ToolJet (https://github.com/ToolJet/ToolJet): A free and open-source low-code platform that permits you to shortly construct functions. You’ll be able to create a free account on ToolJet Cloud or run it in your native machine.
- MinIO: Try the varied editions and their Pricing right here. I’ve used the group version utilizing docker for this tutorial.
Bonus: Obtain the exported software and import it to your ToolJet account to make use of it instantly.
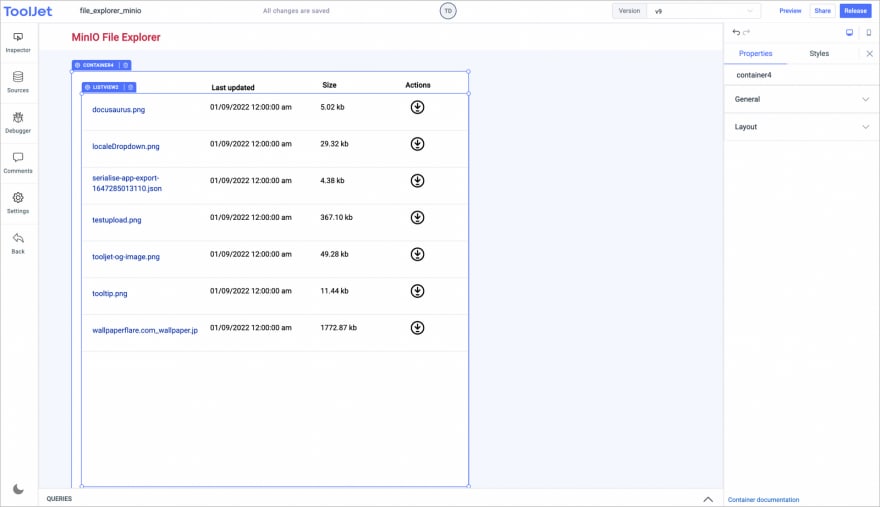
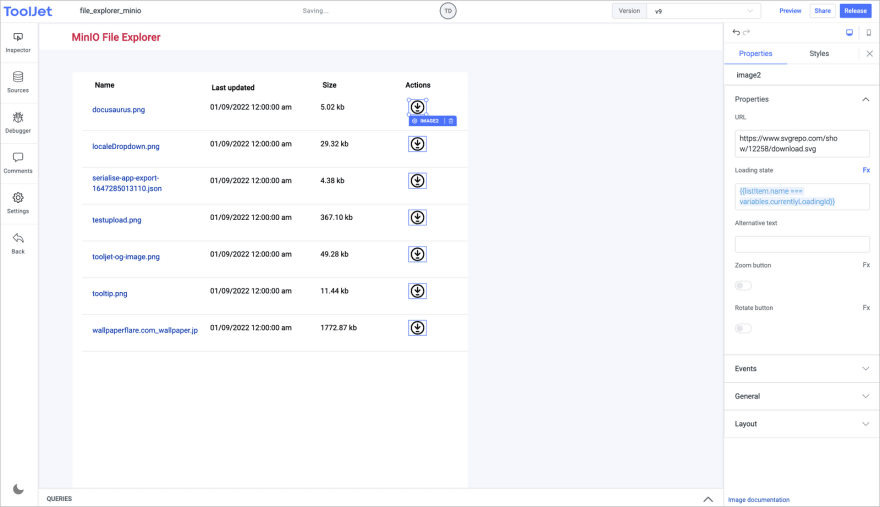
Here is a glimpse of the appliance:
With out additional ado, let’s begin constructing the appliance.
Constructing the UI of the explorer
Let’s begin with constructing the UI for Explorer. Login to ToolJet after which on the Dashboard, click on on the Create new software button to create a brand new app. As soon as the app is created, you’ll be redirected to the visible app editor. You’ll be able to change the title of the app by modifying the default title i.e Untitled app from the highest left of the app builder.
The visible app editor has 4 sections:
- Canvas is on the heart, the place you may drag and drop widgets to construct UI.
- Question editor on the backside, the place you may create queries.
- On the best sidebar, you may discover Widget Supervisor which has an inventory of built-in widgets and parts. You’ll be able to drag and drop to begin constructing out the consumer interface.
- On the left sidebar, you may see the Inspector, debugger, feedback, settings, and Datasource supervisor. The datasource supervisor is used so as to add a brand new datasource or handle the linked datasource.
Let’s construct the UI
For constructing the consumer interface, you’ll want to tug and drop the next parts from the Widget Supervisor(proper sidebar) and place them accordingly.
Right here is the configuration of widgets that I used for constructing the UI:
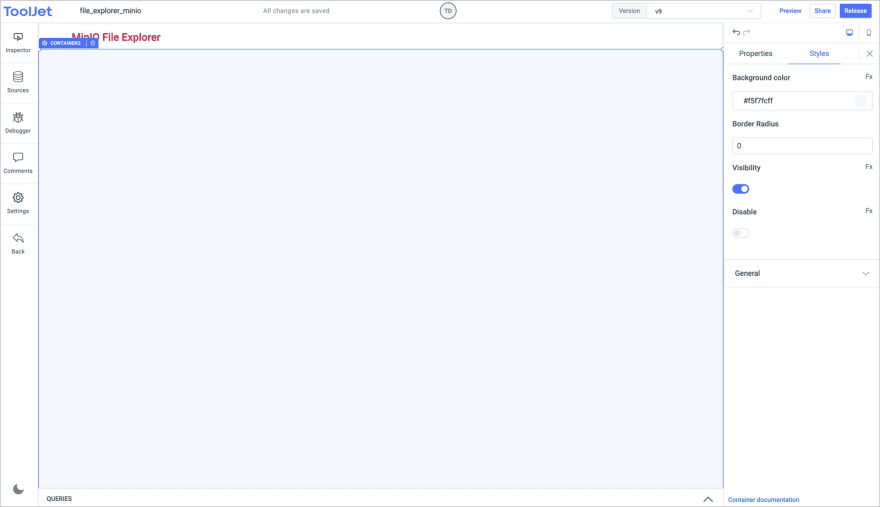
- A Container as header and Textual content widget contained in the container to present a title to the app i.e MinIO File Explorer

- One other container under the header will include all of the sections of the appliance. Give this container a background coloration of your selection from the Kinds.
- Let’s add a textual content widget within the heart and set the textual content to
Please choose a bucket– we’ll show this textual content by conditionally disabling the visibility of the container that we are going to add on high of this textual content widget

- Let’s drag a container on high of the textual content widget, and put record view widget contained in the container. It’s also possible to use textual content widgets to set columns names- Title, Final up to date, Dimension, and Actions.
- Within the Listing view widget, use textual content widget for title, up to date on, and measurement. Use Picture widget for the Motion. Consumer will click on on the obtain picture to obtain the item from the MinIO.
- Set the next discipline worth for the three textual content widgets Title, Up to date on, and Dimension as
{{listItem.title}},{{second(listItem.lastModified).format("DD/MM/YYYY h:mm:ss a")}}, and{{(listItem.measurement/1024).toFixed(2)}}kb respectively. Within the picture widget set the loading state worth to{{listItem.id === variables.currentlyLoadingId}}, and add the occasion handler to open the webpage{{queries.urlfordownload.information.url}}

- Drag a button on the best aspect of the container that can be used to set off the dialog for selecting the bucket.

- Drag a modal someplace under the container, go to the button properties and set the occasion handler to present the modal that you’ve added.

- Click on on the button to indicate the modal, after which you may drag and drop dropdown and button widget contained in the modal to construct the modal UI. The dropdown will embody the record of buckets that we are going to retrieve from the question, and the button can have an occasion handler to fireside the question for itemizing the information from the chosen bucket.

- Let’s add textual content widget subsequent to button for displaying up the at the moment chosen bucket. Set the textual content worth as
{{parts.dropdown1.worth}}

- Now, the final part of the UI – the add part. We’ll construct this part inside a container. We can be utilizing textual content, divider, textual content enter, file picker and button widget to construct the part. The button widget will embody an occasion handler for firing up the add question that we are going to create later.

💡 Examine the documentation to be taught extra about customizing the widgets and beautifying the UI. ✨
Now, we’re finished constructing the UI – let’s transfer ahead with connecting the MinIO and construct the queries.
Connecting the MinIO datasource and creating queries
Earlier than creating the queries let’s join the MinIO datasource first:
- Go to the datasource supervisor on the left sidebar and click on on + button to add a brand new datasource.
- Search and click on on MinIO.
- Enter the Host, Port, Username and Password.
- You’ll be able to click on on
Check connectionbutton to examine the connection after which click on on Save button to save lots of the datasource. - Now, we’re good to go for creating queries.

*For this software, we might want to construct the queries for:
*
- JavaScript code for triggering present modal motion
- Itemizing the buckets from MinIO
- Itemizing the item/information from the chosen bucket
- Importing the file to the chosen bucket
- Creating signed URL for downloading the item from the bucket
JavaScript code for triggering present modal motion
- Go to the Question Panel, and click on on the
+button - Create a brand new
JavaScript code questionand enter the next code for triggering the present modal motion:
actions.showModal('modal1')

- Go to the Superior tab, toggle on the Run question on web page load? choice, and save the question as showModalOnPageLoad. Enabling the Run question on web page load choice will show the modal each time the app is loaded – giving customers the pliability to decide on the bucket earlier than transferring to different app features.
Itemizing the buckets from MinIO
- Go to the Question Panel, and click on on the + button to create a brand new question
- Choose MinIO because the datasource
- Within the operations dropdown, choose the Listing buckets choice
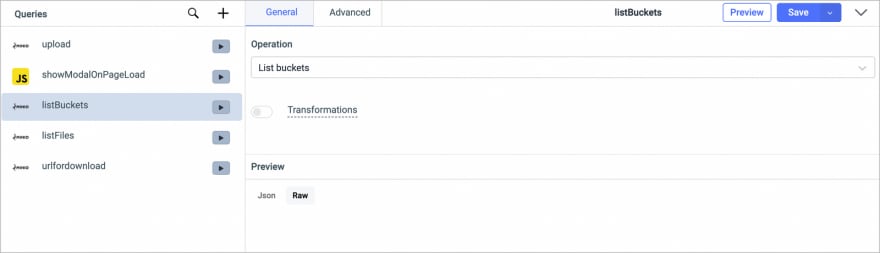
- Go to the Superior tab, toggle on the Run question on web page load? choice, and click on Save and Run button.
- Let’s open up the modal by clicking on the change button, after which edit the properties of the dropdown contained in the modal. Set the Possibility Values and Possibility Label as
{{queries.listBuckets.information.map(row => row.title)}}, the Default worth to{{queries.listBuckets.information.map(row => row.title)[0]}}, and Choices loading state to{{queries.listBuckets.isLoading}}

Itemizing the item/information from the chosen bucket
- Go to the Question Panel, and click on on the + button to create a brand new question
- Choose MinIO because the datasource
- Within the operations dropdown, choose the Listing objects in a bucket choice
- Within the Bucket discipline, use JS to dynamically get the worth from the chosen choice within the dropdown widget –
{{parts.dropdown1.worth}}

- Now, go to the Superior tab and add an occasion handler to shut the modal as soon as the question is profitable.
- Save and run the question as listFiles.

- Let’s open up the modal by clicking on the change button, after which edit the properties of the button that’s contained in the modal. Add an occasion handler for operating the listFiles question for On Click on occasion.

- Go to the record view widget and join the info returned by the question. Set record information discipline worth to
{{queries.listFiles.information.information}}
Importing the file to the chosen bucket
- Go to the Question Panel, and click on on the + button to create a brand new question
- Choose MinIO because the datasource
- Within the operations dropdown, choose the Put object choice
- Within the Bucket discipline enter
{{parts.dropdown1.worth}}, File title discipline enter{{parts.textinput1.worth}}, Content material kind discipline enter{{parts.filepicker1.file[0].kind}}, and Add information discipline enter{{parts.filepicker1.file[0].content material}}

- Go to the Superior tab and add the 2 occasion handlers, one to run the listFiles question for the On Success occasion. This can reload the record of information within the listview widget.

- And the opposite occasion handler to set element particular motion for file picker that can clear the file from the widget as soon as the question is profitable.

- Save and run the question as add.
Creating signed URL for downloading the file from the bucket
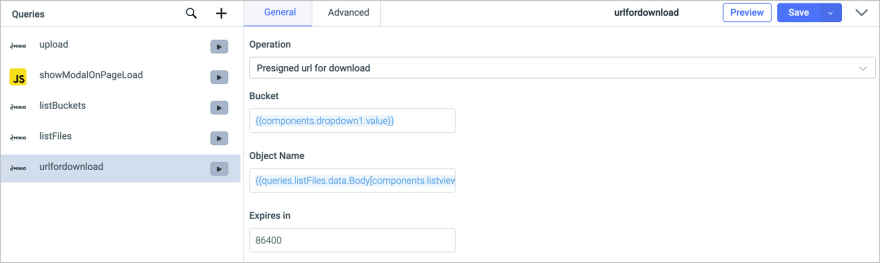
- Go to the Question Panel, and click on on the + button to create a brand new question
- Choose MinIO because the datasource
- Within the operations dropdown, choose the Presigned URL for obtain choice
- Within the Bucket discipline enter
{{parts.dropdown1.worth}}, and in File title discipline enter{{queries.listFiles.information.Physique[components.listview2.selectedRowId].title}}
- Go to the Superior tab and set an occasion handler to
unset a variable– currentlyLoadingId
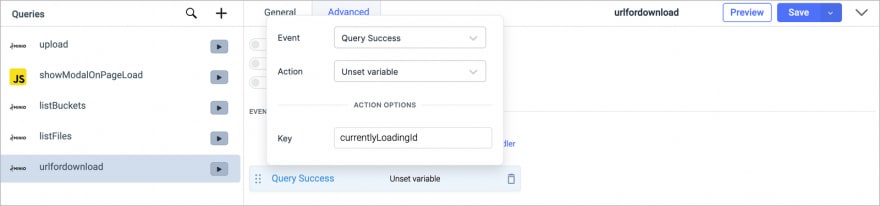
- Save the question as urlfordownload
- Go to the record view widget and click on on its deal with to edit its properties.
- Add the two occasion handlers– one to set a variable
currentlyLoadingIdfor On row click on occasion and set its worth to{{queries.listFiles.information.Physique[components.listview2.selectedRowId].title}} - And the opposite handler to run the urlfordownload question.
- Now you may click on on one of many row on the record view widget and it’ll fireplace up the urlfordownload question.
Superior! We have now efficiently constructed all of the queries and linked with the UI.
And now FINALLY simply Launch your software from the highest proper nook of the app editor.
You’ve efficiently created a File explorer app to your MinIO object storage 🎉
You probably have any queries associated to constructing functions with ToolJet or simply need to hang around in the neighborhood of low-code software builders simply drop us a Hello in our Slack Neighborhood. 🚀
