
Have you ever ever used instruments like Bitly or TinyURL to shorten lengthy hyperlinks? Or, have you ever questioned how these companies work? Perhaps you needed to construct a URL shortener however by no means discovered the time or the correct instruments to take action. In any case, if you’re on this subject, this text is ideal for you.
On this put up, we’ll reveal the way to construct a fundamental URL shortener service utilizing Cloudflare Staff. We’ll present detailed details about how URL shortener companies work, introduce a number of options of Cloudflare Staff, and provides step-by-step directions on the way to get began with Cloudflare Staff.
Bounce forward:
Let’s get began!
What’s Cloudflare Staff?
Cloudflare Staff is a service that permits you to deploy serverless code to the Cloudflare community. The Cloudflare community, or the Edge, is a community of net servers unfold throughout the globe. One wonderful thing about Cloudflare Staff is that you just don’t have to fret about scaling your code. Additionally, you don’t have to fret in regards to the time zones your code lives in; your code in Staff is unfold throughout the globe seconds after it’s deployed.
On high of that, Cloudflare Staff include a easy key-value knowledge retailer, referred to as KV. On this tutorial, we’ll use a mixture of Cloudflare Staff and KV storage to construct our URL shorter.
Undertaking overview: URL shortener service
We’ll begin by constructing a easy, non-dynamic URL shortener the place you hardcode the web sites you wish to redirect to. This may function an introduction to studying the way to use Wrangler (Cloudflare’s official CLI software) and can reveal fundamental ideas within the Staff realm.
Subsequent, we’ll spice issues up a bit and add assist for dynamic URLs. Mainly, we’ll work together with the Cloudflare Staff KV retailer, and enter quick variations of the URL and the precise URL we wish to redirect to. The info within the KV retailer shall be just like the next construction:
'short-url': 'https://my-cool-website.com'
'submit': 'https://my-cool-site.org/weblog/concepts/submit'
Lastly, we’ll deploy our code to manufacturing and see it work reside throughout the globe.
Are you excited already? Nice, let’s soar in!
Organising the surroundings
To observe together with this text, you’ll want the next:
- Node.js and npm
- Wrangler
- curl (or the browser of your selecting) to check the URL shortener
I take advantage of the asdf software to handle my native dependencies, however you need to use any model supervisor you favor. On the time of writing, right here’s my Node and npm model:
$ node --version
v18.5.0
$ npm --version
8.12.1
Wrangler is a command-line software for constructing, and just lately, it bought its 2.0 model. For the aim of this put up, Wrangler will fulfill all our wants. Sooner or later, we would use Miniflare, a extra strong and feature-rich sibling of Wrangler. However, for now, let’s set up Wrangler globally through npm:
$ npm set up -g [email protected]
On the time of writing, the most recent Wrangler model is 2.0.21, so we’ll go along with that one.
Cool. Now that we have now all of the dependencies in place, we will use the Wrangler CLI to generate our starter Cloudflare Employee.
Producing the challenge
The Wrangler CLI software will show very useful right here.
To begin, let’s run a command to provoke and arrange our challenge correctly:
Extra nice articles from LogRocket:
$ wrangler init short-it
This command will ask a few questions. For now, we’re going to reply sure (by typing y) for all of them:
$ wrangler init short-it
 ⛅️ wrangler 2.0.21
--------------------
Utilizing npm as bundle supervisor.
✨ Created short-it/wrangler.toml
Would you want to make use of git to handle this Employee? (y/n)
✨ Initialized git repository at short-it
No bundle.json discovered. Would you wish to create one? (y/n)
✨ Created short-it/bundle.json
Would you want to make use of TypeScript? (y/n)
✨ Created short-it/tsconfig.json
Would you wish to create a Employee at short-it/src/index.ts?
  None
❯ Fetch handler
  Scheduled handler
✨ Created short-it/src/index.ts

added 62 packages, and audited 63 packages in 1s

1 bundle is searching for funding
  run `npm fund` for particulars

discovered 0 vulnerabilities
✨ Put in @cloudflare/workers-types and typescript into devDependencies

To begin creating your Employee, run `cd short-it && npm begin`
To publish your Employee to the Web, run `npm run deploy`
Should you answered positively to all of the questions from Wrangler, then you’ll have a challenge title short-it, with the next inside:
.gitlisting in your challenge, which means you’re able to push it to your Git supplierbundle.jsonfiletsconfig.jsonfile with all of the TypeScript configurationsrc/index.tsfile with some easy logic to get a response from our Employee
Superior. Let’s see if this factor works!
Let’s cd into the short-it listing and begin Wrangler in native growth mode:
$ cd short-it
$ wrangler dev --local
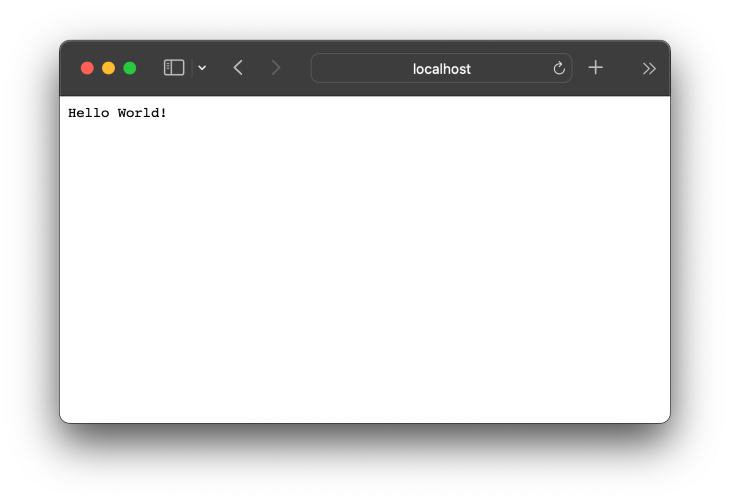
This could run our Employee on http://localhost:8787/. If we go to localhost, we must always see a easy “Whats up World!” message:
Yay! We made it work. However how? Let’s take a more in-depth look.
How does Cloudflare Staff work?
We bought our first message domestically from the generated Employee, however how precisely did that work?
Let’s undergo the generated src/index.ts file to achieve a greater understanding of what’s happening there.
// src/index.ts

/**
 * Welcome to Cloudflare Staff! That is your first employee.
 *
 * - Run `wrangler dev src/index.ts` in your terminal to start out a growth server
 * - Open a browser tab at http://localhost:8787/ to see your employee in motion
 * - Run `wrangler publish src/index.ts --name my-worker` to publish your employee
 *
 * Be taught extra at https://builders.cloudflare.com/employees/
 */

export interface Env {
  // Instance binding to KV. Be taught extra at https://builders.cloudflare.com/employees/runtime-apis/kv/
  // MY_KV_NAMESPACE: KVNamespace;
  //
  // Instance binding to Sturdy Object. Be taught extra at https://builders.cloudflare.com/employees/runtime-apis/durable-objects/
  // MY_DURABLE_OBJECT: DurableObjectNamespace;
  //
  // Instance binding to R2. Be taught extra at https://builders.cloudflare.com/employees/runtime-apis/r2/
  // MY_BUCKET: R2Bucket;
}

export default {
  async fetch(
    request: Request,
    env: Env,
    ctx: ExecutionContext
  ): Promise<Response> {
    return new Response("Whats up World!");
  },
};
The above code features a definition for our surroundings (the Env interface) and a few feedback referring to the ENV interface.
Because the interface is out of the scope of this text, we’ll ignore that portion of the code and focus solely on the principle logic:
// src/index.ts

export default {
  async fetch(
    request: Request,
    env: Env,
    ctx: ExecutionContext
  ): Promise<Response> {
    return new Response("Whats up World!");
  },
};
What occurs right here is that our index.ts exports a fetch perform. That is an interface just like Internet Staff. The truth is, it’s from this interface that the title “Cloudflare Staff” originates. Cloudflare Staff is just like Internet Staff, besides it runs on Cloudflare infrastructure somewhat than a browser.
Within the above code, the fetch perform returns a brand new Response object with the “Whats up World!” textual content. So once we run our Employee, this fetch perform is invoked. Then, the invoked fetch perform returns the “Whats up World!” response, and that is what we choose up within the browser (or through any software used to invoke the Employee).
OK, we’ve cleared up the fundamentals of Cloudflare Staff. We are able to transfer on with confidence. Should you’re new to TypeScript, don’t worry; we’ll use its options solely calmly. Think about this as a light-weight onboarding to the world of TypeScript.
Nice, let’s transfer onward!
Including a primary redirect
We’ll start engaged on our logic with a delicate begin. First, we’ll have our URL shortener redirect a person to a unique web site. This would be the basis for later modifications.
For now, we’ll have the person go to a web page on the https://http.cat/ web site once they go to our native Employee.
Should you’re not aware of https://http.cat/, it’s a enjoyable website that shows numerous cat photos for various HTTP statuses. For instance, if a person makes a request to our Employee to http://localhost:8787/404, they are going to be directed to https://http.cat/404.
To realize this redirect, we’ll edit the src/index.ts, like so:
// src/index.ts
// ...

const basePath = "https://http.cat";

export default {
  async fetch(
    request: Request,
    _env: Env,
    _ctx: ExecutionContext
  ): Promise<Response> {
    const url = new URL(request.url);

    const { pathname } = url;

    const redirectURL = basePath + pathname;

    if (pathname === "https://weblog.logrocket.com/") {
      return new Response("Whats up World from our superior Employee!");
    }

    return Response.redirect(redirectURL, 301);
  },
};
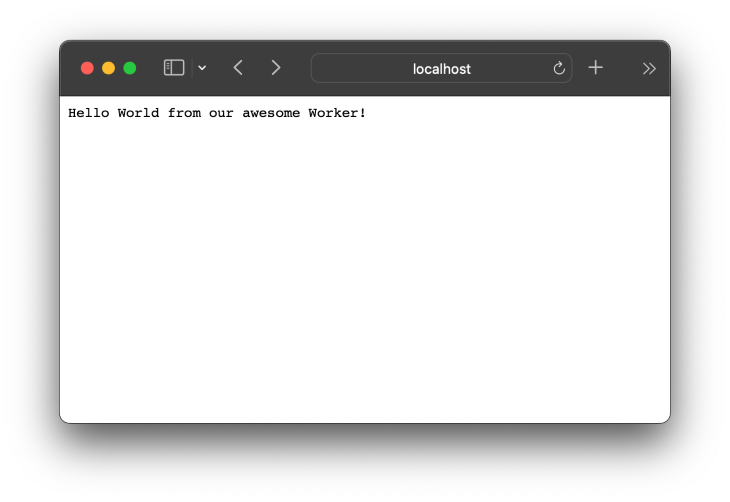
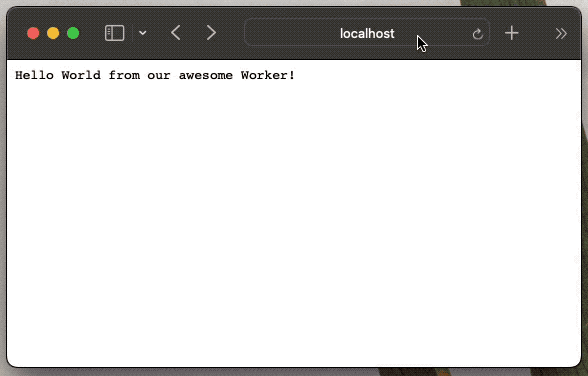
Now, if we go to http://localhost:8787 we’ll get an up to date message: “Whats up World from our superior Employee!”, as proven under:
However, if we attempt to go to http://localhost:8787/404, we’ll get redirected to https://http.cat/404.
Nice, we bought our first redirect going. Now, let’s make our URL shortener really shorten some URLs.
Shortening the URL
For now, we’ll add a small knowledge construction to retailer our shortened URLs. We are able to do it like this:
const shortURLs = {
  "/weblog": "https://pragmaticpineapple.com/",
  "/twitter": "https://twitter.com/nikolalsvk",
  "/github": "https://github.com/nikolalsvk",
} as Document<any, string>;

export default {
  async fetch(
    request: Request,
    _env: Env,
    _ctx: ExecutionContext
  ): Promise<Response> {
    const url = new URL(request.url);

    const { pathname } = url;

    const redirectURL = shortURLs[pathname];

    if (!redirectURL) {
      return new Response(
        `There isn't a outlined URL for the trail: '${pathname}', sorry :(`
      );
    }

    return Response.redirect(redirectURL, 301);
  },
};
Right here, we added a few shortened URLs:
You possibly can change it to no matter you want simply to see it working. Now, once I go to http://localhost:8787/weblog, I get redirected to an extended URL the place my weblog is positioned. Right here’s the end result:
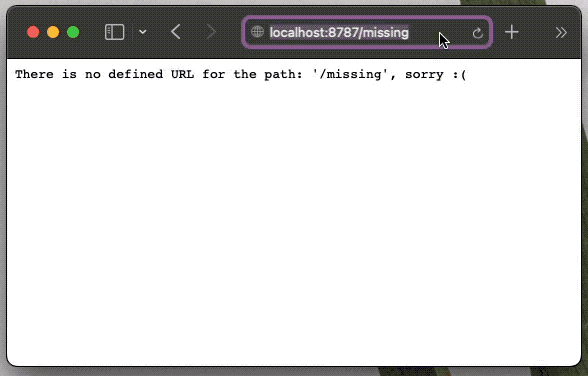
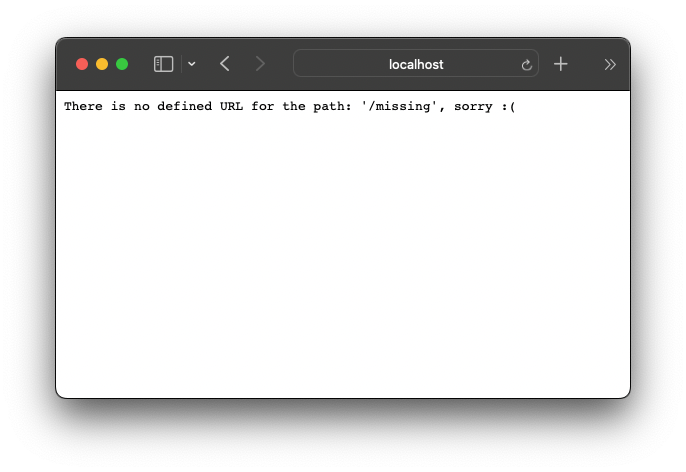
However, if we request some path, like http://localhost:8787/lacking, we get the next error message: “There isn’t a outlined URL for the trail: ‘/lacking’, sorry :(“.
Superior, now we’re prepared to maneuver our hardcoded URLs and their shortened variations to a storage someplace. Happily, we’re utilizing Cloudflare Staff, and it affords a easy key-value storage referred to as KV.
Including storage
Earlier than we really create the KV for our challenge, we first must log into Cloudflare Staff through Wrangler. That is mandatory as a result of Wrangler will later must contact Cloudflare so as to create a KV occasion for us.
Logging into Cloudflare
To log into Cloudflare, use the next command:
$ wrangler login
A browser will open, asking you to log in to Cloudflare. Don’t fear; the free plan covers all the pieces we’ll want for this tutorial, and you’ll not be requested for cost. Go forward and register, or log in if you have already got an account.
Subsequent, Cloudflare will ask if you wish to grant authorization to Wrangler. After you agree, it is best to see the next display screen:
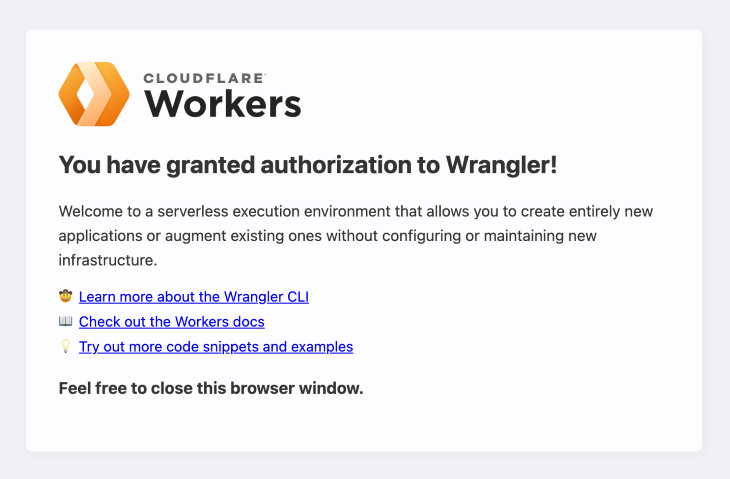
There shouldn’t be any hiccups in the course of the signup course of. However, when you bought caught at any level, you’ll be able to observe Cloudflare’s information on creating an account.
Superior! Now that you’re signed up and logged in, let’s verify whether or not all the pieces is linked correctly.
Use the next command:
$ wrangler whoami
 ⛅️ wrangler 2.0.21
--------------------
Getting Consumer settings...
👋 You might be logged in with an OAuth Token, related to the e-mail '[email protected]'!
┌──────────────────────┬──────────────────────────────────┐
│ Account Identify │ Account ID │
├──────────────────────┼──────────────────────────────────┤
│ Nikola Đuza Private │ 98a16dfefca0e2ee27e1e79ba590d973 │
└──────────────────────┴──────────────────────────────────┘
Nice, we’re able to make a KV namespace.
Making a KV namespace
A KV namespace might be considered it as an example of KV up on the Cloudflare community. We’ll create two KV namespaces: one for manufacturing the place our app will reside and work and one other for the preview surroundings. We’ll use the preview namespace whereas we check and develop our URL shortener.
We’ll create our KV namespaces through Wrangler with the next instructions:
$ wrangler kv:namespace create SHORT_URLS
🌀 Creating namespace with title "short-it-SHORT_URLS"
✨ Success!
Add the next to your configuration file in your kv_namespaces array:
{ binding = "SHORT_URLS", id = "029d374ebd984e19b0bb98e37ab1a95e" }

$ wrangler kv:namespace create SHORT_URLS --preview
 ⛅️ wrangler 2.0.21
--------------------
🌀 Creating namespace with title "short-it-SHORT_URLS_preview"
✨ Success!
Add the next to your configuration file in your kv_namespaces array:
{ binding = "SHORT_URLS", preview_id = "99a72876e5f84cf58de722b1c2080604" }
After these two instructions run and each namespaces are created, we have to inform Wrangler to make use of these namespaces once we run wrangler dev.
We’ll add details about KV namespaces to the wrangler.toml file on the root of our challenge. It ought to look one thing like this:
title = "short-it"
principal = "src/index.ts"
compatibility_date = "2022-07-15"

kv_namespaces = [
  { binding = "SHORT_URLS", id = "029d374ebd984e19b0bb98e37ab1a95e", preview_id = "99a72876e5f84cf58de722b1c2080604" }
]
The wrangler.toml file is a configuration file that tells wrangler sure details about our challenge. Now, we’re strapped up and able to add some knowledge to our KV.
Including knowledge to the KV
Our subsequent step is to seed the information to the KV. Bear in mind, we have now two namespaces so we’ll must run two instructions to have the information in each locations. Let’s add the /weblog entry to the KV:
$ wrangler kv:key put --binding SHORT_URLS "/weblog" "https://pragmaticpineapple.com/" --preview false
 ⛅️ wrangler 2.0.21
--------------------
Writing the worth "https://pragmaticpineapple.com/" to key "/weblog" on namespace 029d374ebd984e19b0bb98e37ab1a95e.

$ wrangler kv:key put --binding SHORT_URLS "/weblog" "https://pragmaticpineapple.com/" --preview
 ⛅️ wrangler 2.0.21
--------------------
Writing the worth "https://pragmaticpineapple.com/" to key "/weblog" on namespace 99a72876e5f84cf58de722b1c2080604.
Superior. Now we have now one entry within the KV. Subsequent, let’s add logic that reads from the KV and redirects the person.
Studying from the KV
We’ll shortly take away our previous hardcoded quick URLs and add a name to the KV, like so:
// src/index.ts
export interface Env {
  SHORT_URLS: KVNamespace;
}

export default {
  async fetch(
    request: Request,
    env: Env,
    _ctx: ExecutionContext
  ): Promise<Response> {
    const url = new URL(request.url);

    const { pathname } = url;

    const redirectURL = await env.SHORT_URLS.get(pathname);

    if (!redirectURL) {
      return new Response(
        `There isn't a outlined URL for the trail: '${pathname}', sorry :(`
      );
    }

    return Response.redirect(redirectURL, 301);
  },
};
Right here, we add SHORT_URLS as a KVNamespace sort. This may enable us to name KV strategies to get the correct knowledge. As a substitute of the hardcoded object with URLs, this time we use await env.SHORT_URLS.get(pathname).
The decision to env.SHORT_URLS.get(pathname) tries to get the important thing from the KV. If it returns a promise, we should await. However, if there’s a worth for the given pathname, then the person is redirected to that URL.
Now, once we go to http://localhost:8787/weblog, we shall be redirected to the precise weblog URL we put within the KV. It’ll seem like this:
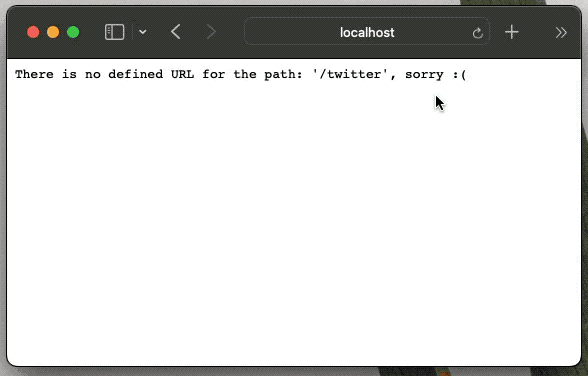
However, if we now attempt to go to any of the opposite URLs we hardcoded, we’ll get a message saying that these URLs are lacking a redirect:
Let’s shortly add the Twitter shortened URL to the KV utilizing these instructions:
$ wrangler kv:key put --binding SHORT_URLS "/twitter" "https://twitter.com/nikolalsvk" --preview false
⛅️ wrangler 2.0.21
--------------------
Writing the worth "https://twitter.com/nikolalsvk" to key "/twitter" on namespace 029d374ebd984e19b0bb98e37ab1a95e.

$ wrangler kv:key put --binding SHORT_URLS "/twitter" "https://twitter.com/nikolalsvk" --preview
 ⛅️ wrangler 2.0.21
--------------------
Writing the worth "https://twitter.com/nikolalsvk" to key "/twitter" on namespace 99a72876e5f84cf58de722b1c2080604.
Now, once we refresh the http://localhost:8787/twitter, we must always get redirected to the Twitter account.
Superior, now we have now two quick URLs: /weblog and /twitter. Let’s attempt to deploy our service and see it in manufacturing.
Deploying Cloudflare Staff
The Cloudflare Staff deployment step is pretty simple. We’ll make the most of wrangler publish, like so:
$ wrangler publish
 ⛅️ wrangler 2.0.21
--------------------
Retrieving cached values for userId from node_modules/.cache/wrangler
Your employee has entry to the next bindings:
- KV Namespaces:
  - SHORT_URLS: 029d374ebd984e19b0bb98e37ab1a95e
Complete Add: 0.45 KiB / gzip: 0.29 KiB
Employee ID: short-it
Employee ETag: f8395cab29edf297137631b803b14c32daaae982758c23e3019b700e2468c277
Uploaded short-it (2.14 sec)
Printed short-it (6.33 sec)
  short-it.nikolalsvk.employees.dev
Now, the companies are reside at https://short-it.nikolalsvk.employees.dev. Yay!
Should you’re following together with this tutorial, your companies ought to reside someplace alongside the URL https://short-it.YOUR_SUBDOMAIN.employees.dev, relying on what you chose for YOUR_SUBDOMAIN.
At this level, our Employee script is deployed throughout the globe on the Cloudflare Edge community. Which means that pals and strangers throughout the globe can get redirected blazingly quick to our Twitter account in the event that they go to https://short-it.nikolalsvk.employees.dev/twitter.
Wrapping up
Thanks for following alongside on the journey of making a easy URL shortener service utilizing Cloudflare Staff. On this article, we launched the ideas of a Employee contained in the Cloudflare context. We additionally demonstrated the way to create and handle knowledge in Cloudflare’s KV storage.
We have been capable of execute all of this easily utilizing Wrangler, which gives an important developer expertise. However, most significantly, we managed to create, check, and deploy our small service that runs quick in all corners of the world.
Reaching this in an analogous know-how or service may require some huge cash and energy. Nevertheless, Cloudflare helps a beneficiant free tier of 100,000 requests per day. So you’ll be able to shorten many URLs and have many visits on them earlier than breaching right into a paid plan.
All of the code on this article is on the market within the GitHub repo (please star it, when you prefer it). The shortener service is reside at https://short-it.nikolalsvk.employees.dev.
Should you appreciated the put up, please take into account sharing it with your pals and coworkers.
Till subsequent time, cheers!
LogRocket: Full visibility into your net and cell apps

LogRocket is a frontend software monitoring answer that permits you to replay issues as in the event that they occurred in your personal browser. As a substitute of guessing why errors occur, or asking customers for screenshots and log dumps, LogRocket helps you to replay the session to shortly perceive what went mistaken. It really works completely with any app, no matter framework, and has plugins to log extra context from Redux, Vuex, and @ngrx/retailer.
Along with logging Redux actions and state, LogRocket information console logs, JavaScript errors, stacktraces, community requests/responses with headers + our bodies, browser metadata, and customized logs. It additionally devices the DOM to report the HTML and CSS on the web page, recreating pixel-perfect movies of even probably the most advanced single-page net and cell apps.
