
ASP.NET Core 6 introduces a simplified internet hosting mannequin that enables us to construct light-weight APIs with minimal dependencies. Naturally, you’ll typically must safe the endpoints of such APIs in your functions. The objective of this publish is to present you a head begin on doing so.
Now we have mentioned methods to get began with minimal APIs, methods to use logging and dependency injection in minimal APIs, and methods to take a look at minimal APIs in earlier articles. This text discusses how we are able to safe our minimal API endpoints utilizing JWT authentication—i.e., authentication primarily based on JSON Internet Tokens.
To safe a minimal API utilizing JWT authentication, we are going to comply with these steps:
- Create a minimal API venture in Visible Studio 2022.
- Create an API endpoint within the Program.cs file.
- Add the Microsoft.AspNetCore.Authentication.JwtBearer NuGet package deal to our venture.
- Implement JWT authentication within the Program.cs file.
- Create a consumer mannequin class named Person to retailer the login credentials of the consumer.
- Specify a secret key within the appsettings.json file.
- Specify JWT authentication settings within the Program.cs file.
- Add authorization companies middleware to our utility within the Program.cs file.
- Create and validate the JSON Internet Token within the Program.cs file.
Word that the entire code examples proven on this publish, besides the Person mannequin class, needs to be a part of Program.cs. The Person mannequin class needs to be a part of the Person.cs file.
To work with the code examples supplied on this article, it is best to have Visible Studio 2022 put in in your system. If you happen to don’t have already got a duplicate, you’ll be able to obtain Visible Studio 2022 right here.
Create an ASP.NET Core 6 minimal Internet API venture in Visible Studio 2022
First off, let’s create an ASP.NET Core 6 venture in Visible Studio. Following these steps will create a brand new ASP.NET Core 6 Internet API venture in Visible Studio 2022:
- Launch the Visible Studio 2022 IDE.
- Click on on “Create new venture.”
- Within the “Create new venture” window, choose “ASP.NET Core Internet API” from the listing of templates displayed.
- Click on Subsequent.
- Within the “Configure your new venture” window, specify the identify and site for the brand new venture.
- Optionally examine the “Place resolution and venture in the identical listing” examine field, relying in your preferences.
- Click on Subsequent.
- Within the “Further Data” window proven subsequent, uncheck the examine field that claims “Use controllers…” since we’ll be utilizing minimal APIs on this instance. Depart the “Authentication Kind” as “None” (default).
- Be certain that the examine containers “Allow Docker,” “Configure for HTTPS,” and “Allow Open API Help” are unchecked as we received’t be utilizing any of these options right here.
- Click on Create.
We’ll use this ASP.NET Core 6 Internet API venture to create a minimal API endpoint and implement JWT authentication for it within the subsequent sections of this text.
Create a HTTP Get endpoint in ASP.NET Core 6
Whenever you create a brand new minimal Internet API venture in Visible Studio 2022, a Program.cs file will likely be created with just a few strains of default code. You may exchange the default code with the next code snippet to maintain issues easy and nonetheless present a method to take a look at your API.
var builder = WebApplication.CreateBuilder(args);
var app = builder.Construct();
app.MapGet("/safety/getMessage",
() => "Whats up World!").RequireAuthorization();
app.Run();
Word using the RequireAuthorization extension methodology right here. This helps you shield your routes utilizing authorization insurance policies and forces you to offer authentication info when calling this endpoint. The authorization middleware will use this info to validate the request for the present execution context.
If you happen to execute this endpoint with out this info, you’ll encounter a HTTP 401 Unauthorized error as proven in Determine 1.
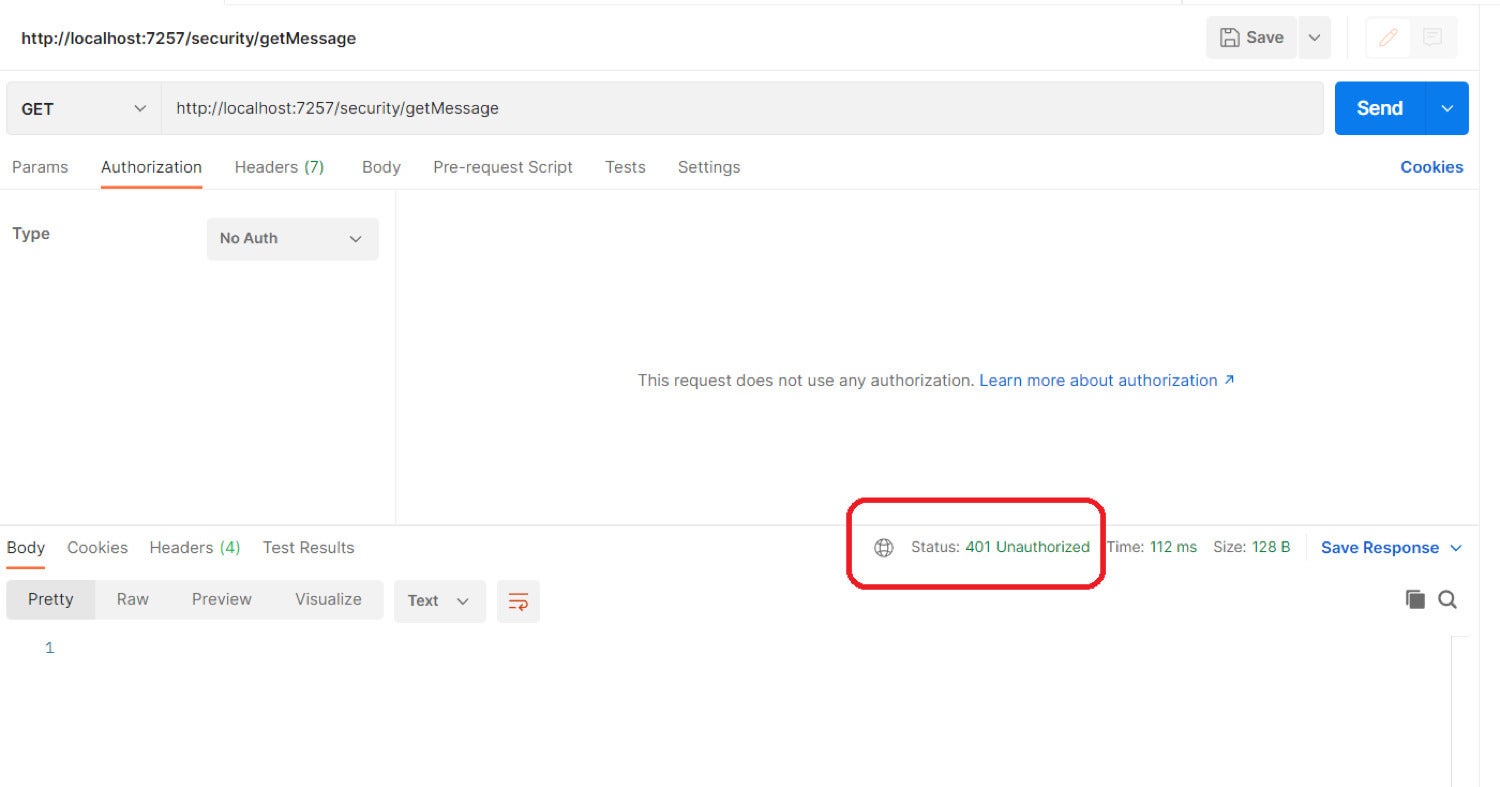 IDG
IDGDetermine 1. An HTTP 401 Unauthorized error will likely be generated if authorization is required and no authorization info is supplied.
Set up the JwtBearer NuGet package deal
Now add the Microsoft.AspNetCore.Authentication.JwtBearer NuGet package deal to your venture. To do that, choose the venture within the Answer Explorer window, then right-click and choose “Handle NuGet Packages.” Within the NuGet Package deal Supervisor window, seek for the Microsoft.AspNetCore.Authentication.JwtBearer package deal and set up it.
Alternatively, you’ll be able to set up the package deal by way of the NuGet Package deal Supervisor console by getting into the command proven under.
PM> Set up-Package deal Microsoft.AspNetCore.Authentication.JwtBearer
Specify a secret key within the appsettings.json file
Subsequent, create a piece within the appsettings.json file for the Issuer, Viewers, and Key info. This info will likely be used later to generate a JSON Internet Token. Word which you could give any identify to this part you need; I’ll use the identify “Jwt” for comfort.
Add the next info within the appsettings.json file.
  "Jwt": {
    "Issuer": "https://joydipkanjilal.com/",
    "Viewers": "https://joydipkanjilal.com/",
    "Key": "This can be a pattern secret key - please do not use in manufacturing atmosphere.'"
  }
Specify authentication settings within the Program.cs file
The AddAuthenication methodology within the Program.cs file is used to configure JWT authentication on the time when the appliance begins. It specifies the authentication scheme as JwtBearer. Moreover the decision to the AddJwtBearer methodology helps configure token parameters.
The Issuer, Viewers, and Key values are learn from the appsettings.json config file. The TokenValidationParameters occasion is used to point if the Issuer, Viewers, Key, and Lifetime info needs to be validated or not.
builder.Companies.AddAuthentication(choices =>
{
    choices.DefaultAuthenticateScheme = JwtBearerDefaults.AuthenticationScheme;
    choices.DefaultChallengeScheme = JwtBearerDefaults.AuthenticationScheme;
    choices.DefaultScheme = JwtBearerDefaults.AuthenticationScheme;
}).AddJwtBearer(o =>
{
    o.TokenValidationParameters = new TokenValidationParameters
    {
        ValidIssuer = builder.Configuration["Jwt:Issuer"],
        ValidAudience = builder.Configuration["Jwt:Audience"],
        IssuerSigningKey = new SymmetricSecurityKey
        (Encoding.UTF8.GetBytes(builder.Configuration["Jwt:Key"])),
        ValidateIssuer = true,
        ValidateAudience = true,
        ValidateLifetime = false,
        ValidateIssuerSigningKey = true
    };
});
So as to add authorization companies to your utility, your Program.cs must also embody the next code snippet.
builder.Companies.AddAuthorization();
Your Program.cs must also embody the next strategies to allow authentication and authorization capabilities.
app.UseAuthentication();
app.UseAuthorization();
Create a consumer mannequin in ASP.NET Core 6
We’ll want a category to retailer the login credentials of the consumer or customers. Create a category named Person in a file having the identical identify with a .cs extension. Then insert the next code.
public class Person
{
    public string UserName { get; set; }
    public string Password { get; set; }
}
This class will likely be used to just accept consumer credentials as enter.
Create an endpoint to generate JSON Internet Tokens
Lastly, we have to write the mandatory code to generate and validate the JWTs we’ll use to authorize calls to the API. As soon as a token is generated in response to an preliminary request to the API, you’ll be able to copy it and use it for authorization in all subsequent requests.
Now, write the next code within the Program.cs file to create a brand new HTTP Publish endpoint that may create a JWT for an authenticated consumer.
app.MapPost("/safety/createToken",
[AllowAnonymous] (Person consumer) =>
{
    if (consumer.UserName == "joydip" && consumer.Password == "joydip123")
    {
        var issuer = builder.Configuration["Jwt:Issuer"];
        var viewers = builder.Configuration["Jwt:Audience"];
        var key = Encoding.ASCII.GetBytes
        (builder.Configuration["Jwt:Key"]);
        var tokenDescriptor = new SecurityTokenDescriptor
        {
            Topic = new ClaimsIdentity(new[]
            {
                new Declare("Id", Guid.NewGuid().ToString()),
                new Declare(JwtRegisteredClaimNames.Sub, consumer.UserName),
                new Declare(JwtRegisteredClaimNames.Electronic mail, consumer.UserName),
                new Declare(JwtRegisteredClaimNames.Jti,
                Guid.NewGuid().ToString())
             }),
            Expires = DateTime.UtcNow.AddMinutes(5),
            Issuer = issuer,
            Viewers = viewers,
            SigningCredentials = new SigningCredentials
            (new SymmetricSecurityKey(key),
            SecurityAlgorithms.HmacSha512Signature)
        };
        var tokenHandler = new JwtSecurityTokenHandler();
        var token = tokenHandler.CreateToken(tokenDescriptor);
        var jwtToken = tokenHandler.WriteToken(token);
        var stringToken = tokenHandler.WriteToken(token);
        return Outcomes.Okay(stringToken);
    }
    return Outcomes.Unauthorized();
});
An occasion of the Person class is used to just accept a consumer identify and a password handed to this endpoint. Word the AllowAnonymous attribute. That is used to specify that we don’t want an authorization examine on this endpoint. The Issuer, Viewers, and Key are learn from the configuration file. Every of those is used to create the token, which we now have specified will expire in 5 minutes.
The entire supply code for Program.cs
Right here is the entire supply code of the Program.cs file to your reference.
utilizing Microsoft.AspNetCore.Authentication.JwtBearer;
utilizing Microsoft.AspNetCore.Authorization;
utilizing Microsoft.IdentityModel.Tokens;
utilizing System.IdentityModel.Tokens.Jwt;
utilizing System.Safety.Claims;
utilizing System.Textual content;
var builder = WebApplication.CreateBuilder(args);
builder.Companies.AddAuthentication(choices =>
{
    choices.DefaultAuthenticateScheme = JwtBearerDefaults.AuthenticationScheme;
    choices.DefaultChallengeScheme = JwtBearerDefaults.AuthenticationScheme;
    choices.DefaultScheme = JwtBearerDefaults.AuthenticationScheme;
}).AddJwtBearer(o =>
{
    o.TokenValidationParameters = new TokenValidationParameters
    {
        ValidIssuer = builder.Configuration["Jwt:Issuer"],
        ValidAudience = builder.Configuration["Jwt:Audience"],
        IssuerSigningKey = new SymmetricSecurityKey
            (Encoding.UTF8.GetBytes(builder.Configuration["Jwt:Key"])),
        ValidateIssuer = true,
        ValidateAudience = true,
        ValidateLifetime = false,
        ValidateIssuerSigningKey = true
    };
});
builder.Companies.AddAuthorization();
var app = builder.Construct();
app.UseHttpsRedirection();
app.MapGet("/safety/getMessage", () => "Whats up World!").RequireAuthorization();
app.MapPost("/safety/createToken",
[AllowAnonymous] (Person consumer) =>
{
    if (consumer.UserName == "joydip" && consumer.Password == "joydip123")
    {
        var issuer = builder.Configuration["Jwt:Issuer"];
        var viewers = builder.Configuration["Jwt:Audience"];
        var key = Encoding.ASCII.GetBytes
        (builder.Configuration["Jwt:Key"]);
        var tokenDescriptor = new SecurityTokenDescriptor
        {
            Topic = new ClaimsIdentity(new[]
            {
                new Declare("Id", Guid.NewGuid().ToString()),
                new Declare(JwtRegisteredClaimNames.Sub, consumer.UserName),
                new Declare(JwtRegisteredClaimNames.Electronic mail, consumer.UserName),
                new Declare(JwtRegisteredClaimNames.Jti,
                Guid.NewGuid().ToString())
             }),
            Expires = DateTime.UtcNow.AddMinutes(5),
            Issuer = issuer,
            Viewers = viewers,
            SigningCredentials = new SigningCredentials
            (new SymmetricSecurityKey(key),
            SecurityAlgorithms.HmacSha512Signature)
        };
        var tokenHandler = new JwtSecurityTokenHandler();
        var token = tokenHandler.CreateToken(tokenDescriptor);
        var jwtToken = tokenHandler.WriteToken(token);
        var stringToken = tokenHandler.WriteToken(token);
        return Outcomes.Okay(stringToken);
    }
    return Outcomes.Unauthorized();
});
app.UseAuthentication();
app.UseAuthorization();
app.Run();
JWT authentication in motion
Whenever you publish the consumer credentials to the createToken endpoint utilizing Postman, you’ll be capable of see the generated token.
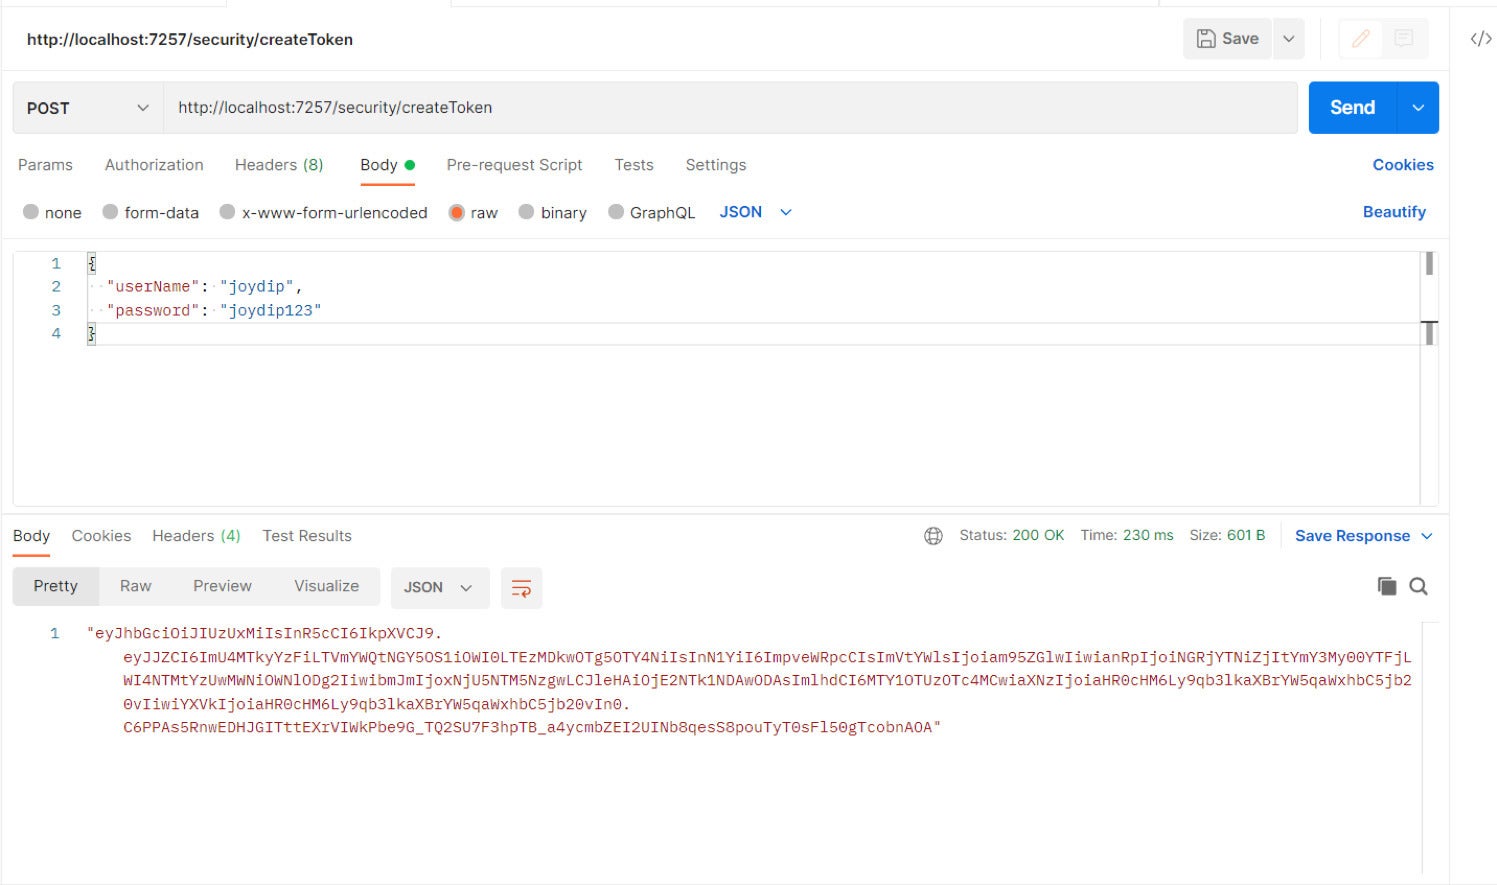 IDG
IDGDetermine 2. The JWT is generated efficiently.
Word that we’ve handed the consumer credentials, i.e., the consumer identify and password, within the physique of the request.
Now, name the HTTP Get endpoint we created earlier and go the generated token as a bearer token within the request header. In case your generated token is legitimate, you’ll see the message proven in Determine 3.
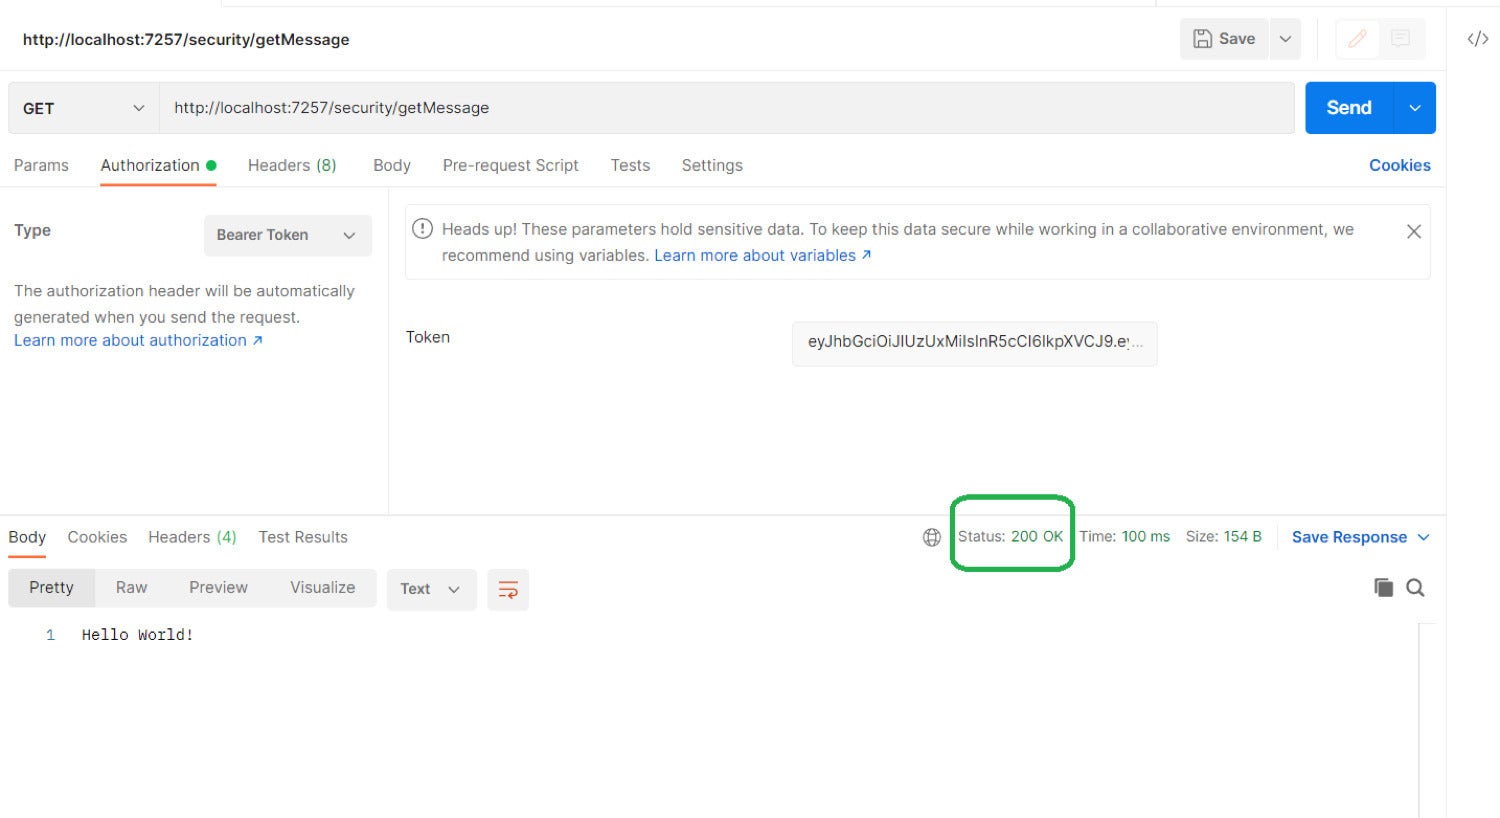 IDG
IDGDetermine 3. The HTTP Get endpoint returns the textual content message within the response.
As you’ll be able to see in Determine 3, the textual content message “Whats up World!” is displayed as a result of the token we handed is legitimate. Word the HTTP 200 OK response as properly (highlighted in a inexperienced rectangle).
On this instance, we hardcoded the consumer identify and password to maintain issues easy. In fact, it is best to by no means hardcode consumer credentials in a manufacturing atmosphere. A good selection is to make use of ASP.NET Core 6 Id to handle consumer accounts.
To check our minimal API implementation right here, we’ve used Postman, probably the most fashionable instruments out there as we speak to check APIs. To check your minimal API endpoints, you may additionally use Swagger, a toolkit that makes it easy to offer a graphical illustration of your API.
Copyright © 2022 IDG Communications, Inc.
