
Flask and Subsequent.js are two distinctive open-source internet frameworks constructed on prime of Python and JavaScript programming languages, respectively.
You possibly can construct a Flask software with out Subsequent.js, and you may as well construct a Subsequent.js app with out Flask. Nonetheless, you may end up in a scenario the place you’ve constructed an software with Flask and later determine to make use of Subsequent.js for server-side rendering.
So, what do you do at this level?
One factor you possibly can strive is to incrementally undertake Subsequent.js or Flask. On this article, I’ll present you make Subsequent.js work seamlessly with a Flask API utilizing the Subsequent.js incremental adoption design, and how one can deploy it with Nginx on an Ubuntu server.
To leap forward on this article:
Construct an app in Subsequent.js and Flask
Requirements
Let’s begin by constructing a pattern Subsequent.js software. Following the official Subsequent.js documentation, run the next command to put in Subsequent.js in your laptop: npx [email protected]. Comply with the directions to arrange a fundamental app.
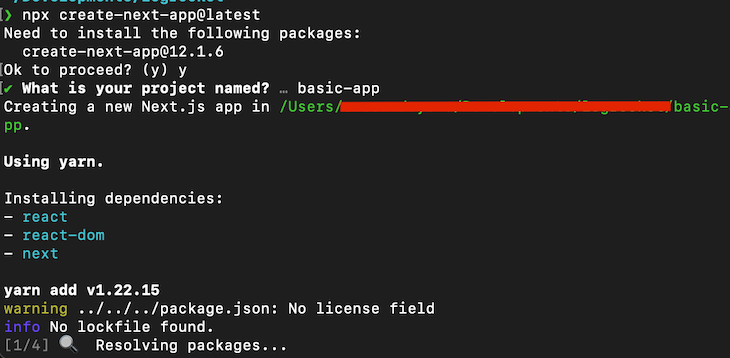
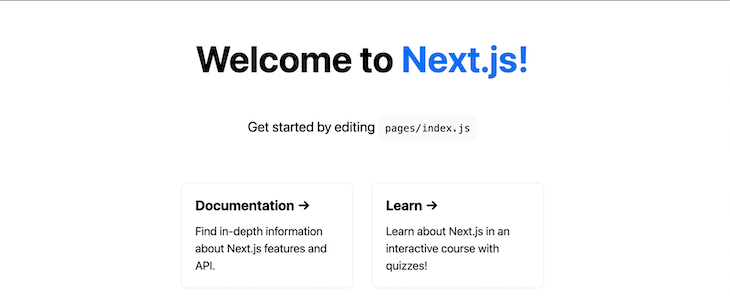
This set up will give us a “Good day, World!” app, prepared for deployment. If all goes properly, you possibly can run yarn run dev on the terminal and go to localhost:3000 in your browser to verify that it really works. It is best to see one thing like this:
That’s all there’s to it for now. Subsequent, let’s construct a fundamental Flask API. I’ll assume you will have Python put in, however for those who don’t, you possibly can set up it by following the directions within the official documentation on your OS.
First, let’s create and activate a digital atmosphere to comprise the Python software.
python3 -m venv env & supply ./env/bin/activate
Subsequent, set up Flask by working the next command in your terminal. We’ll use Flask-RESTful to create a restful API:
pip set up Flask flask-restful
Then, create a file referred to as hiya.py and add the next code to it:
from flask import Flask
from flask_restful import reqparse, Api, Useful resource
app = Flask(__name__)
api = Api(app)

parser = reqparse.RequestParser()
parser.add_argument('process')
class Message(Useful resource):
    def get(self):
        return {"message": 'Good day World'}
api.add_resource(Message, '/api/hiya')

if __name__ == '__main__':
    app.run(debug=True)
Now, we’ve each the Flask and the Subsequent.js app arrange. Let’s proceed with making them work collectively.
Integrating Flask API into Subsequent.js utilizing rewrites
Subsequent.js rewrites permit you to map an incoming request path to a unique vacation spot path.
Transfer into the listing of the Subsequent.js app we simply created, open the subsequent.config.js file, and change the content material with the code beneath:
module.exports = () => {
  const rewrites = () => {
    return [
      {
        source: "/hello/:path*",
        destination: "http://localhost:5000/hello/:path*",
      },
    ];
  };
  return {
    rewrites,
  };
};
With this integration, we are able to entry all of our API routes instantly from Subsequent.js as if the API is in the identical area and port because the Subsequent.js consumer. This implies we’ll solely must name http://localhost:3000/api/ and that we’ll be capable to attain the API at port 5000 not directly.
Let’s have a look at an instance.
Extra nice articles from LogRocket:
Open the /pages/index.js file and change its element with the “Good day, World!” element beneath:
import types from '../types/Residence.module.css'
import { useEffect, useState } from 'react'

export default operate Residence() {
    const [message, setMessage] = useState("");
    const [loading, setLoading] = useState(true);

    useEffect(() => {
        fetch('/hiya/')
            .then(res => res.json())
            .then(information => {
                setMessage(information.message);
                setLoading(false);
            })
    }, [])

    return (
        <div className={types.container}>
            <p> {!loading ? message : "Loading.."}</p>
        </div>
    )
}
The code above is an easy Subsequent.js element that talks to the Flask API utilizing Fetch. As you possibly can see, we didn’t must put the precise URL within the name to the API. Subsequent.js understood it based mostly on the settings we initially set.
In fact, you may as well select to name the Flask API instantly.
Arrange Nginx
Now that we’ve a working integration, let’s proceed to deployment in Nginx. Set up Nginx in your server (an Ubuntu server, in our case), create a config file on your Nginx configuration, which we’ll name nextflask, and add the next code to the file:
/**
/and so forth/nginx/sites-available/nextflask
**/
server {
    server_name        yourdomainname.com www.yourdomainname.com;
    hear 80;

  location /hiya/ {
    proxy_pass http://127.0.0.1:5000/hiya/;
    proxy_http_version 1.1;
    proxy_set_header Connection "improve";
    proxy_set_header Host $host;
    proxy_set_header Improve $http_upgrade;
    proxy_set_header X-Actual-IP $remote_addr;
    proxy_set_header X-Forwarded-For $proxy_add_x_forwarded_for;
  }
  location / {
    proxy_pass http://0.0.0.0:3000;
    proxy_http_version 1.1;
    proxy_set_header Connection "improve";
    proxy_set_header Host $host;
    proxy_set_header Improve $http_upgrade;
    proxy_set_header X-Actual-IP $remote_addr;
    proxy_set_header X-Forwarded-For $proxy_add_x_forwarded_for;
  }
}
The Nginx config above will serve your Subsequent.js app on the foundation area yourdomainname.com and serve your API on yourdomainname.com/api/hiya.
After including this configuration, begin Nginx by working the command beneath:
sudo systemctl begin nginx.service
That’s it for establishing Nginx to serve our Flask API and Subsequent.js server. Push your Flask and Subsequent.js code to your server, set up the dependencies, and run them individually. Oh, wait, we’ll must daemonize them.
You possibly can daemonize a Flask app with both Supervisor or Gunicorn, that are two well-liked instruments for deploying Python functions.
We’ll use Gunicorn for Flask and PM2 for Subsequent.js.
Run the Flask API and the Subsequent.js API as a service
Let’s begin with working the Flask API with Gunicorn. Guarantee that you’ve a working Python set up in your server, then create a digital atmosphere to put in Gunicorn.
Create a digital atmosphere:
python3 -m venv env
Then, set up Gunicorn and Flask:
pip set up gunicorn flask
Arrange Gunicorn to serve the Flask software
First, create a wsgi.py file within the root listing. This may function the entry level of the appliance. Add the next code to the file:
// wsgi.py
from hiya import app

if __name__ == "__main__":
    app.run()
Subsequent, create config file sudo vim /and so forth/systemd/system/hiya.service for Gunicorn and add the next configuration to it:
[Unit]
Description=Gunicorn occasion to serve hiya
After=community.goal

[Service]
Consumer=eze
Group=www-data
WorkingDirectory=/path/to/your/app/listing
ExecStart=/path/to/gunicorn/bin/gunicorn --workers 3 --bind unix:hiya.sock -m 007 wsgi:app

[Install]
WantedBy=multi-user.goal
Take note of the reference paths. Lastly, begin and allow Gunicorn by working the next command in your terminal:
sudo systemctl begin hiya & sudo systemctl allow hiya
To test if the operation was profitable, evaluation the standing by working the command beneath:
sudo systemctl standing
If all goes properly, our Flask app ought to be up and working on port 500 and within the root area, yourdomainname.com.
Run the Subsequent.js app with PM2
PM2 is a course of administration software for Node.js functions. To make use of it, set up PM2 globally with the next command:
pm2 set up -g pm2
Subsequent, run this command within the listing that has your Subsequent.js code:
pm2 begin "npm run begin" --name nextapp
Your Subsequent.js software will begin engaged on port 3000 and within the root area, yourdomainname.com.
Congratulations! You’ve got efficiently deployed your Subsequent.js frontend together with your Flask API. It might sound sophisticated at first, however you received’t must repeat this course of in your future deployments, as a result of this units the essential atmosphere on your software to work correctly. You may solely must push your code and restart your server, which will be managed by your CI/CD pipeline.
Conclusion
New applied sciences come and go on a regular basis, and now is perhaps the time so that you can select to deploy Subsequent.js with Flask to enhance the overall engineering of your software. I hope you discover this text useful.
Personally, I had an previous Flask API, however I needed to proceed growth with Subsequent.js whereas retaining a number of the Python backend implementations. I discovered it very simple to modify with out interrupting or breaking my present API.
Try this pattern Subsequent.js mission, which you’ll clone to copy the method from this text. Cheers!
LogRocket: Full visibility into manufacturing Subsequent.js apps
Debugging Subsequent functions will be troublesome, particularly when customers expertise points which are troublesome to breed. In case you’re desirous about monitoring and monitoring state, mechanically surfacing JavaScript errors, and monitoring sluggish community requests and element load time, strive LogRocket. 

LogRocket is sort of a DVR for internet and cell apps, recording actually every thing that occurs in your Subsequent app. As a substitute of guessing why issues occur, you possibly can mixture and report on what state your software was in when a difficulty occurred. LogRocket additionally screens your app’s efficiency, reporting with metrics like consumer CPU load, consumer reminiscence utilization, and extra.
The LogRocket Redux middleware bundle provides an additional layer of visibility into your consumer periods. LogRocket logs all actions and state out of your Redux shops.
Modernize the way you debug your Subsequent.js apps — begin monitoring without spending a dime.
