
There are occasions once we simply need to use an utility and wouldn’t have the persistence to enroll and check in with our electronic mail and password first. We would additionally simply need to check out the appliance and don’t want the burden of getting to create a brand new account only for that.
On the similar time, the house owners of the appliance must know what number of customers have used their utility to get suggestions about who’s utilizing their utility and the way. To try this, they want the customers to enroll with their emails to get the statistics.
These two conditions put each the customers and the app house owners in a little bit of a pickle. That is the place having a Google login function performs a really very important position.
Since Google is the preferred electronic mail platform on this planet, permitting customers to make use of Google login together with your React app eliminates the friction between customers and app house owners. Customers can start utilizing an utility virtually instantly with out having to create a totally new account.
On this article we are going to learn the way Google login works and the way we are able to add it in our React app utilizing a package deal known as react-google-login. We’ll cowl:
To comply with together with this tutorial, you must have React put in in your native laptop and be aware of how you can use it. You probably have put in React, then you must have already got Node.js, npm, and Yarn put in too.
Packages wanted so as to add Google login to your React app
To make use of the Google login, we are going to set up two packages.
First, gapi-script is an npm package deal that hundreds Google API scripts and initializes some features.
The second package deal is known as react-google-login and permits us to combine the Google login function into our React app. Moreover, react-google-login permits us to acquire the entry tokens we have to entry all Google APIs each shortly and safely.
Earlier than we set up and start integrating gapi-script and react-google-login into our React app, we must first configure just a few issues with Google. Let’s begin by getting a Google consumer ID.
Extra nice articles from LogRocket:
Buying a Google consumer ID to your mission
A consumer ID is a novel identifier related to an utility that assists with consumer and server OAuth 2.0 authentication.
To get a consumer ID from Google, go over to your Google Cloud Console and create a brand new mission. For this text, I’ve named the mission “Google Signal In,” however you possibly can title it no matter you need:
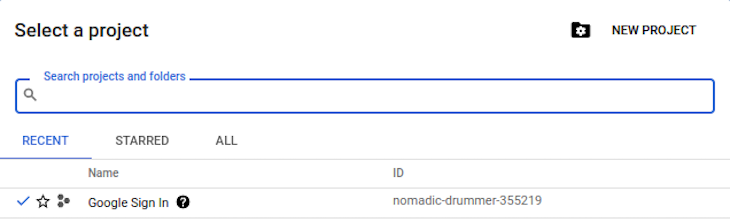
After making a mission, enter the mission to see a dashboard that appears just like the one proven beneath. Your present mission title needs to be seen on the prime left of your dashboard web page subsequent to the Google Cloud brand:

Subsequent, let’s go over how you can configure your consent display earlier than creating your credentials.
Configuring a Google login consent display to your React app
A consent display, because the title suggests, is a consent web page that prompts the person to make use of an exterior or third-party library to log in. This step alerts the person that they’re leaving your app’s root web page and permitting entry to a third-party web page.
Merely put, once you use OAuth 2.0 for authorization, your app requests the person to authorize a number of scopes of entry from a Google Account. Scopes of entry embrace any data or actions your app is allowed to entry or train on the person’s account.
The Google login consent display your app shows to the person could embrace a short description of your mission, its insurance policies, and the requested scopes of entry.
A easy consent web page can appear like this:
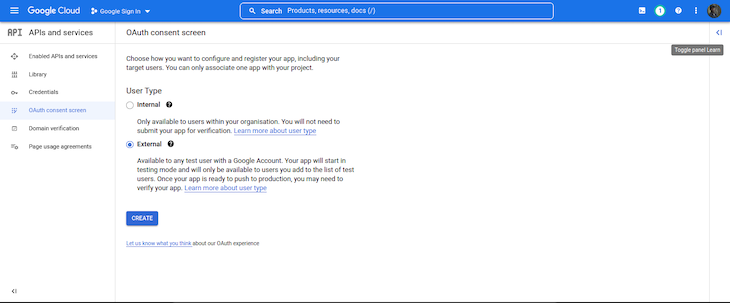
To configure the Google consent web page to your React app, go to the “OAuth consent display” tab on the left-side menu of your Google Cloud Console.
As soon as you might be on this tab, select exterior — which is definitely the one choice you possibly can select until you might be utilizing a Google-verified group or utility — and click on on the “Create” button to create your consent display.
Subsequent, in the identical tab, select a reputation to your utility and an electronic mail tackle to get notifications about any adjustments to your mission. You possibly can maintain the opposite necessities and choices empty for now. You probably have the small print prepared, you possibly can add them throughout this step if you would like.

It’s also possible to skip the remainder of the registration sections for now. Simply scroll down on each part and click on ”Save and proceed” till you might be lastly taken again to the dashboard after completion.
Creating your internet consumer ID
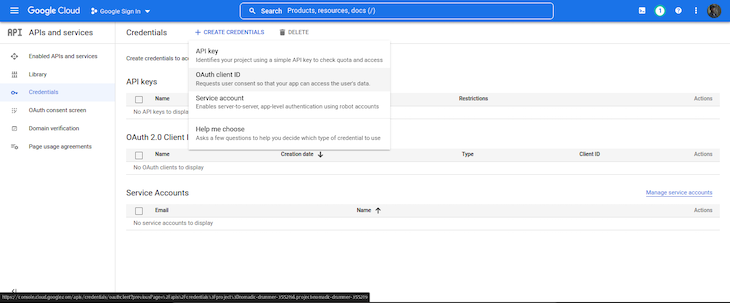
Subsequent, within the left aspect menu, you will notice a tab labeled “Credentials.” Click on on this tab to go to the web page the place you possibly can create your internet consumer ID.
On this web page, click on on “Create credentials” on the prime of the web page, after which click on on the “OAuth consumer ID” choice.
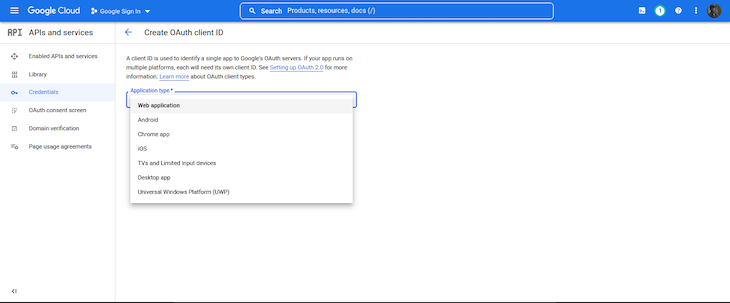
You’ll be prompted to pick out an utility kind, as proven within the picture beneath. If you’re following these steps for a React app, select “Internet utility.” It is because we’re utilizing the Google consumer ID for the net.
If you’re integrating it in a React Native, Flutter, or Swift utility, you possibly can select the Android or iOS choices for the 2 respective working techniques.
Subsequent, we are going to select a reputation for our consumer ID. This title is just used to notice or outline the actual ID we’re creating. So for instance, if we’re creating internet, iOS, and Android IDs, we are able to embrace “Internet ID,” “Android ID,” “iOS ID,” and so forth of their names to distinguish them.
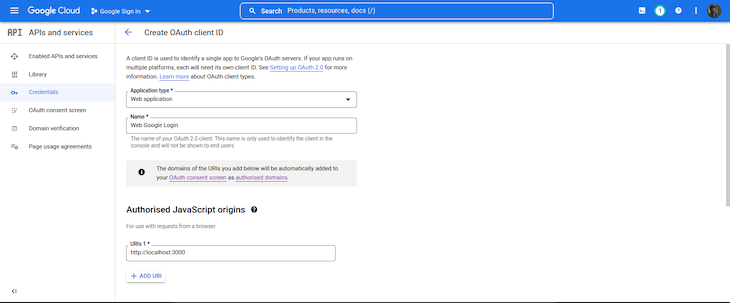
Subsequent, we will even be including two kinds of URLs: licensed JavaScript origins and licensed redirect URLs.
The licensed JavaScript origins URL is the URL from which your utility is originating the login; i.e., localhost and localhost:3000 for React builders, or your hosted URL in case you’ve hosted your utility.
The licensed redirect URL is the hyperlink that Google will redirect the person to after the login is profitable. For instance, you could need to take the person again to your unique hyperlink, or perhaps redirect the person to a different hyperlink. Both means, it’s important to embrace the URL right here.
For this tutorial’s licensed JavaScript origins and licensed redirect URLs, write your localhost URLs: http://localhost:3000. See beneath:
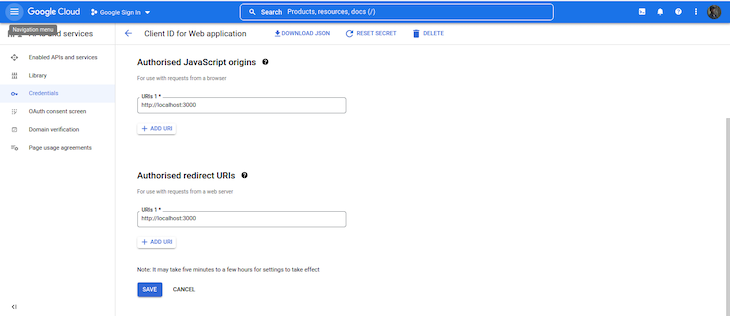
Lastly, click on on the “Create” button to create your internet consumer ID. You’ll be taken again to the homepage, the place you will notice your newly created credential. Click on on the copy icon to repeat your new internet consumer ID.
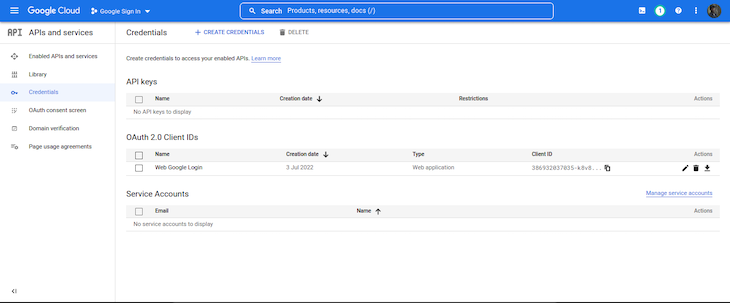
Now that we’ve efficiently created our internet consumer ID, allow us to go into our React app, set up, after which combine the Google login.
Placing all of it along with react-google-login
As you could bear in mind, we shall be putting in the 2 packages gapi-script and react-google-login for our mission. Run both of the instructions beneath to put in them:
//npm
npm set up react-google-login gapi-script

//Yarn
yarn add react-google-login gapi-script
Identical to with each put in package deal in React, we should first import the modules earlier than we are able to use them. In your App.js file, import the modules by writing the code beneath:
/*App.js*/

import { GoogleLogin } from 'react-google-login';
import { gapi } from 'gapi-script';
Subsequent, we initialize our clientId utilizing gapi, which is Google’s consumer library for browser-side JavaScript. It’s a package deal that helps us load gapi scripts and initialize features, and it’s utilized in Google sign-in and different exterior internet pages to simply join with Google’s APIs.
To initialize our consumer, we are going to name the gapi operate in our useEffect hook in order that it will get known as when our web page hundreds or on each render:
/*App.js*/

const clientId = '386932037035-k8v833noqjk************.apps.googleusercontent.com';

useEffect(() => {
   const initClient = () => {
         gapi.consumer.init({
         clientId: clientId,
         scope: ''
       });
    };
    gapi.load('consumer:auth2', initClient);
});
Subsequent, we are going to add the login button that we imported from react-google-login:
/*App.js*/

    const onSuccess = (res) => {
        console.log('success:', res);
    };
    const onFailure = (err) => {
        console.log('failed:', err);
    };
    return (
       <GoogleLogin
          clientId={clientId}
          buttonText="Sign up with Google"
          onSuccess={onSuccess}
          onFailure={onFailure}
          cookiePolicy={'single_host_origin'}
          isSignedIn={true}
      />
  );
The GoogleLogin button calls the clientId and returns both a success response or an error.
If the response was profitable, the onSuccess operate handles it. If the response returned is an error, then the onFailure operate handles it. The isSignedIn attribute retains the person signed in by calling the onSuccess callback.
In our browser, testing out the code above will appear like beneath;
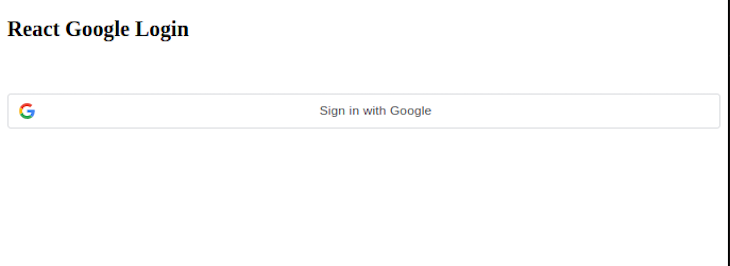
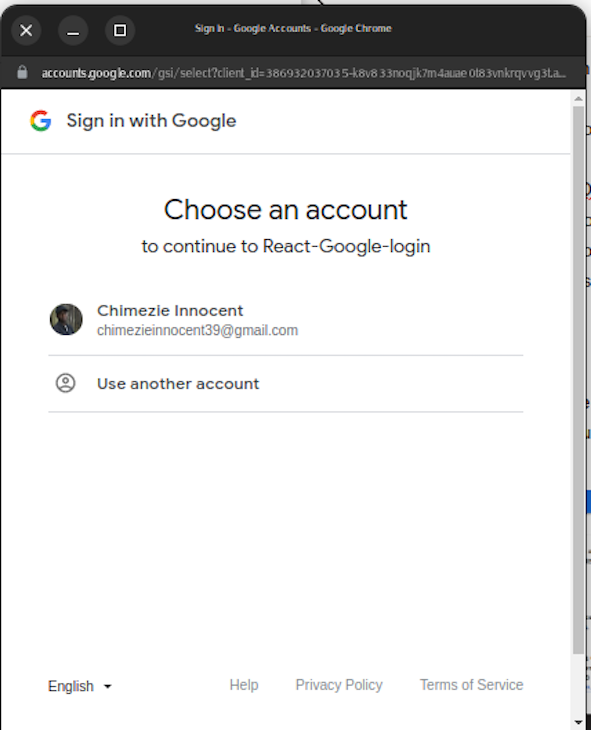
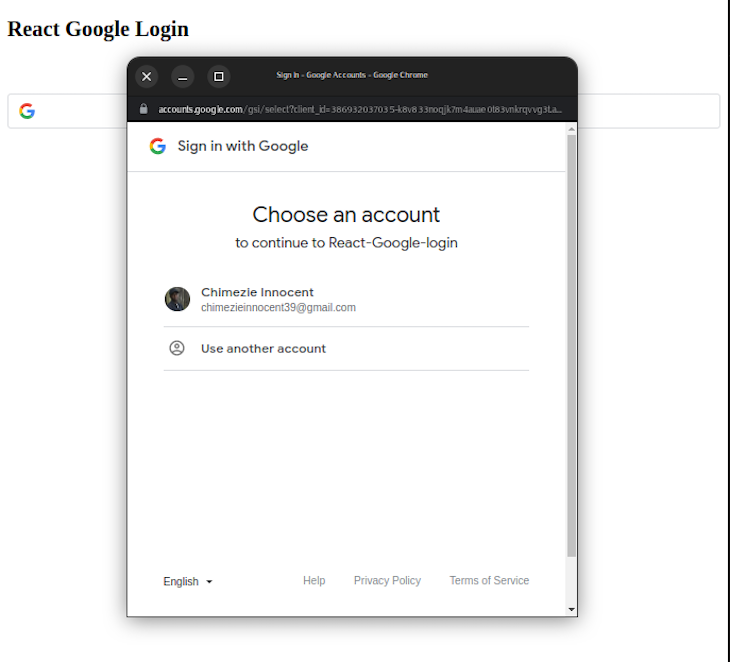
Moreover, clicking on the “Sign up with Google” button will immediate a consent display or modal that may appear like the beneath:
Now that we’ve seen how you can add the Google login to our React app, let’s take it a step additional and get the person’s particulars to create a person profile in our app. We’ll solely be redirecting the person to a homepage after which getting the person’s electronic mail, title, and picture.
Making a person profile in your React app based mostly on the person’s Google profile
Integrating Google login with our app offers us entry to the person’s profile, which incorporates the person’s title, electronic mail tackle, picture, accessToken, googleId, id_token, and so forth. We’ll use this data to create our person’s profile.
Nonetheless in our App.js part, let’s substitute our current code with this one beneath:
/*App.js*/

import React, { useState, useEffect } from 'react';
import { GoogleLogin, GoogleLogout } from 'react-google-login';
import { gapi } from 'gapi-script';

operate App() {
    const [ profile, setProfile ] = useState([]);
    const clientId = '386932037035-k8v833noqjk7m4auae0t83vnkrqvvg3t.apps.googleusercontent.com';
    useEffect(() => {
        const initClient = () => {
            gapi.consumer.init({
                clientId: clientId,
                scope: ''
            });
        };
        gapi.load('consumer:auth2', initClient);
    });

    const onSuccess = (res) => {
        setProfile(res.profileObj);
    };

    const onFailure = (err) => {
        console.log('failed', err);
    };

    const logOut = () => {
        setProfile(null);
    };

    return (
        <div>
            <h2>React Google Login</h2>
            <br />
            <br />
            {profile ? (
                <div>
                    <img src={profile.imageUrl} alt="person picture" />
                    <h3>Person Logged in</h3>
                    <p>Identify: {profile.title}</p>
                    <p>E mail Deal with: {profile.electronic mail}</p>
                    <br />
                    <br />
                    <GoogleLogout clientId={clientId} buttonText="Sign off" onLogoutSuccess={logOut} />
                </div>
            ) : (
                <GoogleLogin
                    clientId={clientId}
                    buttonText="Sign up with Google"
                    onSuccess={onSuccess}
                    onFailure={onFailure}
                    cookiePolicy={'single_host_origin'}
                    isSignedIn={true}
                />
            )}
        </div>
    );
}
export default App;
In our code above, we imported our GoogleLogin and GoogleLogout buttons from react-google-login.
The GoogleLogin button makes a login request to the clientId that we offered, and gapi connects us to Google API utilizing that very same clientId. If the request fails, we deal with the error in our onFailure operate. If the request is profitable, we deal with it in our onSuccess operate.
Subsequent, in our onSuccess operate, we set our profile state with the info that was returned. This knowledge comprises the person’s particulars, like google_id, entry and id_token, electronic mail, title, and so forth.
Lastly, we’re utilizing a conditional to vary our UI: if profile is true, the UI will present us the profile of the logged-in person with their picture, title, and electronic mail. If the profile turns into null (i.e. when the person has logged out utilizing the GoogleLogout button), it is going to present us the login button.
Conclusion
Google login is a vital function to incorporate in our purposes to avoid wasting time and enhance the person’s expertise. One other nice motive so as to add this function is that it’s quick and straightforward to each implement and use.
On this tutorial, we reviewed how you can add Google login to our React utility with react-google-login. For one more method, find out about how one can use Firebase to deal with Google authentication and sign-in to your React apps.
I hope you discovered this text each straightforward to grasp and useful to your personal tasks.
Full visibility into manufacturing React apps
Debugging React purposes could be tough, particularly when customers expertise points which can be arduous to breed. In case you’re concerned with monitoring and monitoring Redux state, robotically surfacing JavaScript errors, and monitoring sluggish community requests and part load time, attempt LogRocket. 

LogRocket is sort of a DVR for internet and cell apps, recording actually every thing that occurs in your React app. As an alternative of guessing why issues occur, you possibly can mixture and report on what state your utility was in when a problem occurred. LogRocket additionally displays your app’s efficiency, reporting with metrics like consumer CPU load, consumer reminiscence utilization, and extra.
The LogRocket Redux middleware package deal provides an additional layer of visibility into your person periods. LogRocket logs all actions and state out of your Redux shops.
Modernize the way you debug your React apps — begin monitoring totally free.
