
Website-to-site VPN is a sort of VPN connection that’s created between two separate community places. It offers the power to attach geographically separate places or networks, normally over the general public web connection or a WAN connection.
Step 1 – Confirm your Digital Networks
Within the Azure Portal, click on the “Digital Networks” and create

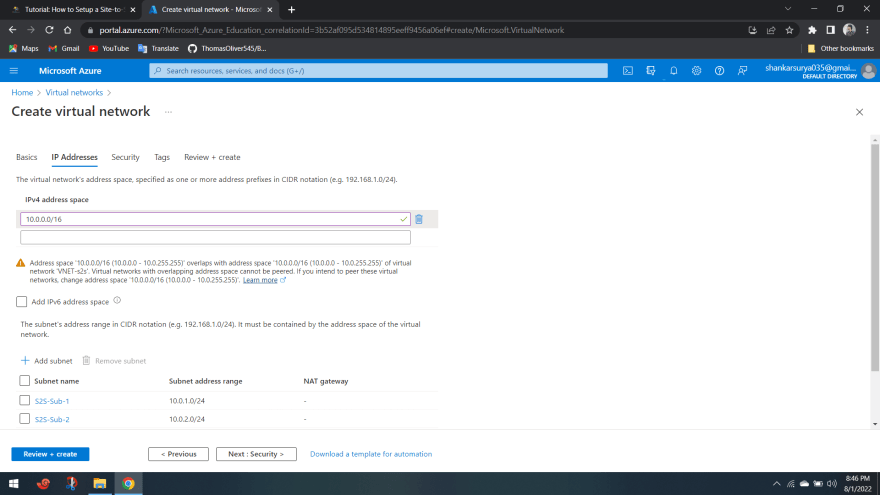
Step 2 – Making a Gateway Subnet
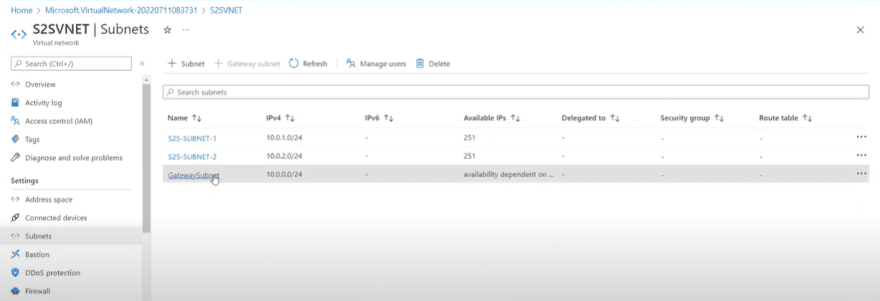
Now, we’ve to create a Gateway subnet. So, choose “Subnets” after which click on “+ Gateway Subnet”.
Now, we have to enter the deal with vary (CIDR block) and click on “Okay”. The Gateway Subnet is an inner gateway on this community that Azure can use to route visitors again to your on-premises setting.
Step 3 – Creating Digital Community Gateway
We have to create a Digital Community Gateway that may turn into the endpoint to your connections.
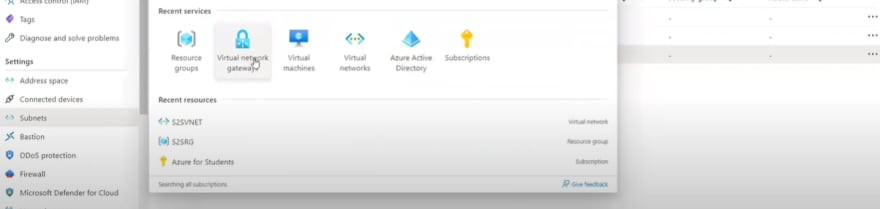
Go to “+ Create a useful resource”, begin typing “Digital community gateway”, and choose it to start configuring.
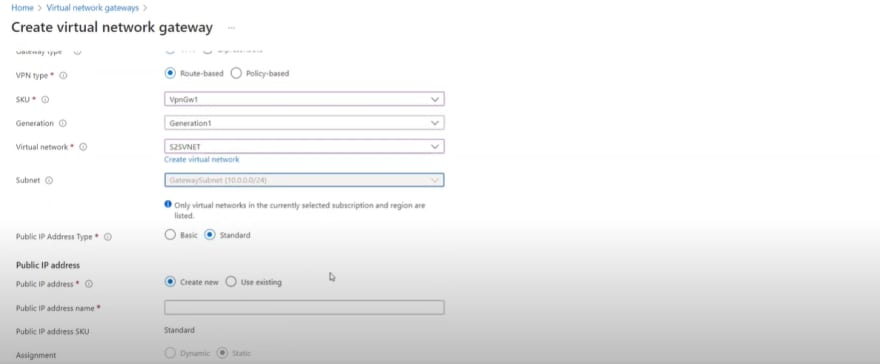
Now, we have to fill the occasion info.
Title: S2SVNGW
Gateway Kind: VPN
VPN Kind: Router-based
SKU: VpnGw1
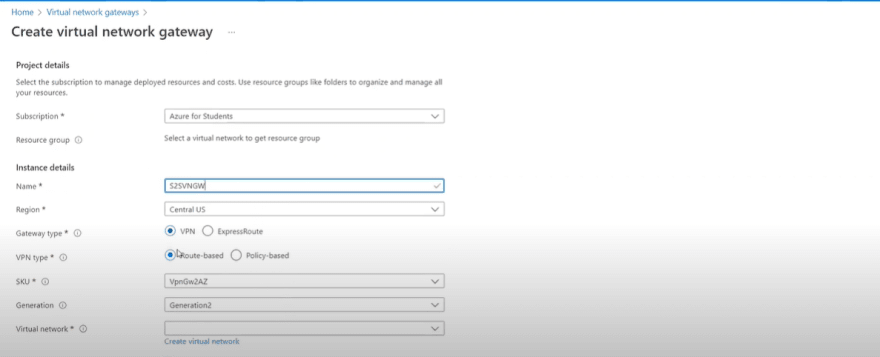
Digital Community:(Our Azure Native Digital Community)
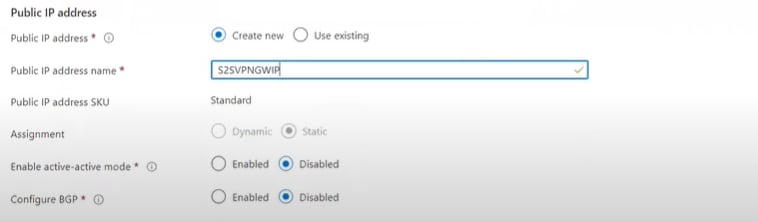
Public IP Tackle: Create New
Public IP Tackle Title: S2SVPNGWIP (Within the demo, we will use this title as our Public IP)
Allow Lively-Lively mode: Disable
Configure BGP ASN: Disable
Click on the “Create + Evaluation” button to start out the method. It’ll take extra minutes to complete the method.
Step 4 – Creating Native Community Gateway
On this step, we have to create a “Native Community Gateway”. This represents our native on-premises networks. This Gateway reveals our on-premises info in order that Azure is aware of the place our on-premises are working.
Now, we have to fill our right info.
Title: S2SLNGW
IP Tackle: 103.59.187.18 – Azure IP Tackle
[In real situation you have to specify the Static IP address of the on-premises server or the Fully Qualified Domain Name]
Tackle House: 192.168.1.0/24 – LAN IP Tackle Vary
Enter the opposite mandatory info and click on “Create”.


Step 5 – Making a Connection
The connection is represented to attach Digital Community Gateway and Native Community Gateway.

Connection Kind: Website-to-Website (IPsec)
Click on the “OK” button to complete the essential info.
Within the Digital Community Gateway, select the Gateway that we've already created
Within the Native Community Gateway, select the Gateway that we've already created
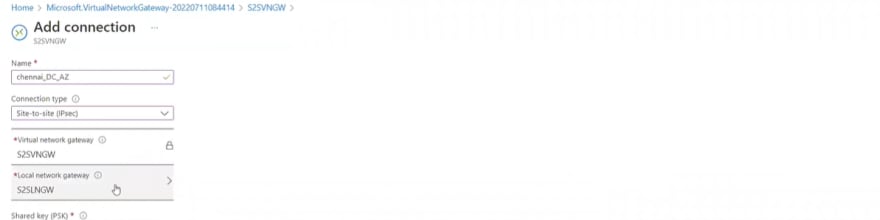
Within the Connection Title, it assigns the title itself. If we have to change the title we will do it. Now, we have to assign the Shared Key (PSK) for Safe VPN connection.

After efficiently finishing the steps you can find a configuration file. Obtain this and ship the textual content file to the community engineers on the opposite aspect

After that, we will confirm our VPN standing within the Connection settings.
It Will present VPN Standing is “Related” and we will confirm the Peer 1 and Peer 2.
