On this article, you’ll learn to create an augmented actuality expertise utilizing Vuforia and Unity. Additionally, you will learn to take a look at and run your app on an Android smartphone.
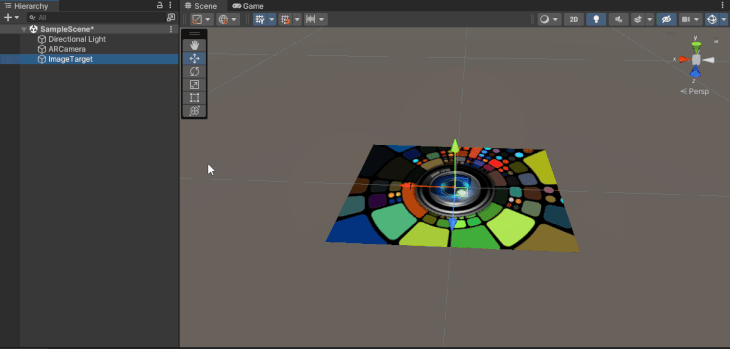
That is what you’ll construct

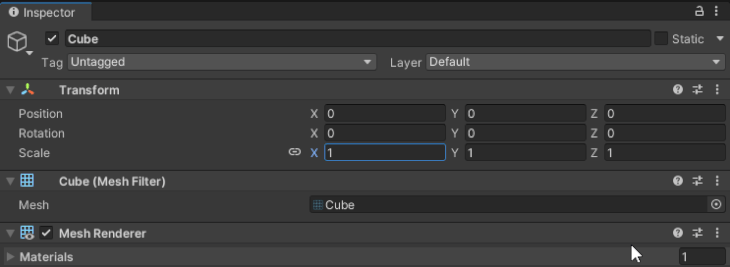
This dice will be changed with another 3D object, however for simplicity’s sake, we are going to solely follow a dice on this tutorial.
Here’s a breakdown of what’s taking place within the above video:
- The telephone’s digital camera detects a picture
- The picture is recognized as a marker
- The telephone then renders an object on high of the picture (or marker)
Such AR experiences, the place your telephone renders 3D content material on high of pictures, are referred to as marker-based AR experiences. That is what we intention to create right now and we are going to do it utilizing an SDK known as Vuforia.
Why Vuforia?
Vuforia has many options corresponding to:
- Picture Monitoring
- Object Monitoring
- Floor Aircraft Monitoring
- Multi Targets
- Cloud Recognition
- Digital Buttons
and rather more.
One of many explanation why I’ve used Vuforia on this tutorial is that it’s fast and easy to arrange. You’ll be able to create your first AR expertise with out the effort of coding.
In addition to, if you recognize the configuration steps for Vuforia on a platform like Android, it is possible for you to to use the identical steps for iOS. This implies which you could develop as soon as and launch your app to a number of platforms.
Extra nice articles from LogRocket:
The most important benefit of Vuforia over ARCore and ARKit is that it helps a broad vary of units. Apart from smartphones and tablets, Vuforia additionally helps augmented actuality headsets corresponding to Microsoft Hololens and Magic Leap. You’ll be able to discover the total listing of advisable units by Vuforia right here.
Conditions
Earlier than we soar into Unity and get began with the mission, just remember to are accomplished with the next duties:
- Register as a Vuforia Engine Developer
- Be sure you have Unity 2021.3 (LTS model) put in
- Examine in case your machine helps augmented actuality
Right here’s what we’ll cowl:
- Mission setup
- Organising Vuforia with Unity
- How do you create Picture Targets in Vuforia?
- Rendering 3D content material on high of an Picture Goal
Mission setup
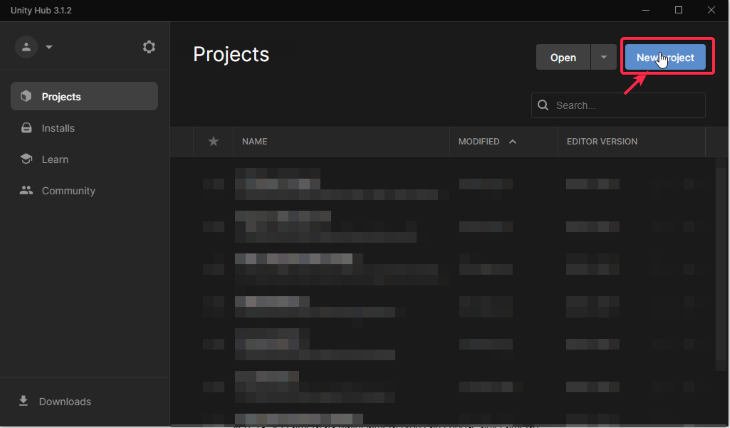
When you haven’t accomplished so already, create a brand new Unity 3D mission and title it “Hey Vuforia.”
You are able to do so by launching Unity Hub in your pc and clicking New Mission.
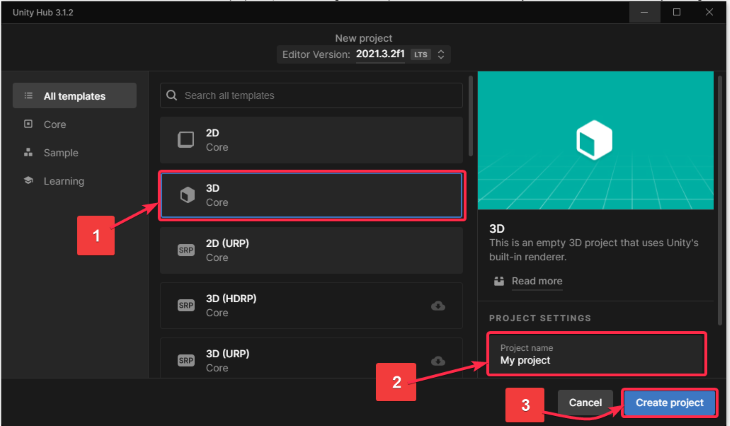
After clicking on New Mission, the beneath window pops up. To make sure that we’re making a 3D mission, do the next steps:
- Choose 3D from the templates
- Replace the Mission Title from My Mission to Hey Vuforia
- Click on the Create Mission button
The mission will take a couple of minutes to open up in Unity.
Preserve the mission open, and let’s work on integrating Vuforia.
Organising Vuforia with Unity
On this step, you’ll add the Vuforia package deal to the Hey Vuforia mission in Unity.
To start out, obtain the Vuforia package deal. Please word that you just can not obtain the package deal until you’ve got registered your self as a Vuforia Developer.
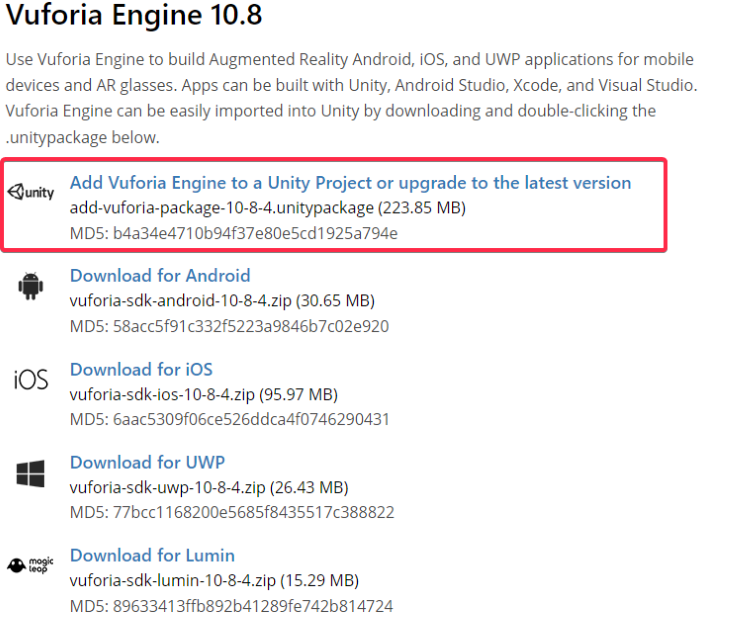
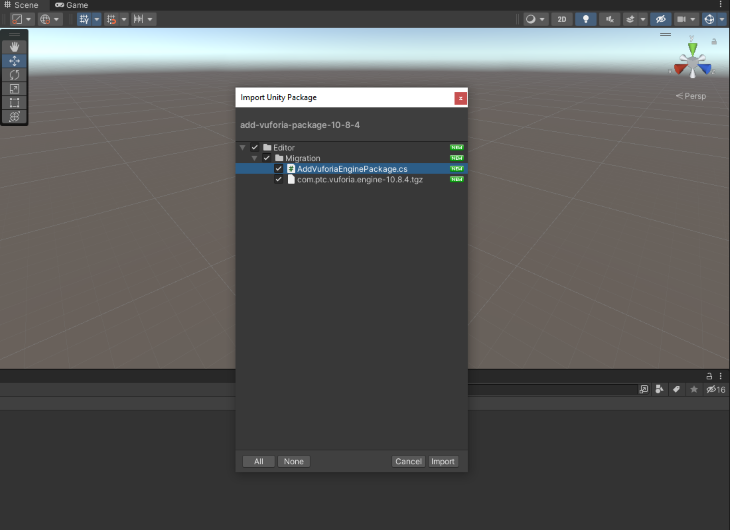
Subsequent, double click on on the downloaded Unity package deal and you will note this pop up within the Unity Editor robotically. Click on import.
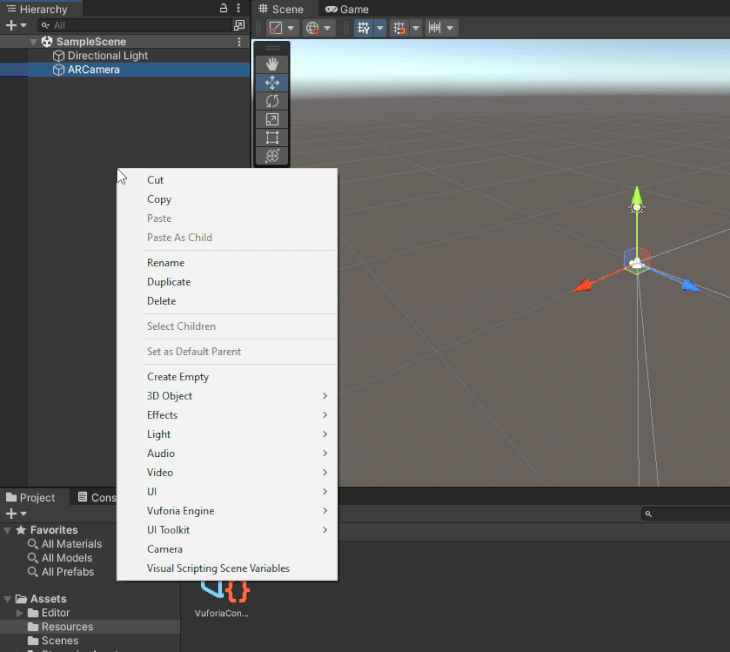
To confirm whether or not Vuforia is imported efficiently, right-click within the Hierarchy panel within the Unity Editor. When you see Vuforia Engine within the dropdown listing, it signifies that Vuforia is imported efficiently.
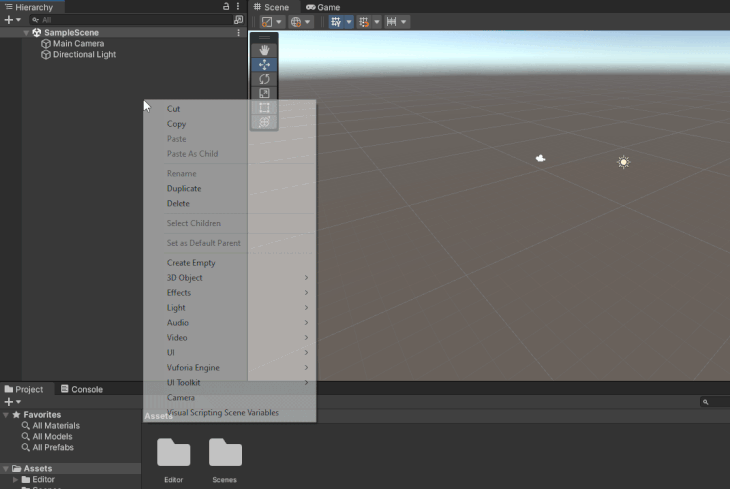
Delete the Principal Digital camera from the scene. Then, proper click on within the Hierarchy panel > Vuforia Engine > Add AR Digital camera to the scene.

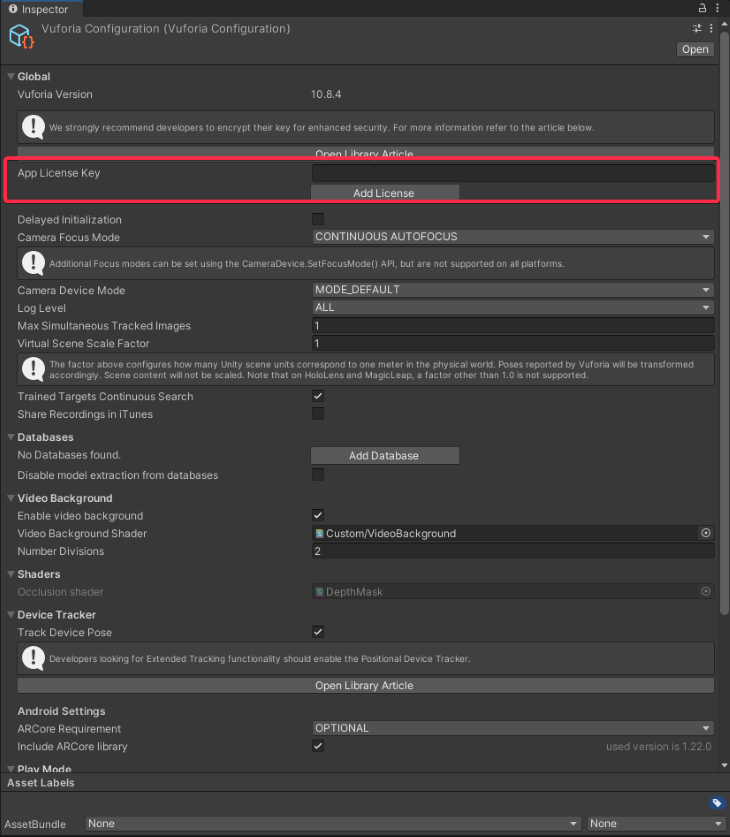
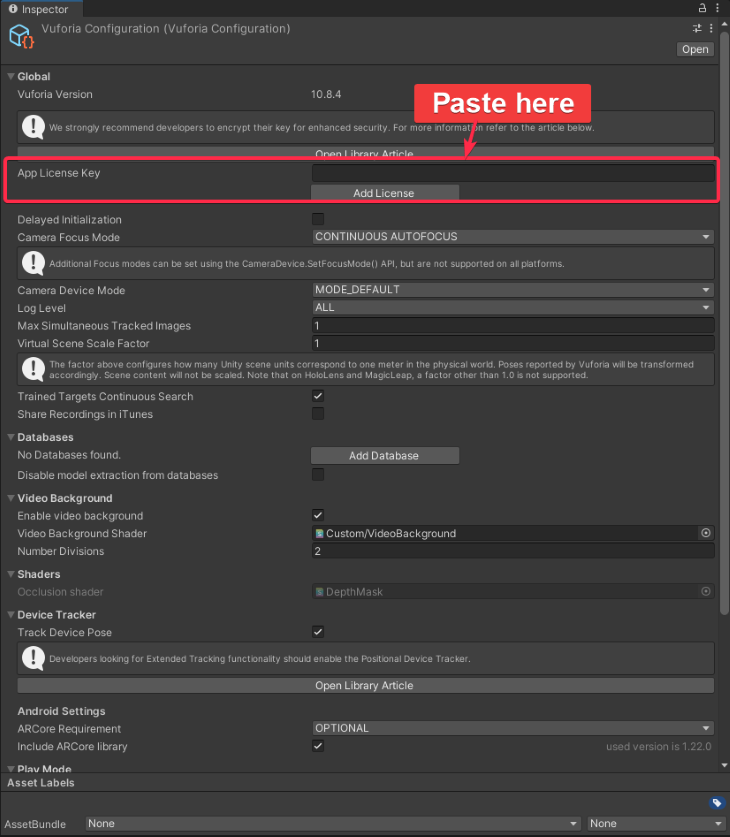
Within the Mission Window, go to Property > Sources and double click on VuforiaConfiguration to view its properties within the inspector panel. You’ll add the license key within the subsequent step.
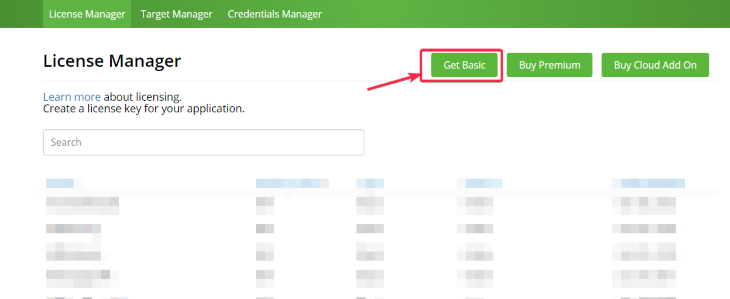
So as to add the license key, go to your Vuforia Developer Portal > License Supervisor and click on Get Primary.
The Primary Plan (obtainable without spending a dime) covers options corresponding to Picture Targets, Multi Targets, Cylinder Targets, VuMarks, and Floor Aircraft. You’ll be able to construct and publish a vast variety of apps with out the Vuforia watermark. Nonetheless, in case your utility makes use of superior options of Vuforia such because the Mannequin Targets and Space Targets, the Vuforia Watermark shall be current. This implies you possibly can develop your app utilizing these options for private analysis functions however can not publish the app on any platform.
If you need to get entry to Mannequin Targets and Space Targets with out the Vuforia Watermark being displayed in your app, you should purchase the Premium plan. To get a extra detailed understanding of Vuforia you possibly can go to this hyperlink.
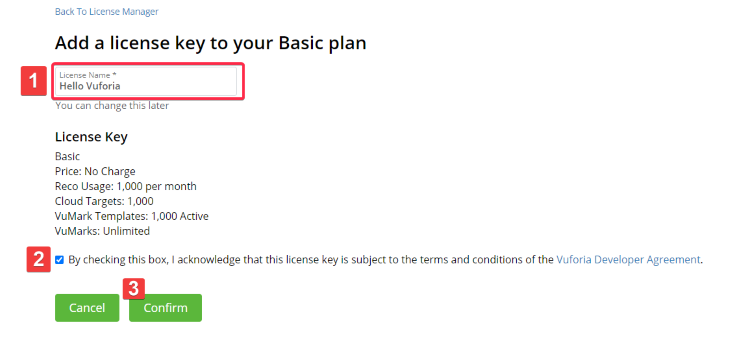
Preserve the license title the identical as your mission title; i.e., Hey Vuforia. You may give any title to your license. Examine the phrases and circumstances field, then click on Verify.
Subsequent, copy the license key.
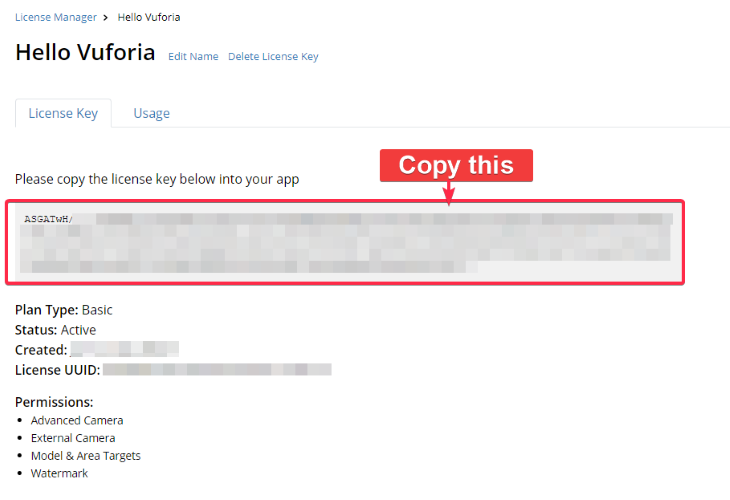
And paste it into the App License Key area in Unity.
Excellent! You might have efficiently configured Vuforia and your Unity mission.
Now we will transfer to the enjoyable half: picture recognition.
How do you create Picture Targets in Vuforia?
On this step, we are going to add pictures (or markers) in order that Vuforia can detect and observe them. These detected and tracked pictures are referred to as Picture Targets in Vuforia. A group of Picture Targets is saved in a Database.
Each Picture Targets and Databases are created from the Vuforia Developer Portal.
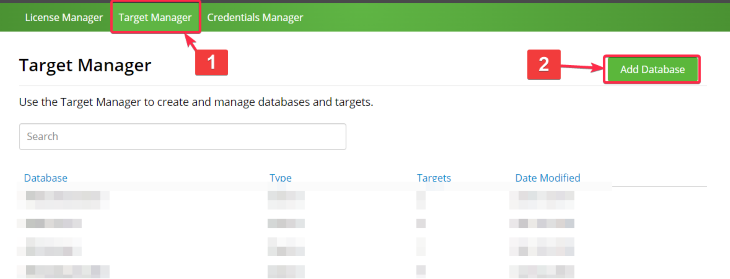
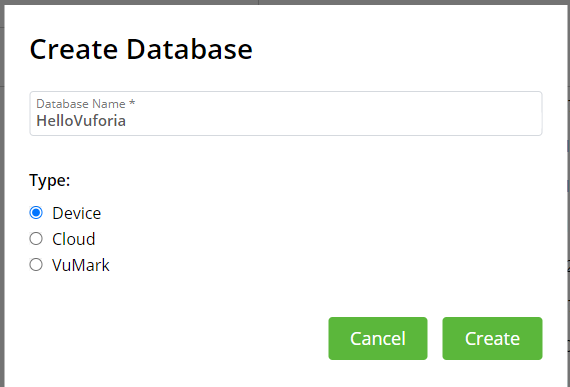
To get began with Picture Targets, within the Vuforia Developer Portal, go to Goal Supervisor. Then click on Add Database.
Set the Database Title as “HelloVuforia” (no areas) and choose the Gadget kind. A Gadget-type Database is a database that exists inside your app. In case you have a big Database, then choose Cloud kind. Lastly, click on Create.
After the Database is created, open the HelloVuforia and click on Add Goal.

Choose Picture as your Kind. You’ll be able to add any picture within the File area; I used this one from Pixabay. This picture shall be your Picture Goal, which signifies that it is going to be detected and tracked by your app.
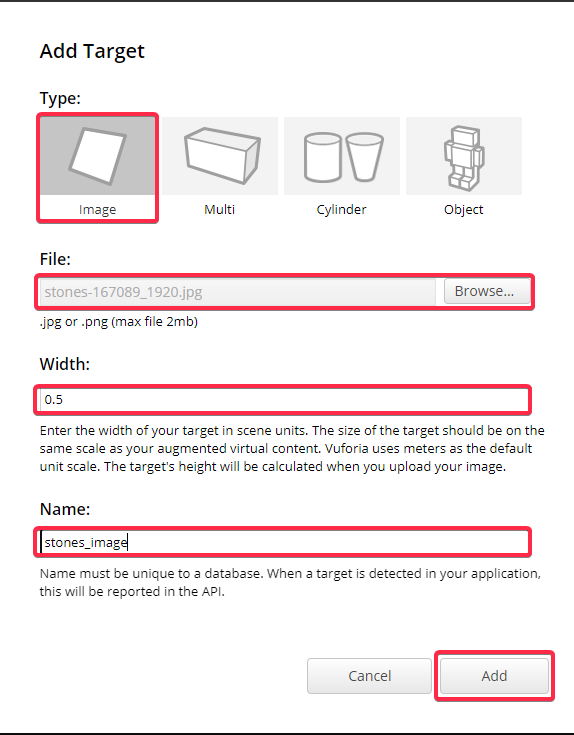
After filling in the remainder of your particulars above, click on Add. You will note the photographs listed in your Database. Corresponding to every picture, there’s a property known as Score. Attempt to add a picture that has the next variety of stars. The upper the variety of stars, the better it’s to detect and observe the picture.
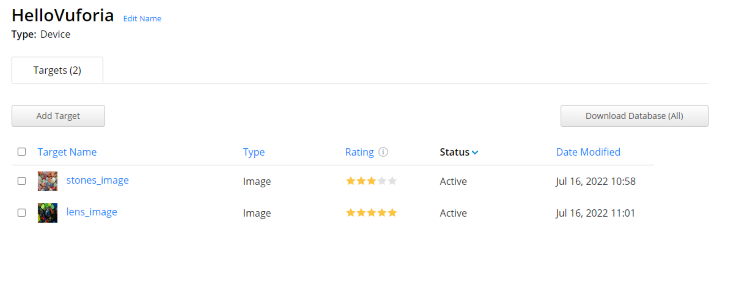
Within the picture beneath, you will note two Picture Targets. The goal known as stones_image has solely 3 stars, however the lens_image goal has 5 stars. Each the photographs are augmentable, however lens_image will give higher efficiency.
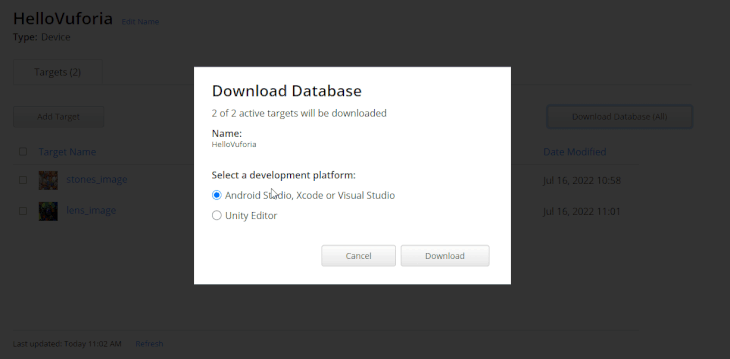
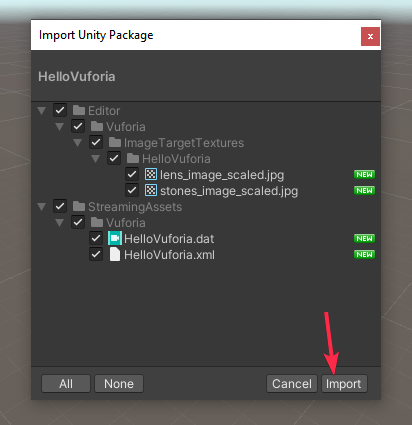
Click on Obtain Database > Unity Editor > Obtain. As soon as it downloads, you’re going to get a file known as HelloVuforia.unitypackage. Double click on on this file to open it in Unity.
You’re going to get the beneath pop-up. Click on Import.
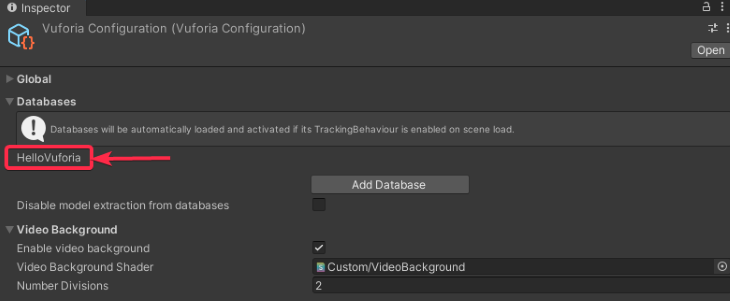
After the Database is imported in Unity, within the mission panel go to Property > Sources and double click on VuforiaConfiguration to view the properties within the Inspector panel. Within the Databases part, you will note HelloVuforia listed. Which means you’ve got efficiently imported the database into your Unity mission.
Rendering 3D content material on high of an Picture Goal
Now you might be prepared to indicate a Dice on high of the Picture Goal. Comply with the remainder of the steps on this tutorial so as accomplish that.
Proper click on in Hierarchy Panel > Vuforia Engine and add an Picture Goal to your Scene.
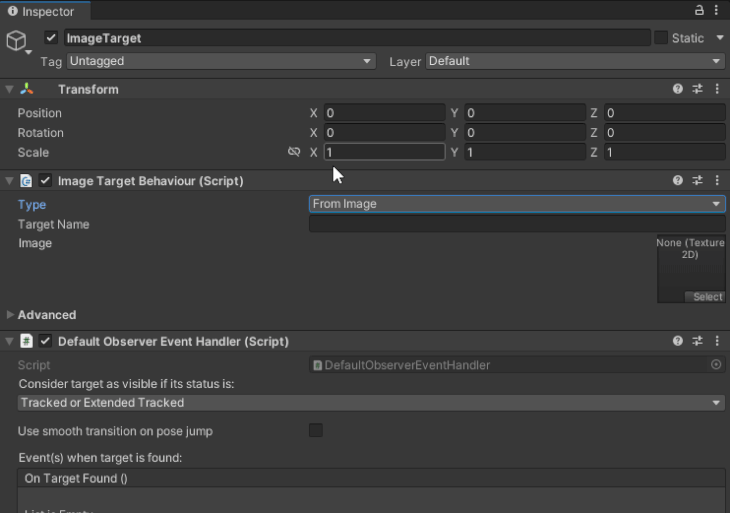
Choose ImageTarget to view its properties within the Inspector panel. Within the Picture Goal Behaviour (Script), make the next adjustments:
- Set Kind to From Database
- Set Database to HelloVuforia
- Set Picture Goal to lens_image (or another picture that you just had uploaded to your HelloVuforia Database)
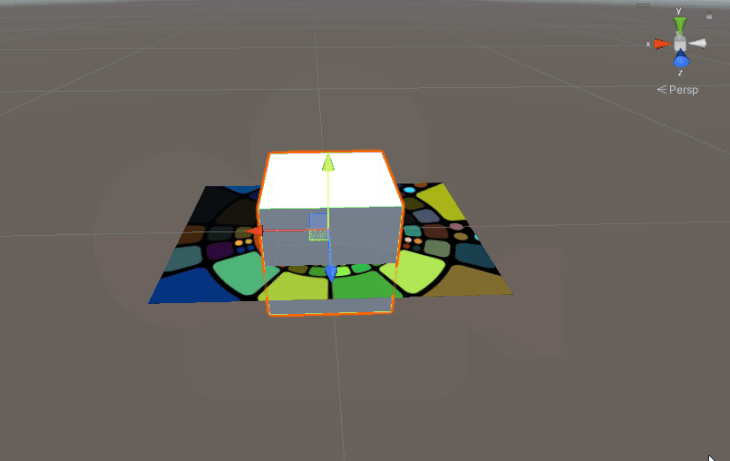
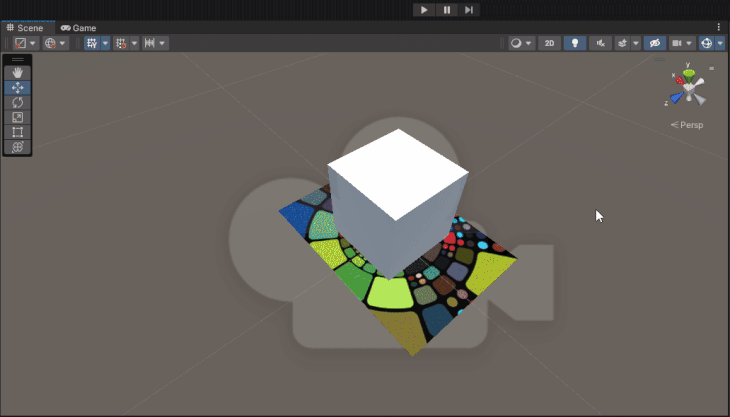
Now add a dice as a toddler of ImageTarget within the Scene like this:
Scale down the dice to 0.2 (or smaller if you would like).
Then, transfer the dice within the constructive y-axis slightly bit in order that it appears to be like like it’s floating above the picture.
That’s it! Now you might be able to run the app in your Android machine.
Click on the play button to run the scene utilizing your webcam.
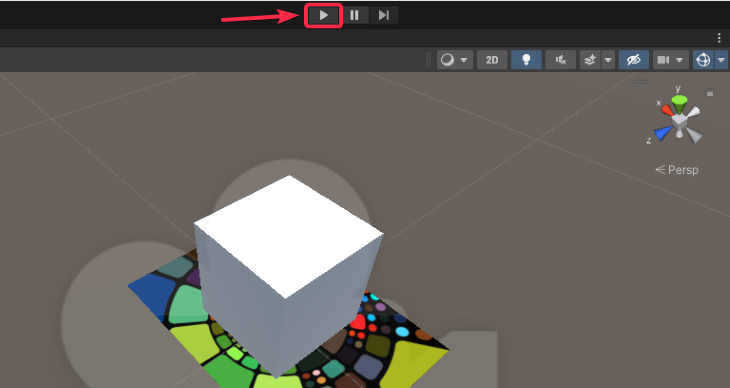
After hitting the play button, level your webcam to the picture and the dice seems magically on high of the picture. I’ve downloaded the picture to my iPad, however you possibly can take out a printout of the picture and level the webcam to the printout too. It provides the identical outcome.
Conclusion
Congratulations!
You simply created an augmented actuality expertise with Unity and Vuforia. This tutorial was a primary one for these making an attempt to create their first AR expertise. Nonetheless, the dice will be changed with another 3D mannequin. Give it a attempt!
When you confronted any points or want some assist, please ping me on Twitter or LinkedIn, and take a look at my Gumroad web page or YouTube Channel for those who’re searching for extra Unity tutorials and sources.
