
Ever discovered your self wanting to construct an utility containing a selectable container and also you need to add some pizazz to it by giving the container a distinct coloration so it will probably seem disabled earlier than it’s clicked?
Then, that is the tutorial for you, because the implementation of this characteristic will not be out there utilizing the container widget. Be part of me as I present you how you can construct a selectable container utilizing Flutter.
To proceed, I might counsel that you’ve a powerful understanding of Flutter, as we are going to make use of widgets a newbie might not know.
Intention
On the finish of the article, the reader ought to perceive the first use of the GestureDetector widget and how you can construct a selectable container in Flutter.
Let’s get began!
Getting began
For this venture, we are going to construct a easy utility wherein the background modifications to the colour chosen when you choose a container. With the GestureDetector widget, we can flip this characteristic on and off utilizing the onTap methodology.
To keep away from confusion, we are going to break up our codes into three completely different dart information; “most important.dart”, “gridcontainer.dart”, and “gridview_itemview.dart”.
Constructing the interface
most important.dart file
We’ll begin with the principle.dart file. The default code on this file is an easy counter app that increments by clicking the Add button.
We don’t want that utility; thus, we are going to delete all the things inside that file aside from the fabric.dart package deal and the principle operate. We’ll create a stateless widget with the title MyApp, and inside it, we are going to override the construct operate whereas giving it a BuildContext class as a parameter.
What this class does is deal with the placement of each widget within the widget tree. We will even return a MaterialApp the place we are going to set the title and the house (we are going to give it the worth of the stateful widget within the gridcontainer.dart file).
Here’s what the principle.dart file seems like:
import 'package deal:flutter/materials.dart';
import 'gridcontainer.dart';
void most important() => runApp(const MyApp());
class MyApp extends StatelessWidget {
 const MyApp({Key? key}) : tremendous(key: key);
 static const String _title="Flutter Code Pattern";
 @override
 Widget construct(BuildContext context) {
  return const MaterialApp(
   debugShowCheckedModeBanner: false,
   title: _title,
   house: GridContainer(),
  );
 }
}
gridview_itemview.dart
Earlier than heading to the gridcontainer.dart file, we are going to add some code to this file. First off, we are going to add a brand new stateless widget with the title GridViewItemView to our code, adopted by some constructor variables above the construct operate.
 class GridViewItemView extends StatelessWidget {
 const GridViewItemView({ Key? key }) : tremendous(key: key);
 @override
 Widget construct(BuildContext context) {
  return Container(

  );
 }
}
The constructors might be a string with the title title (title of our container), coloration with the title coloration (coloration of our container), and VoidCallback set to onTap.
 closing String? title;
 closing coloration? coloration;
 closing VoidCallback? onTap;
After including the constructor, we are going to add our formal parameters to our GridViewItemView. Now, we are going to change our container to the GestureDetector widget (it permits us so as to add the onTap property).
Subsequent, we are going to add a baby property which we are going to give the worth Middle, and inside this youngster property, we are going to create one other youngster property and assign it Row. In our Row, we need to set the mainAxisAlignment to the middle, add our textual content, and magnificence the textual content. Lastly, we could have our BuildContext class as:
Widget construct(BuildContext context) {
  return GestureDetector(
   onTap: onTap,
   youngster: Container(
    coloration: coloration,
    youngster: Middle(
      youngster: Row(
     mainAxisAlignment: MainAxisAlignment.middle,
     kids: [
      Text(
       title.toString(),
       style: const TextStyle(color: Colors.white, fontSize: 20),
      ),
     ],
    )),
   ),
  );
 }
We need to add the GridViewItemView to our gridcontainer.dart file.
The gridcontainer.dart file
We’ll start by initializing our stateful widget with the title GridContainer to our code.
import 'package deal:flutter/materials.dart';

class GridContainer extends StatefulWidget {
 const GridContainer({ Key? key }) : tremendous(key: key);
 @override
 State<GridContainer> createState() => _GridContainerState();
}
class _GridContainerState extends State<GridContainer> {
 @override
 Widget construct(BuildContext context) {
  return Scaffold(

  );
 }
}
Fairly than utilizing the container widget, we are going to use the scaffold widget as a replacement. Subsequent, we are going to add the appBar property and GridView widget (GridView.depend() permits GridView to specify the variety of rows and columns) to the physique of our scaffold.
Subsequent, we are going to specify the next GridView.depend properties: crossAxisCount, mainAxisSpacing, and crossAxisSpacing.
Widget construct(BuildContext context) {
 return Scaffold(
  appBar: AppBar(
   title: const Textual content('Selectable Container'),
  ),
  physique: GridView.depend(
   crossAxisCount: 3,
   padding: const EdgeInsets.solely(prime: 16, left: 16, proper: 16),
   mainAxisSpacing: 16,
   crossAxisSpacing: 16,
 );
}
Now, we need to give a coloration to the container we created. To do that, we are going to create 4 variables; crimson, purple, orange (for the containers), and background (we are going to set its opacity to distinguish between the grid and the background).
const crimson = Colour.fromARGB(255, 255, 17, 0);
const purple = Colours.purple;
const orange = Colours.deepOrange;
const background = Colours.white;
Again in our scaffold widget, we are going to add our kids, adopted by three GestureDetector widgets, every containing a baby widget GridViewItemView. These youngster widgets will even comprise a title and a coloration property (the title and the const we created earlier).
kids: <Widget>[
 GestureDetector(
  child: const GridViewItemView(
   title: 'red',
   color: red,
  )),
 GestureDetector(
  child: GridViewItemView(
   title: 'Orange',
   color: orange,
  )),
 GestureDetector(
  child: GridViewItemView(
   title: 'purple',
   color: purple,
  )),
],
Here’s what the appliance’s interface seems like for the time being:
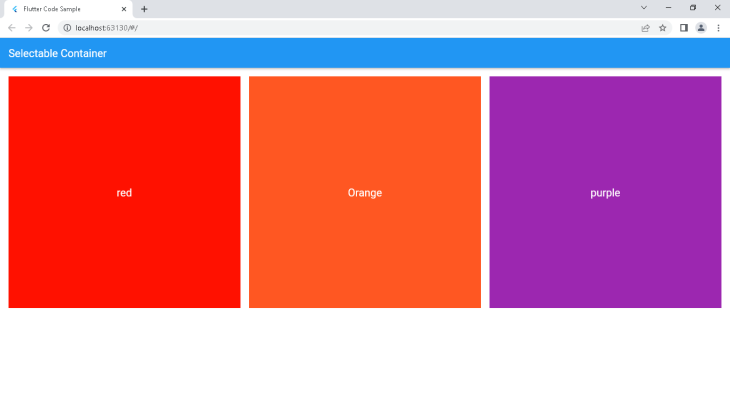
Our utility for the time being shows solely the containers for the time being. On this subsequent part, we are going to implement some functionalities which can enable us to vary the background coloration and choose one container at a time.
Implementing the performance
On this part, we are going to implement two functionalities:
- Inactive container (when one other container is chosen)
- Background coloration change (
onTapproperty)
Inactive container
Earlier, we created 4 variables, with three belonging to the containers and the final for the background.
Equally, we are going to create three new variables for our containers and title them; inactivered, inactivepurple, and inactiveorange.
Then, we are going to assign colours to them (comparable colours however a darker shade), which might be in impact as soon as their corresponding container is inactive.
const inactivered = Colour.fromARGB(255, 160, 13, 3);
const inactivepurple = Colour.fromARGB(255, 74, 18, 83);
const inactiveorange = Colour.fromARGB(255, 165, 56, 22);
To place this characteristic in full impact, we are going to create quite a few if statements, however earlier than continuing, we are going to use Dart enums to outline our named constants.
To do that, we are going to create our enum utilizing the enum key phrase and name it Color. Then, we are going to assign the values; crimson, orange, and purple. Right here is the way it seems:
enum Color {
 crimson,
 orange,
 purple,
}
(Be aware: We’ll name these values in a technique we are going to create later)
Now, we wish all of the containers to start out with the inactive coloration, and once we faucet the container, it ought to change to the energetic coloration.
To do that, we are going to go into our state widget and create 4 variables of kind “coloration” with the title; redColour, orangeColour, purpleColour, mainbackground.
Subsequent, we are going to set the variables to the inactivered, inactiveorange, inactivepurple, and background, respectively.
We then set the primary three variables because the beginning worth for the container coloration in our youngster widget (change the colour from the earlier worth assigned to it).
Colour redColour = inactivered;
Colour orangeColour = inactiveorange;
Colour purpleColour = inactivepurple;
Colour mainbackground = background;
(Be aware: Our state widget is mutable, i.e., its properties can change and mutate, which means the properties for this class should not have to be closing)
Lastly, to make our container change on faucet, we are going to create a updatecolour methodology with an enter Color selectedcolour which can specify the colour chosen.
Subsequent, we are going to use an if assertion to test if the selectedcolour is crimson. After this, we are going to use an if assertion to test if the redColour is the same as the inactivered. If true, we are going to change it to the energetic coloration (crimson) and set the opposite colours (orangeColour, purpleColour) to their inactive colours (inactivepurple, inactiveorange).
Else, whether it is within the energetic card coloration, we are going to change it to the inactive card coloration. Comply with the identical steps for the opposite containers, and we will transfer to the following stage.
void updatecolour(Color selectedcolour) {
 if (selectedcolour == Color.crimson) {
  if (redColour == inactivered) {
   redColour = crimson;
   orangeColour = inactiveorange;
   purpleColour = inactivepurple;
  } else {
   redColour = inactivered;
  }
 }
 if (selectedcolour == Color.orange) {
  if (orangeColour == inactiveorange) {
   orangeColour = orange;
   redColour = inactivered;
   purpleColour = inactivepurple;
  } else {
   orangeColour = inactiveorange;
  }
 }
 if (selectedcolour == Color.purple) {
  if (purpleColour == inactivepurple) {
   redColour = inactivered;
   orangeColour = inactiveorange;
   purpleColour = purple;
  } else {
   purpleColour = inactivepurple;
  }
 }
}
After creating the if statements, we are going to head to our GestureDetector widget and create an onTap property. On this property, we are going to use a setState to replace the state of our Color property. Now, we are going to name the tactic above and set its corresponding selectedcolour.
// crimson
onTap: () {
 setState(() {
  updatecolour(Color.crimson);
 });
}
// orange
onTap: () {
 setState(() {
  updatecolour(Color.orange);
 });
}
// purple
onTap: () {
 setState(() {
  updatecolour(Color.purple);
 });
}
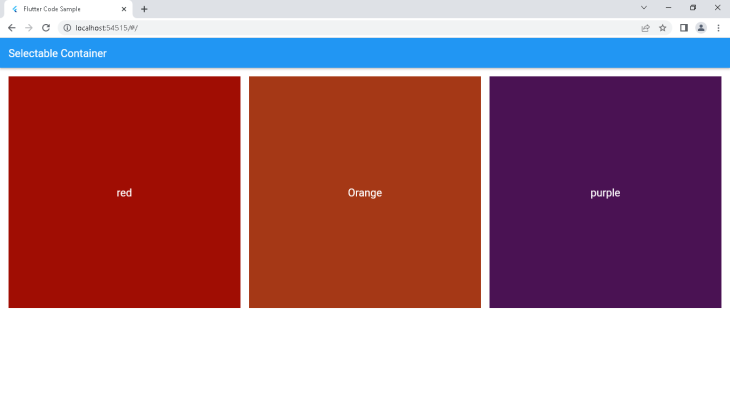
Right here is how the appliance seems for the time being:
Background coloration change
This part comprises the appliance’s closing piece, and implementing the options right here is pretty simple. In our setState, we are going to add the conditional if assertion to test if redColour is the same as the energetic coloration (crimson).
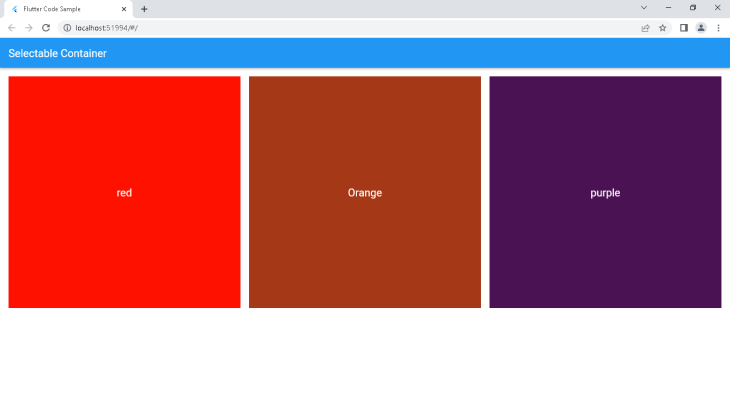
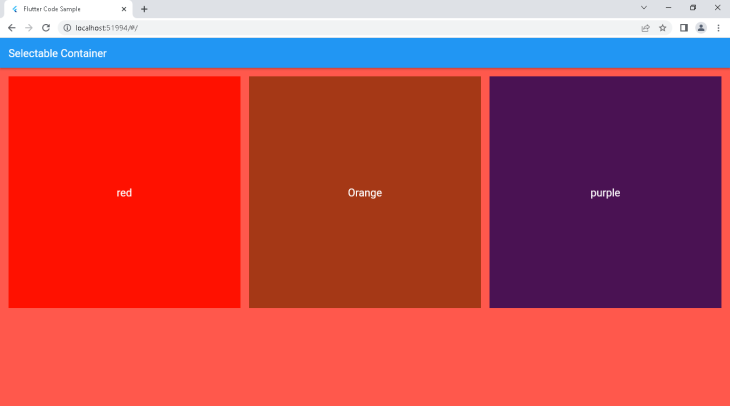
If true, the mainbackground will change to the energetic coloration, and if false, it is going to change to the background coloration. Implement this similar logic for the opposite two containers, and we must always have our outcome as beneath:
if (redColour == crimson) {
 mainbackground = crimson;
} else {
 mainbackground = background;
}
Right here is the total code for the gridview_itemview.dart file:
import 'package deal:flutter/materials.dart';
class GridViewItemView extends StatelessWidget {
 const GridViewItemView(
   {Key? key,
   this.title,
   this.coloration,
   this.onTap,})
   : tremendous(key: key);
 closing String? title;
 closing Colour? coloration;
 closing VoidCallback? onTap;
 @override
 Widget construct(BuildContext context) {
  return GestureDetector(
   onTap: onTap,
   youngster: Container(
    coloration: coloration,
    youngster: Middle(
      youngster: Row(
     mainAxisAlignment: MainAxisAlignment.middle,
     kids: [
      Text(
       title.toString(),
       style: const TextStyle(color: Colors.white, fontSize: 20),
      ),
     ],
    )),
   ),
  );
 }
}
Right here is the total code for the gridcontainer.dart file:
import 'package deal:flutter/materials.dart';
import 'package deal:testproject/gridview_itemview.dart';
const crimson = Colour.fromARGB(255, 255, 17, 0);
const inactivered = Colour.fromARGB(255, 160, 13, 3);
const purple = Colours.purple;
const inactivepurple = Colour.fromARGB(255, 74, 18, 83);
const orange = Colours.deepOrange;
const inactiveorange = Colour.fromARGB(255, 165, 56, 22);
const background = Colours.white;
enum Color {
 crimson,
 orange,
 purple,
}
class GridContainer extends StatefulWidget {
 const GridContainer({Key? key}) : tremendous(key: key);
 @override
 State<GridContainer> createState() => _GridContainerState();
}
class _GridContainerState extends State<GridContainer> {
 Colour redColour = inactivered;
 Colour orangeColour = inactiveorange;
 Colour purpleColour = inactivepurple;
 Colour mainbackground = background;
 void updatecolour(Color selectedcolour) {
  if (selectedcolour == Color.crimson) {
   if (redColour == inactivered) {
    redColour = crimson;
    orangeColour = inactiveorange;
    purpleColour = inactivepurple;
   } else {
    redColour = inactivered;
   }
  }
  if (selectedcolour == Color.orange) {
   if (orangeColour == inactiveorange) {
    orangeColour = orange;
    redColour = inactivered;
    purpleColour = inactivepurple;
   } else {
    orangeColour = inactiveorange;
   }
  }
  if (selectedcolour == Color.purple) {
   if (purpleColour == inactivepurple) {
    redColour = inactivered;
    orangeColour = inactiveorange;
    purpleColour = purple;
   } else {
    purpleColour = inactivepurple;
   }
  }
 }
 @override
 Widget construct(BuildContext context) {
  return Scaffold(
   backgroundColor: mainbackground.withOpacity(0.7),
   appBar: AppBar(
    title: const Textual content('Selectable Container'),
   ),
   physique: GridView.depend(
    crossAxisCount: 3,
    padding: const EdgeInsets.solely(prime: 16, left: 16, proper: 16),
    mainAxisSpacing: 16,
    crossAxisSpacing: 16,
    kids: <Widget>[
     GestureDetector(
       onTap: () {
        setState(() {
         updatecolour(Colour.red);
         if (redColour == red) {
          mainbackground = red;
         } else {
          mainbackground = background;
         }
        });
       },
       child: GridViewItemView(
        title: 'red',
        color: redColour,
       )),
     GestureDetector(
      onTap: () {
       setState(() {
        updatecolour(Colour.orange);
        if (orangeColour == orange) {
         mainbackground = orange;
        } else {
         mainbackground = background;
        }
       });
      },
      child: GridViewItemView(
       title: 'Orange',
       color: orangeColour,
      ),
     ),
     GestureDetector(
      onTap: () {
       setState(() {
        updatecolour(Colour.purple);
        if (purpleColour == purple) {
         mainbackground = purple;
        } else {
         mainbackground = background;
        }
       });
      },
      child: GridViewItemView(
       title: 'purple',
       color: purpleColour,
      ),
     ),
    ],
   ),
  );
 }
}
Conclusion
We’ve ended the tutorial, and I hope you now have discovered how you can use GestureDetector in constructing selectable containers in Flutter. Thanks for following by means of, and glad coding!
